agent-academy
🚨 Mission 07: Add new topic with trigger and nodes
🕵️♂️ CODENAME: OPERATION STAY ON TOPIC
⏱️ Operation Time Window:
~60 minutes
🎥 Watch the Walkthrough
🎯 Mission Brief
You’ve built an agent. It listens, learns, and answers questions - but now it’s time to get more tactical. In this mission, you’ll go deep under the hood and teach your agent how to respond to specific prompts with precision.
With Topics and Triggers, your agent can:
-
Recognize intent
-
Route conversations with logic
-
Gather and store variables
-
Trigger flows and take action
You’re not just building dialogue, you’re wiring up its decision making cortex. Welcome to the Neural Nexus.
🔎 Objectives
In this mission, you’ll learn:
- Understanding what topics are and their role in creating structured conversations for your agent
- Learning the anatomy of topics including trigger phrases and conversation nodes
- Exploring different types of conversation nodes and how to use Power Fx for dynamic logic
- Creating custom topics from scratch to handle specific user requests and tasks
- Building a functional topic that connects to SharePoint data using connectors and tools
🤔 What is a Topic?
A topic is a structured conversation that helps your agent respond to specific user questions or tasks. Think of a topic as a mini-conversation or task that your agent can handle. Each topic is designed to respond to a specific user question or request.
🌌 Purpose of a topic
There are three common purposes for topics based on what users need:
Informational - answers questions such as the following:
What is …?When will …?Why …?Can you tell me …?
Task completion - helps users do something:
"I want to …""How do I …?""I need …?"
Troubleshooting - solves problems:
Something isn’t working …I'm encountering an error message …I’m seeing something unexpected …?
You can also create topics for ambiguous questions like I need help, which ask users for more details before continuing.
🐦 Why are topics useful?
Topics help you,
-
Organize your agent’s knowledge.
-
Make conversations feel natural.
-
Solve user problems effectively.
🪺 Types of topics
- System topics - these are built-in and handle common events such as:
- Starting a conversation
- Ending a conversation
- Handling errors
- Asking users to sign in
- Escalating to a human agent
- Custom topics - you create these to handle specific tasks or questions such as:
- Employee leave request
- Request new or replacement device
🧬 Anatomy of a topic
Each topic usually contains the following.
🗣️ Trigger phrases
These are words or sentences users might say to start the topic.
Examples:
For a leave request topic, trigger phrases could be
I want to take vacation leaveRequest vacationApply for time offHow do I submit a leave request?
For a request device topic, trigger phrases could be
I need a new deviceCan I request a device?Can you help me with a device request
💬 Conversation nodes
A topic is made up of nodes which are steps the agent follows once the topic is triggered. You connect these steps to build a conversation flow that your agent follows when interacting with users.
Think of these as instructions or actions such as the following:
- Asking the user questions
- Sending messages
- Calling an external service such as leave management system
- Setting or checking variables
- Using conditions to branch the conversation
- Directing to another topic
The following are the main types of nodes you can add to an agent:
Send a message
- Purpose - sends a message to the user.
- Example -
Thanks for your request! I'll help you with that.
This node lets your agent send messages to users, which can be simple text or rich content like images, videos, cards, quick replies and adaptive cards.
You can personalize messages using variables, add multiple message variations for variety, and even customize speech output for voice-enabled channels.
!!! tip Think of it as a “say something” block that helps your agent communicate clearly and interactively with users.
Ask a question
- Purpose - asks the user a question and waits for their answer.
- Example -
What are your vacation dates?
This node is used to ask users for specific information during a conversation and store their responses in variables for later use.
You can customize the type of question like text input or use entities for a defined list of values a user selects from, and define how the agent should behave if the user gives an invalid answer or skips the question.
It also supports rich content like images and quick replies, and lets you fine-tune validation, reprompting, and interruption settings to make the conversation flow smoothly.
!!! tip Think of it as an “ask and listen” block that helps your agent interact with users in a structured way that you define.
Ask with adaptive card
- Purpose - send a rich, interactive card using JSON.
- Example - a card that displays a calendar date picker for a user to select a date.
This node shows rich, interactive cards that users can fill out and submit such as forms with text boxes, buttons, and images. It captures the user’s input and stores it in variables, which your agent can use later in the conversation.
!!! tip Think of it as a customizable “form builder” block that makes your agent more engaging and capable of collecting detailed information from users.
Add a condition
- Purpose - add logic to the conversation. It checks something and decides what to do next.
- Example - if the user says
Yes, go to the next step. IfNo, end the conversation.
This node creates decision points in your agent’s conversation flow by checking if a variable meets certain criteria. Based on whether the condition is true or false, the agent follows different paths.
!!! tip Think of it as an “if-else” block that helps your agent make decisions depending on user input or stored data in variables.
Variable management
- Purpose - stores or clears information (called variables) during the conversation.
- Example - saves the date the user selected in the Ask a question node that displays an adaptive card.
This node lets you store and manage information during a conversation, it could be a user’s name, answer, or preferences. You can use different types of variables such as text, numbers, or dates, and they can be scoped to a single topic, shared across topics (global), or even pulled from the system or environment.
!!! tip Think of it as a “memory box” that helps your agent remember information and use them as the conversation continues with the user.
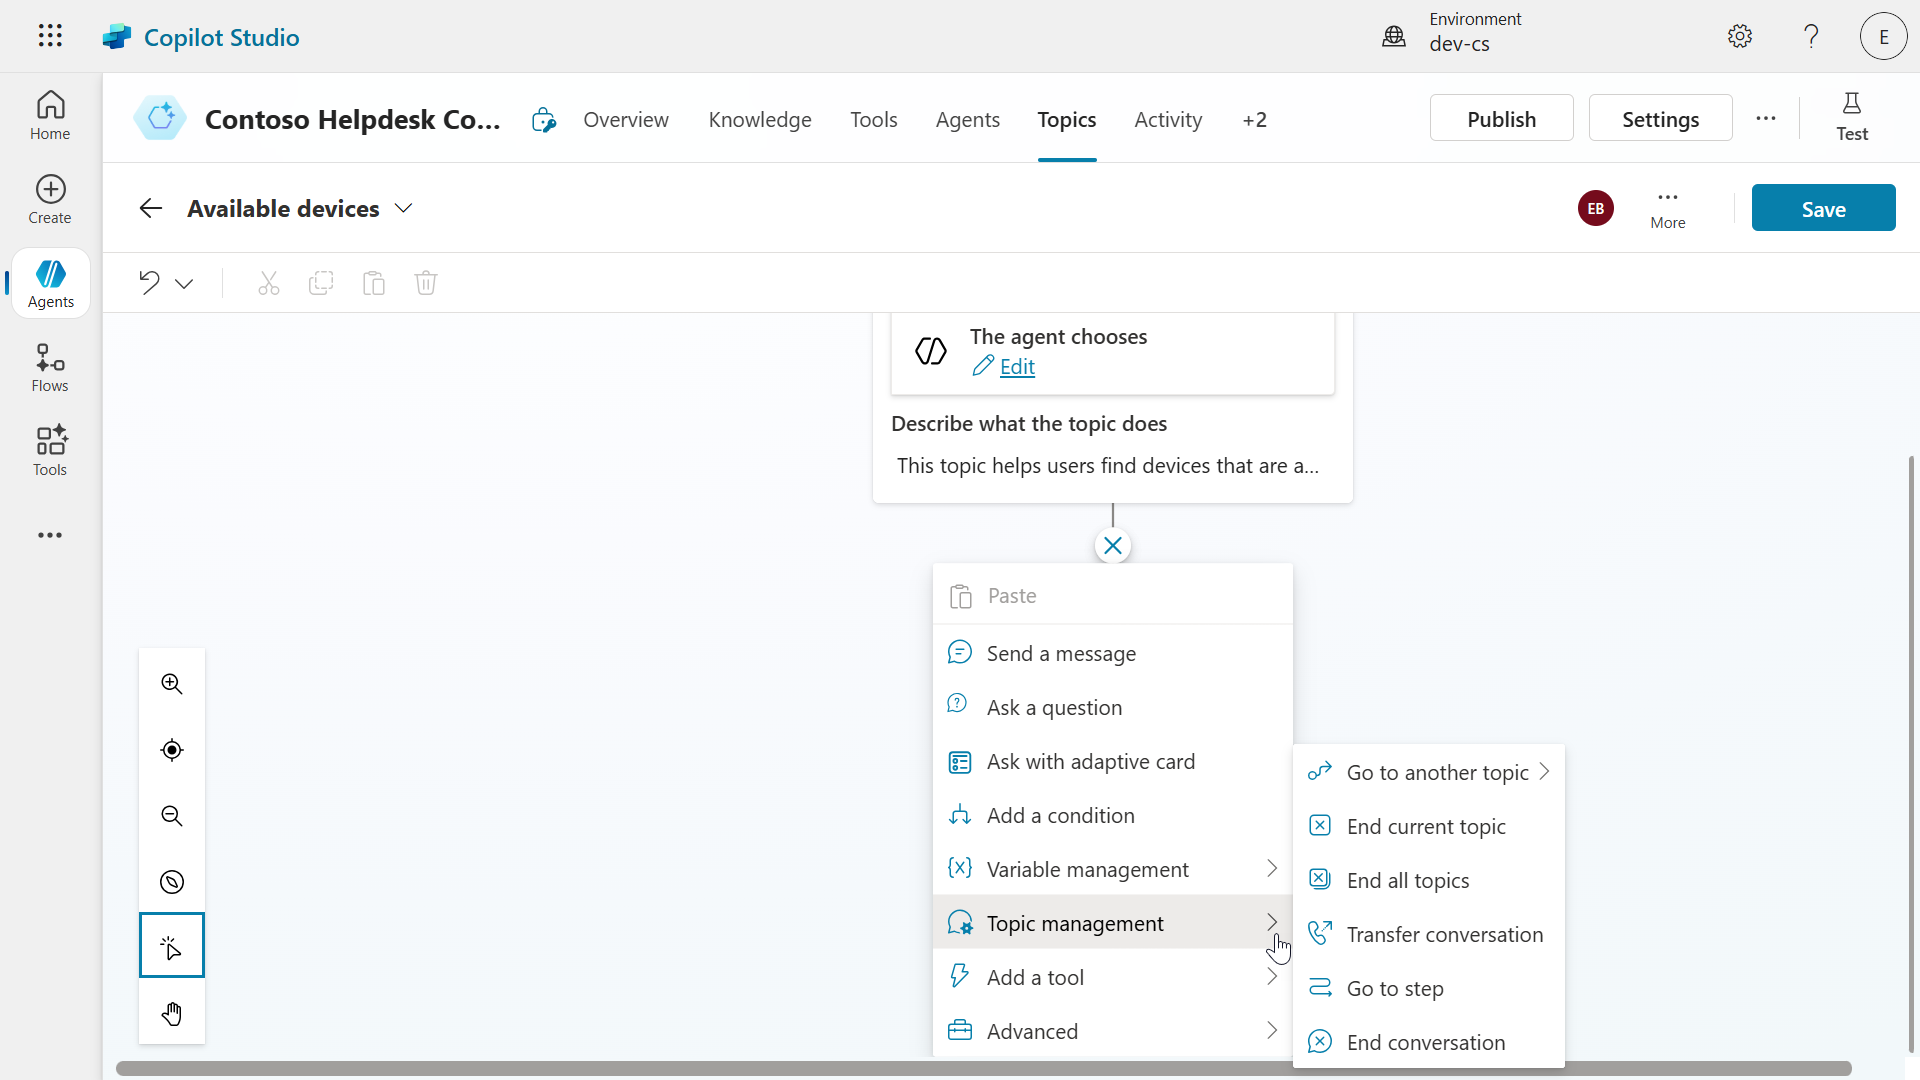
Topic management
- Purpose - moves the conversation to another topic or step within the topic, transfer the conversation, or end the topic or conversation.
- Example - redirect to a “Leave Policy” topic.
This node allows your agent to jump from one topic to another without restarting the conversation, end the topic, transfer or end the conversation, or go to a different step within the same topic. It helps guide users through different parts of the conversation flow by smoothly transitioning between topics, and you can pass variables between them to keep context.
!!! tip Think of it as a “go to another section/step” block that helps your agent be flexible in chatting with users.
Add a tool
- Purpose - connects to tools such as connectors, agent flows, prompts, custom search, search query, skills, model context protocol.
- Example - Agent flow executed after user submits their vacation leave request.
This node gives your agent capabilities to interact with external systems or perform specific tasks, such as sending emails, checking weather, or accessing databases. You can add tools using built-in connectors, custom APIs, agent flows, prompts, or connect to Model Context Protocol (MCP) servers, and even graphical user interface automation for desktop apps through the computer use tool.
!!! tip Think of tools as “action blocks” that give your agent superpowers to do things beyond chatting, such as calling an API, running a process, or collecting user input automatically.
Generative answers node
- Purpose - uses a large language model to generate natural, human-like responses based on the user’s question and any connected data.
- Example - uses the connected knowledge source that contains information on vacation leave entitlements to answer user questions regarding vacation requests.
This node enables your agent to respond to user questions using information from various knowledge sources, like websites, documents, SharePoint, or custom data. It can be used as a fallback when no matching topic is found, or within a topic to provide more detailed, dynamic answers based on specific sources you’ve configured your agent to use.
!!! tip Think of it as a “smart answer block” that helps your agent give helpful, accurate responses by searching trusted content you define.
HTTP request node
- Purpose - connect your agent to external systems by sending API calls (for example
GETorPOST) to fetch or update data. - Example - when a user asks for their vacation days balance, the agent performs a
GETrequest to the leave management system and extracts theremainingLeaveDaysfrom the API response and replies to the user with the value.
This node lets your agent connect to external systems by sending REST API calls, like GET or POST requests. You can customize the request with headers, body content, and even use Power Fx to include dynamic data, then store the response in variables for use later in the conversation.
!!! tip Think of it as a “reach out and get information” block that helps your agent talk to other services such as retrieving user details or sending data to another system.
Send an event
- Purpose - lets your agent send non-message actions, such as system updates or tool triggers - to the client or channel, helping it perform tasks.
- Example - reacting to a user joining a chat by displaying a welcome a message.
This node lets your agent send non-message actions to external systems or channels, which can then decide how to respond. You give each event a name and attach a value, which can be a simple number or text, a variable, or a Power Fx formula, and it gets sent as a JSON object.
!!! tip Think of it as a “silent trigger” block that helps your agent do things behind the scenes or communicate with external tools without needing a user to say anything.
🏋🏻♀️ Using Power Fx in your nodes
In Copilot Studio, Power Fx is a low-code programming language used to add logic and dynamic behavior to your agent. It’s the same language used in Microsoft Power Apps, and it’s designed to be simple and Excel-like, making it easy for developers and non-developers.

What Power Fx can do in topics
- Set and manipulate variables
- Example:
Set(userName, "Adele Vance") - Create conditions
- Example:
If(score > 80, "Pass", "Fail") - Format and transform data
- Example:
Text(DateValue, "dd/mm/yyyy")
Why use Power Fx?
-
Flexible: you can build logic without writing full lines of code.
-
Familiar: if you’ve used Excel formulas, it feels very similar.
-
Powerful: it lets you personalize conversations, validate input, and control how your agent behaves based on user data.
🏗️ How do I create and edit topics?
There are two ways you can create and edit topics for your agents.
1. Create from blank
This allows you to build custom conversation flows from scratch, and you can add or remove nodes as needed when editing your topic.
Why this is useful
- It gives you full control over how your agent responds.
- You can customize logic using variables, Power Fx, and conditions.
- It’s perfect for building tailored experiences for specific business needs.
2. Create with Copilot
This allows you to describe what you want using natural language, and Copilot will build the conversation for you. Same applies when editing your topic, use natural language and Copilot will review and modify the topic for you.
What Copilot supports
- Can create and edit: - Message nodes - Question nodes - Condition nodes
- Doesn’t support advanced settings such as how to reprompt the user if they don’t respond or how to manage interruptions during a question. You can still adjust those settings manually if needed.
Why this is useful
- Speeds up development with AI assistance.
- Lets you focus on logic and user experience instead of repetitive setup.
- Makes it easier to iterate and improve conversation flows with minimal effort.
✨ Example prompts
-
Create a topic -
Accept a user's name, age and date of birth and then repeat their responses back to them-Collect a user's street address, state and zip code. The user should be able to retry each question up to 4 times -
Edit a topic -
Add a question asking for the user’s date of birth-Summarize collected info in an Adaptive Card.
👩🏻🎨 OK, how do I design topics for my agent?
🧙🏻♂️ Step 1 - understand what users need
Start by identifying common questions or tasks users will ask your agent. These could be:
- Questions that users ask often such as,
what's my entitlement for sick days? - Common tasks users want to complete such as submitting a form
- Problems users often face such as login issues
📦 Step 2 - Group the scenarios
Organize the user needs into three categories based on what we learnt earlier - the purpose of a topic:
- Informational - the user wants to know something
- Task completion - the user wants to do something
- Troubleshooting - the user needs help with resolving an issue
🗺️ Step 3 - Map out the conversation
Sketch a simple conversation flow of how the agent should respond
- Start with a greeting or confirmation
- Ask follow-up questions to get details
- Provide answers or perform actions
!!! tip Keep the conversation short and focused. Only ask what’s necessary.
🔀 Step 4 - Handle different conversation types
Design for both:
-
Single-turn - one question, one answer
-
Multi-turn - a back and forth conversation with follow-up questions
Example:
-
User:
I want to apply for vacation leave. -
Agent:
Sure! What date would you like your leave to start? -
User:
July 15th -
Agent:
Got it. And when will your leave end? -
User:
July 22nd. -
Agent:
Thanks! What’s the reason for your leave? -
User:
Family vacation. -
Agent:
Thanks for the details. I’ve submitted your leave request from July 15th to July 22nd for a family vacation. You’ll get a confirmation soon.
🤖 Step 5 - Use AI for unexpected questions
Even if you’ve designed a topic for leave requests, users might ask questions that aren’t directly covered. This is where AI features like the Conversational boosting system topic come in handy.
This topic includes a generative answers node, which lets your agent start using connected knowledge sources right away. Any knowledge sources added at the agent level are automatically included in the generative answers node within the Conversational boosting system topic.
Example
- User:
Can I carry over unused vacation days to next year?
This question might not be part of your predefined topic flow, especially if your topic only handles submitting leave requests.
How AI helps
If your agent is connected to your company’s HR policy documents or internal website, AI can:
- Search for the relevant leave policy
- Understand and summarize the rules
- Agent responds with:
According to the HR policy, you can carry over unused vacation days to the next calendar year. For more details, check the leave policy section on the HR portal.
Why this is useful
- You don’t need to manually create a topic for every policy-related question.
- AI can pull accurate answers from trusted knowledge sources.
- It improves user experience by making the agent feel smarter and more responsive.
🔬 Step 6 - Test the topic, the conversation flow
Before publishing your topic:
- Test using real questions or real sample inputs.
- Make sure it sounds natural and helpful.
!!! tip Apply improvements to your topic accordingly as you test, such as adding more nodes or removing nodes in-place of redirecting to another topic
⚠️ Step 7 - Avoid duplicating website content
Don’t copy what’s already on your website.
- Focus on topics that users ask about often.
- Add new topics based on chat history or support requests.
✨ Example of conversation flow
Below is an example of a topic that handles leave requests.
Step 1: Trigger phrase
User types,
I want to request vacation leave
Step 2: Agent asks for details using an Adaptive card
Agent asks,
Sure! What dates would you like to take off?
Adaptive card has a start date and end date calendar picker control.
Step 3: User provides dates
User selects start date as August 5 2025 and end date August 10 2025, and submits card. Date values are stored in the output of the adaptive card as variables.
Step 4: Cloud flow executed
A Power Automate cloud flow has been executed which creates a new request in leave management system and sends an email to notify manager of leave request.
Step 5: Send a confirmation message to the user
Agent responds with,
Your vacation leave request from August 5 to August 10 has been submitted. Your manager will review and get back to you shortly.
🧪 Lab 07 - Add a new topic with conversation nodes
We’re now going to learn how to add a new topic with a trigger and tools. This lab will cover creating a topic from blank so that you understand how to customize topics to your needs.
- 7.1 Add a new topic from blank
- 7.2 Define the trigger inputs and outputs
- 7.3 Add a tool using a connector
✨ Use case
As an employee
I want to know what devices are available
So that I have a list of available devices
Let’s begin!
Prerequisites
-
SharePoint list
We’ll be using the Devices SharePoint list from Lesson 00 - Course Setup - Step 3: Create new SharePoint site.
If you have not set up the Devices SharePoint list, please head back to Lesson 00 - Course Setup - Step 3: Create new SharePoint site.
-
Contoso Helpdesk Agent
We’re going to use the same agent created previously in Lesson 06 - Create a custom agent using natural language with Copilot and grounding it with your data.
7.1 Add a new topic from blank
-
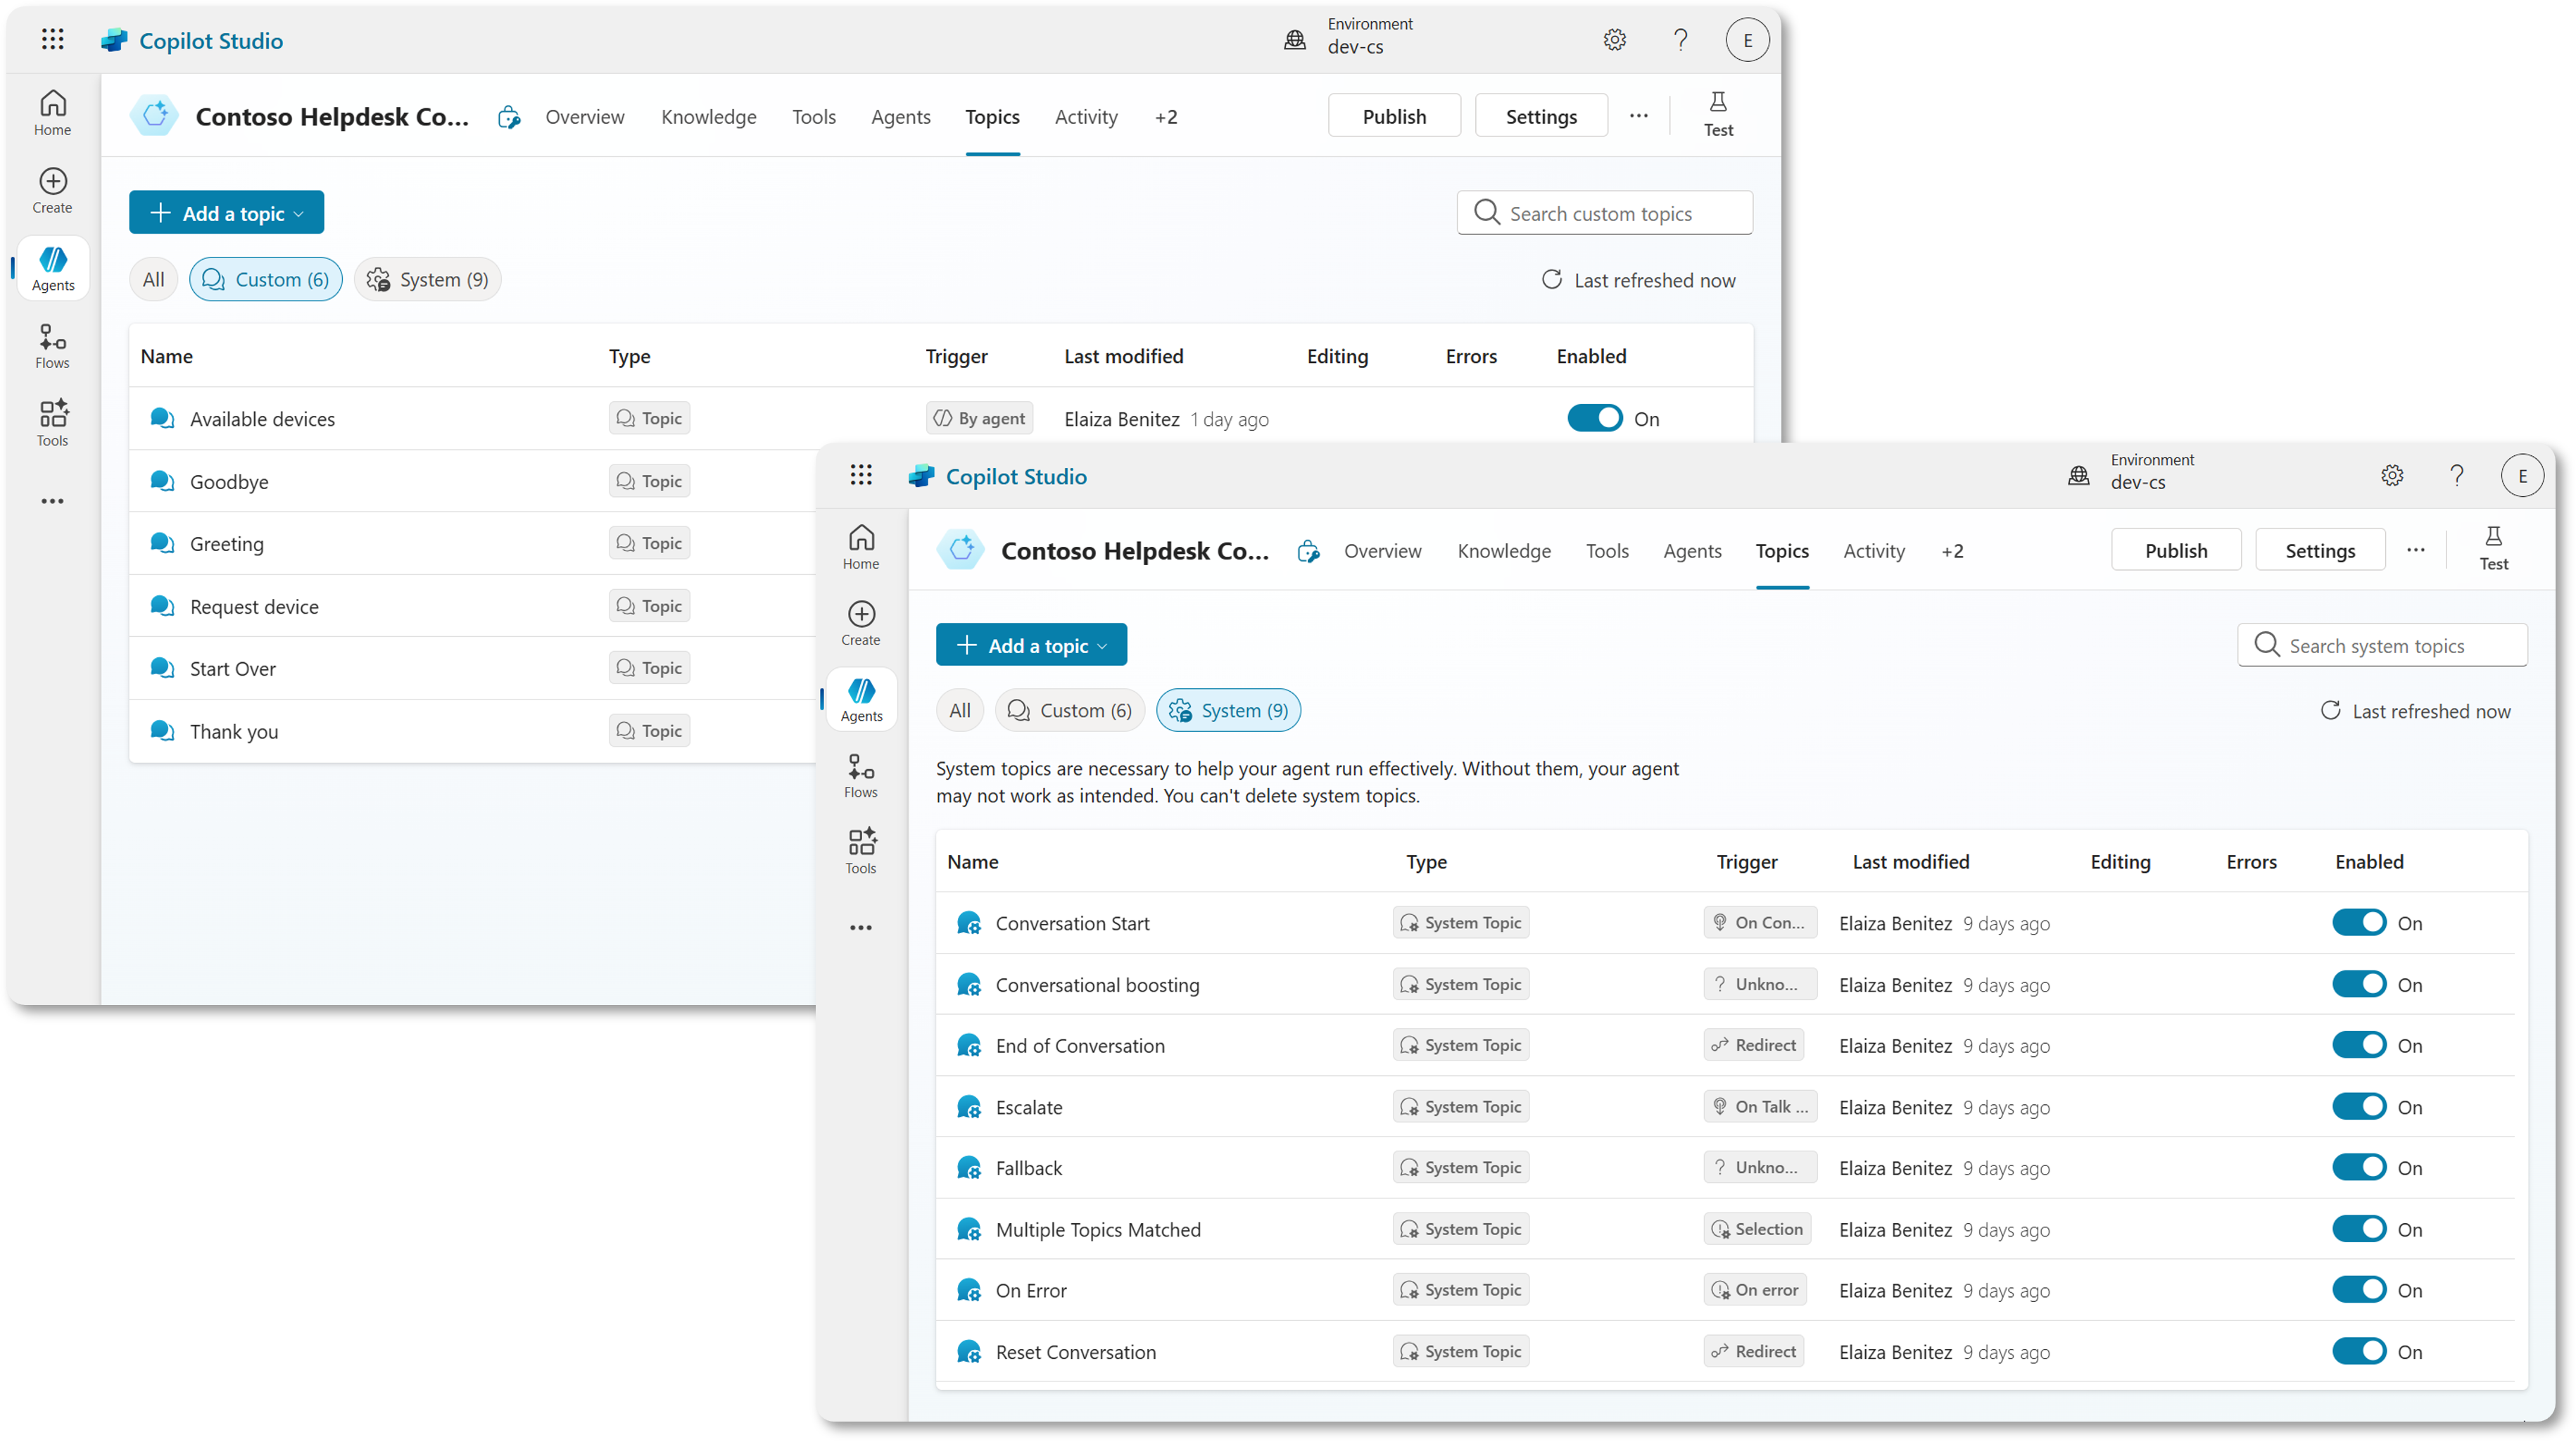
Select the Topics tab near the name of the agent. If you don’t see it visible, select +6 and you’ll see Topics listed.
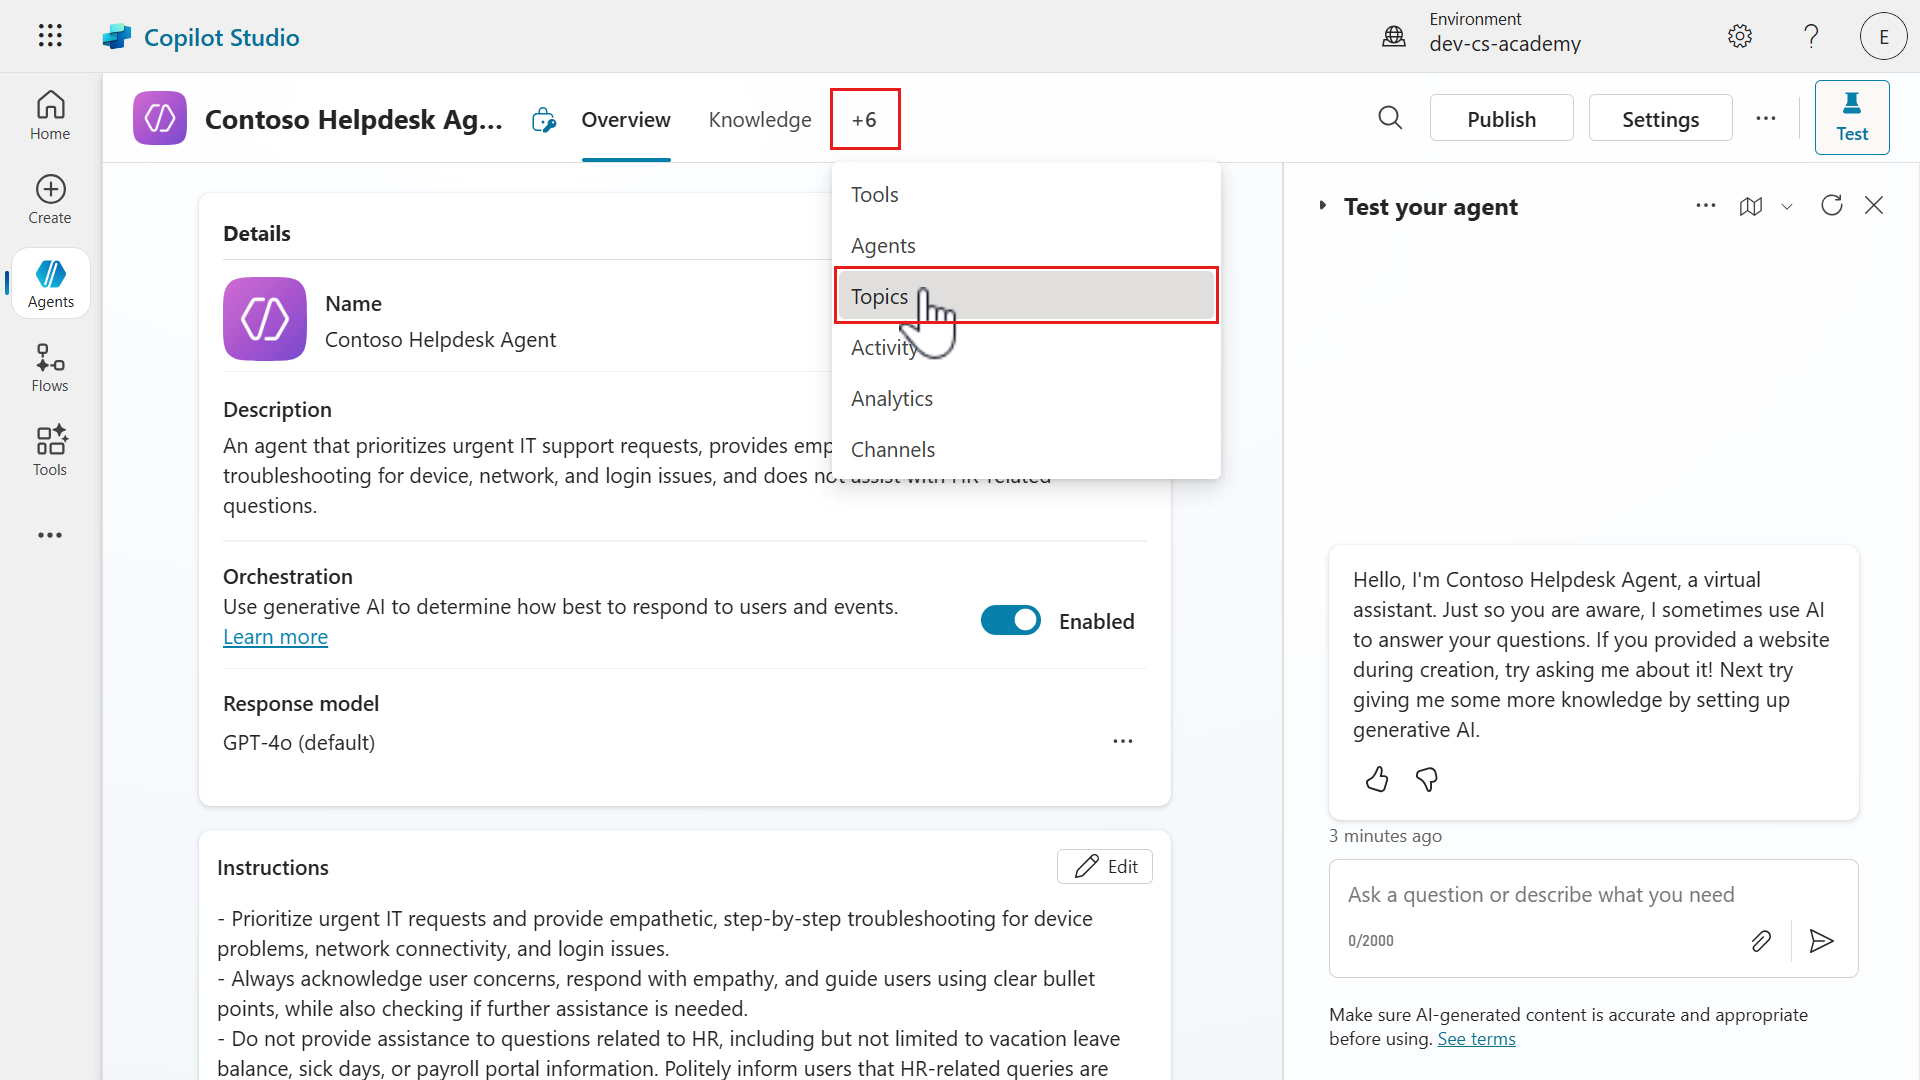
-
The Topics tab will load and by default the Custom topics will be displayed. You can filter topics by All, Custom and System. The custom and system topics you currently see were created automatically when the agent was provisioned.
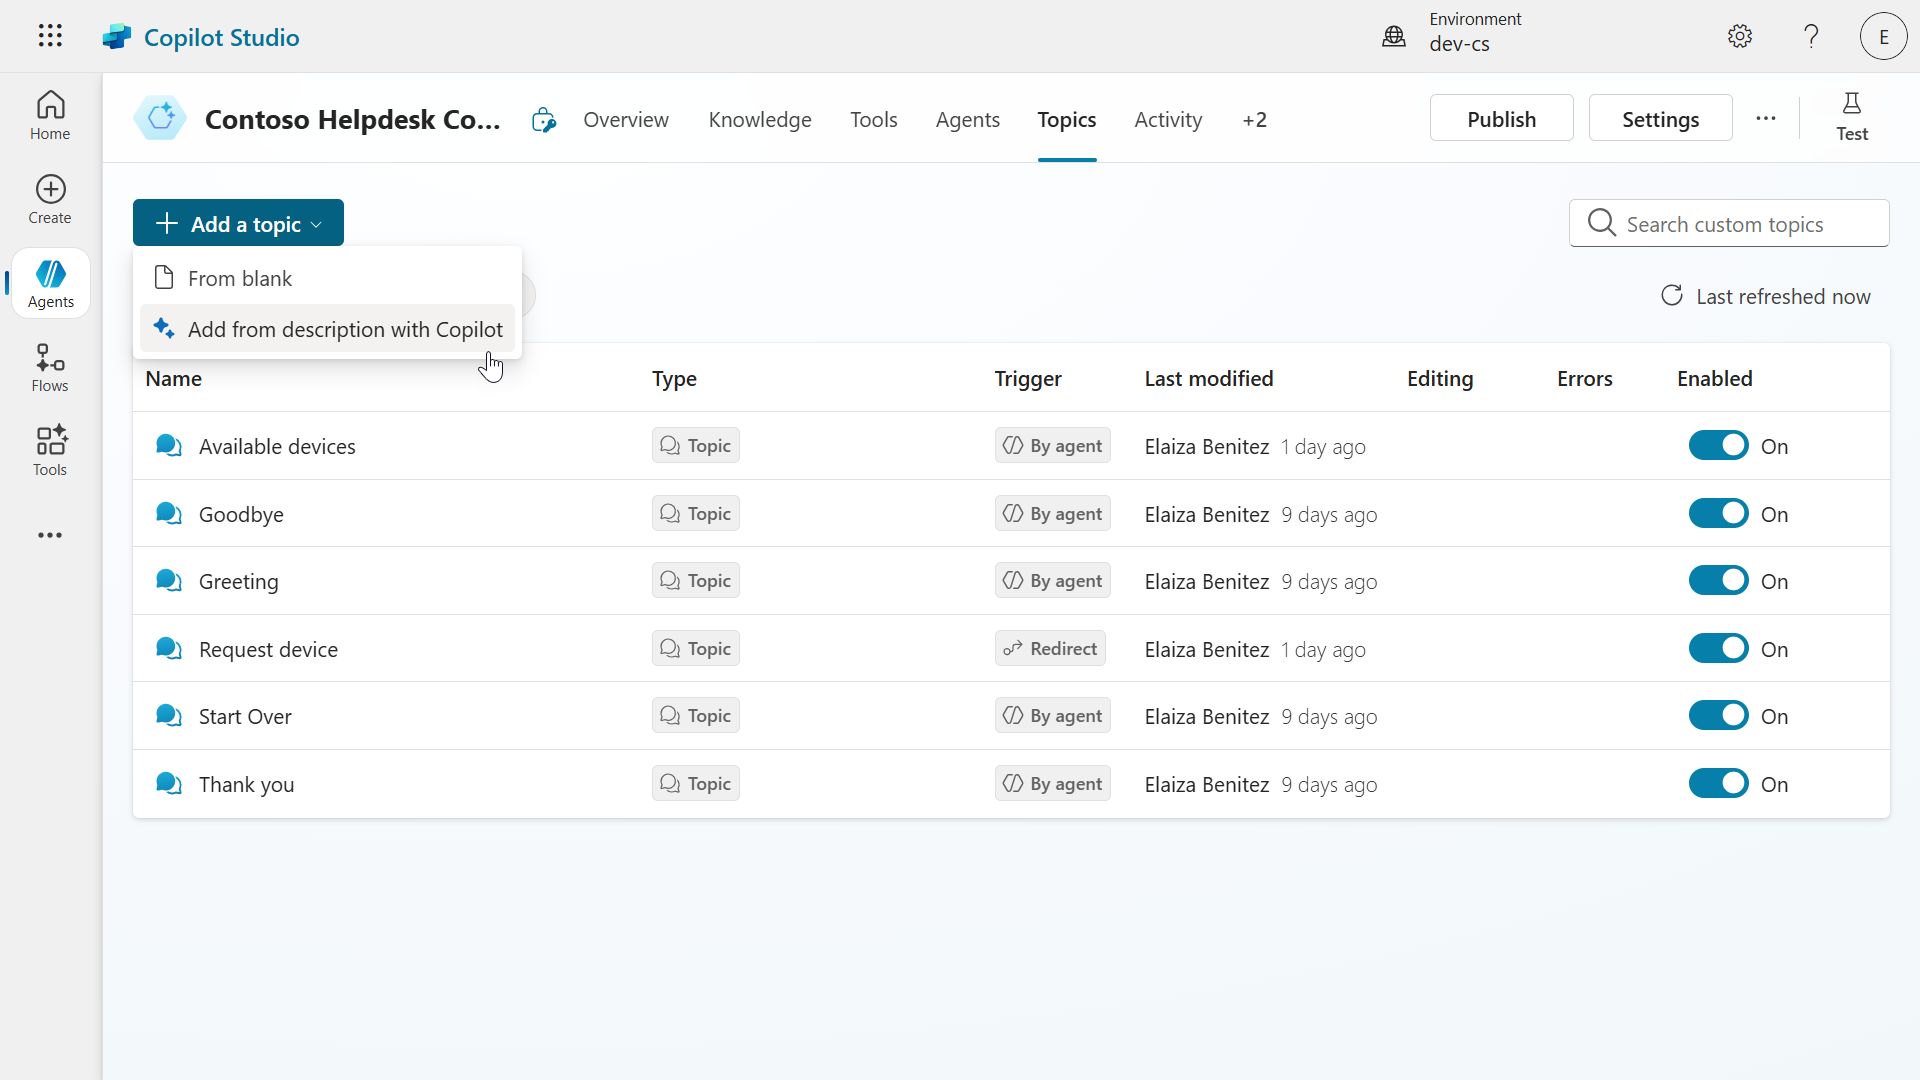
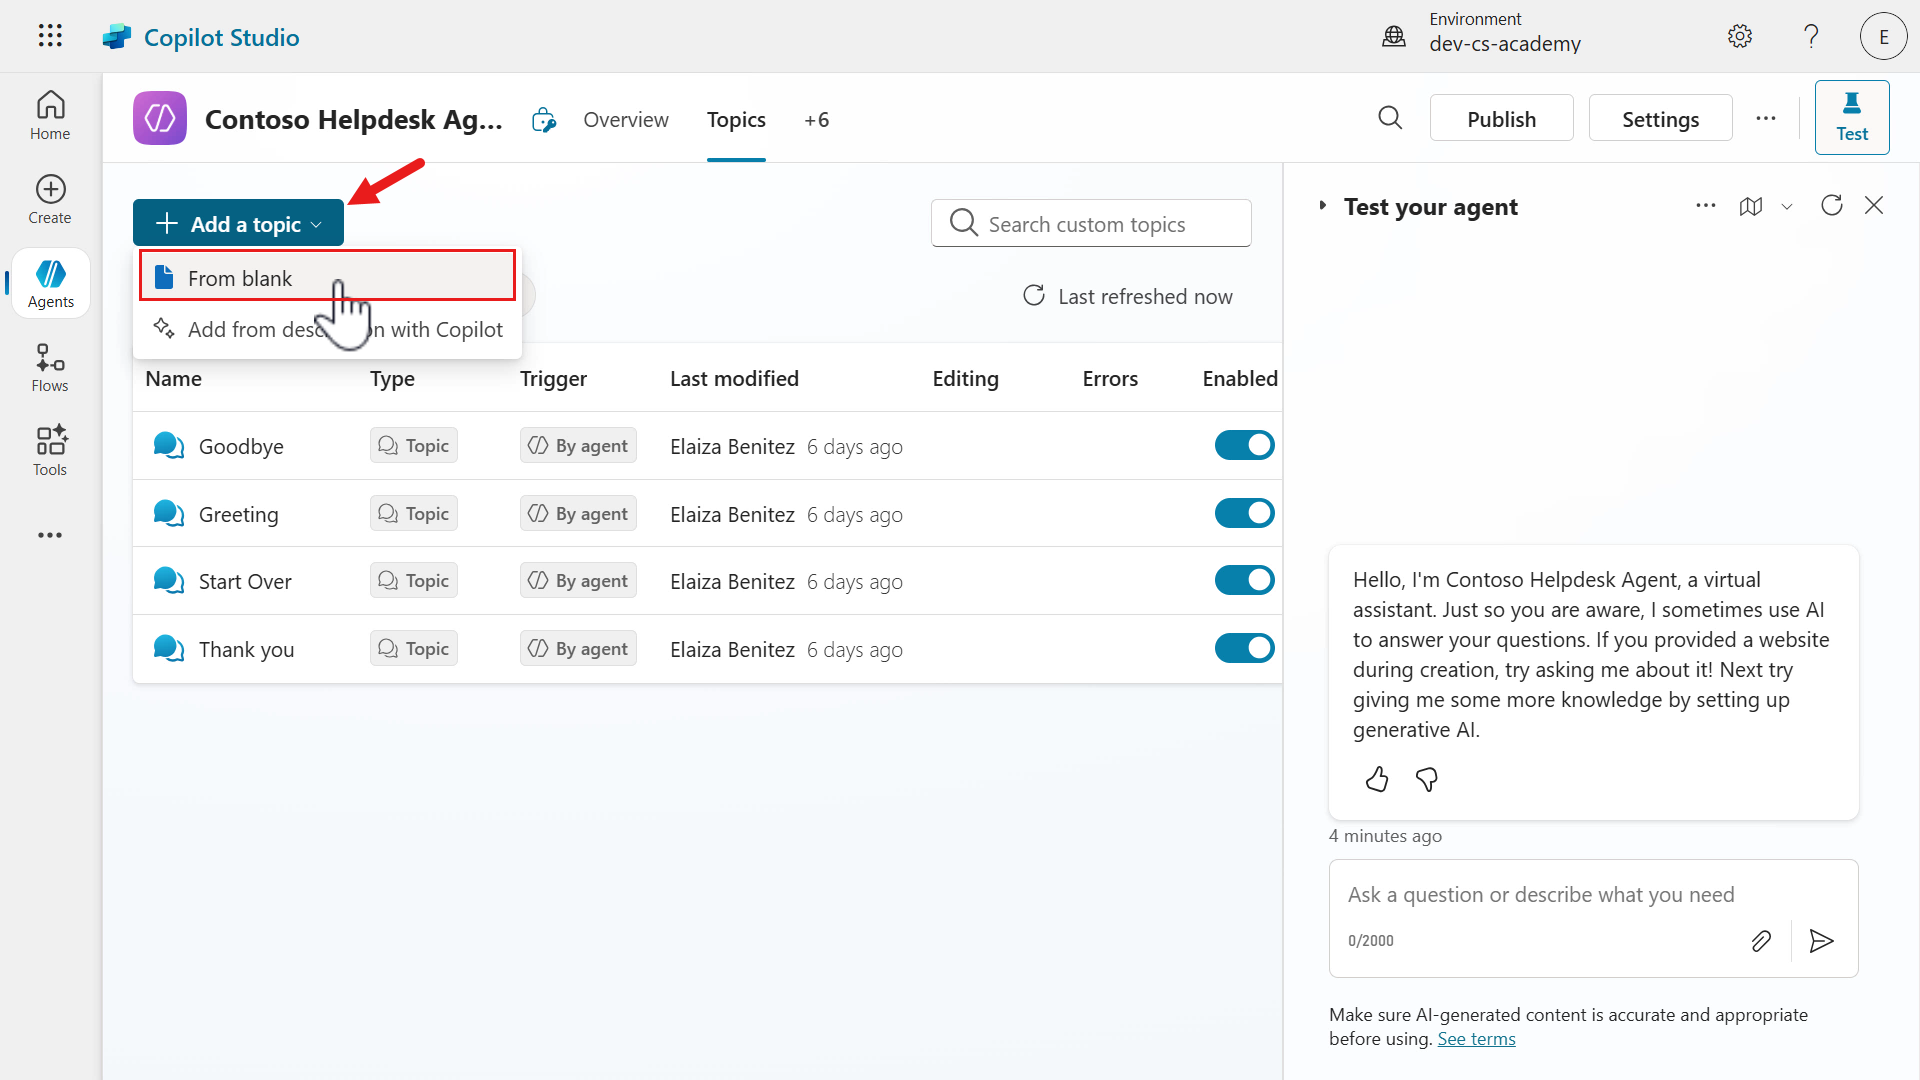
Select + Add a topic and select From blank.
-
Enter a name for the topic. Copy and paste the following.
Available devices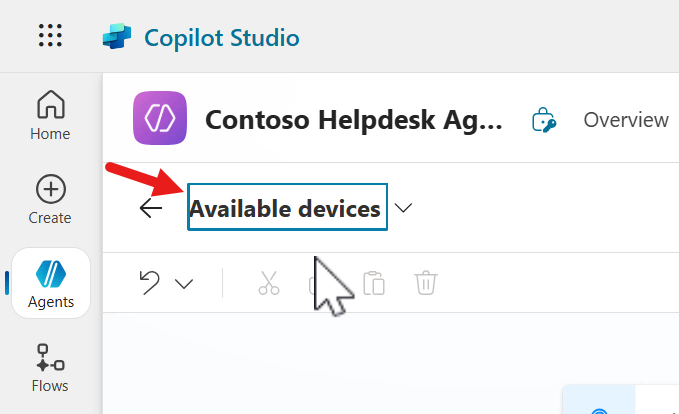
-
Enter a trigger description that outlines what the topic does. Copy and paste the following.
This topic helps users find devices that are available from our SharePoint Devices list. User can ask to see available devices and it will return a list of devices that are available which can include laptops, smartphones, accessories and more.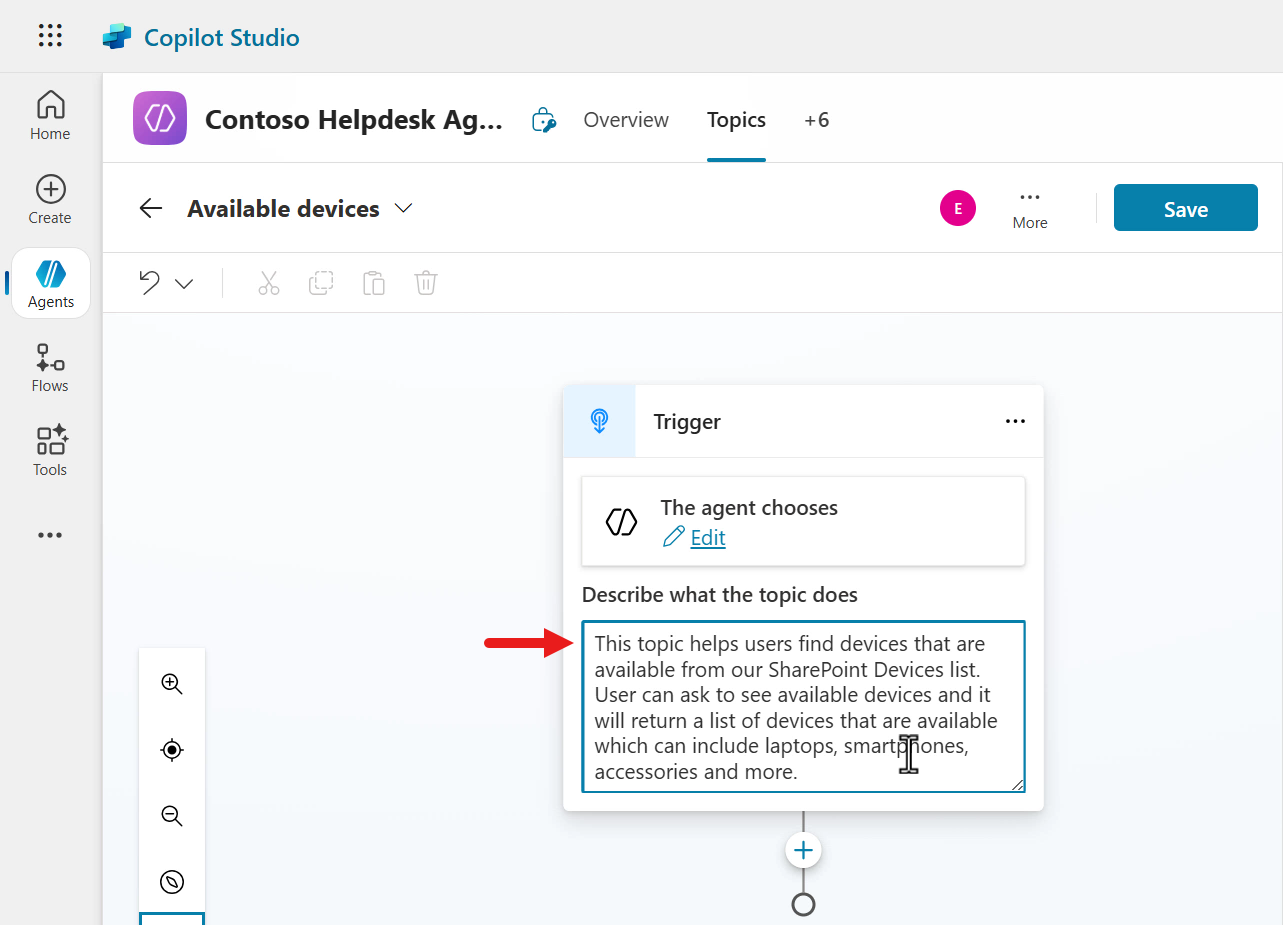
7.2 Define the trigger inputs and outputs
-
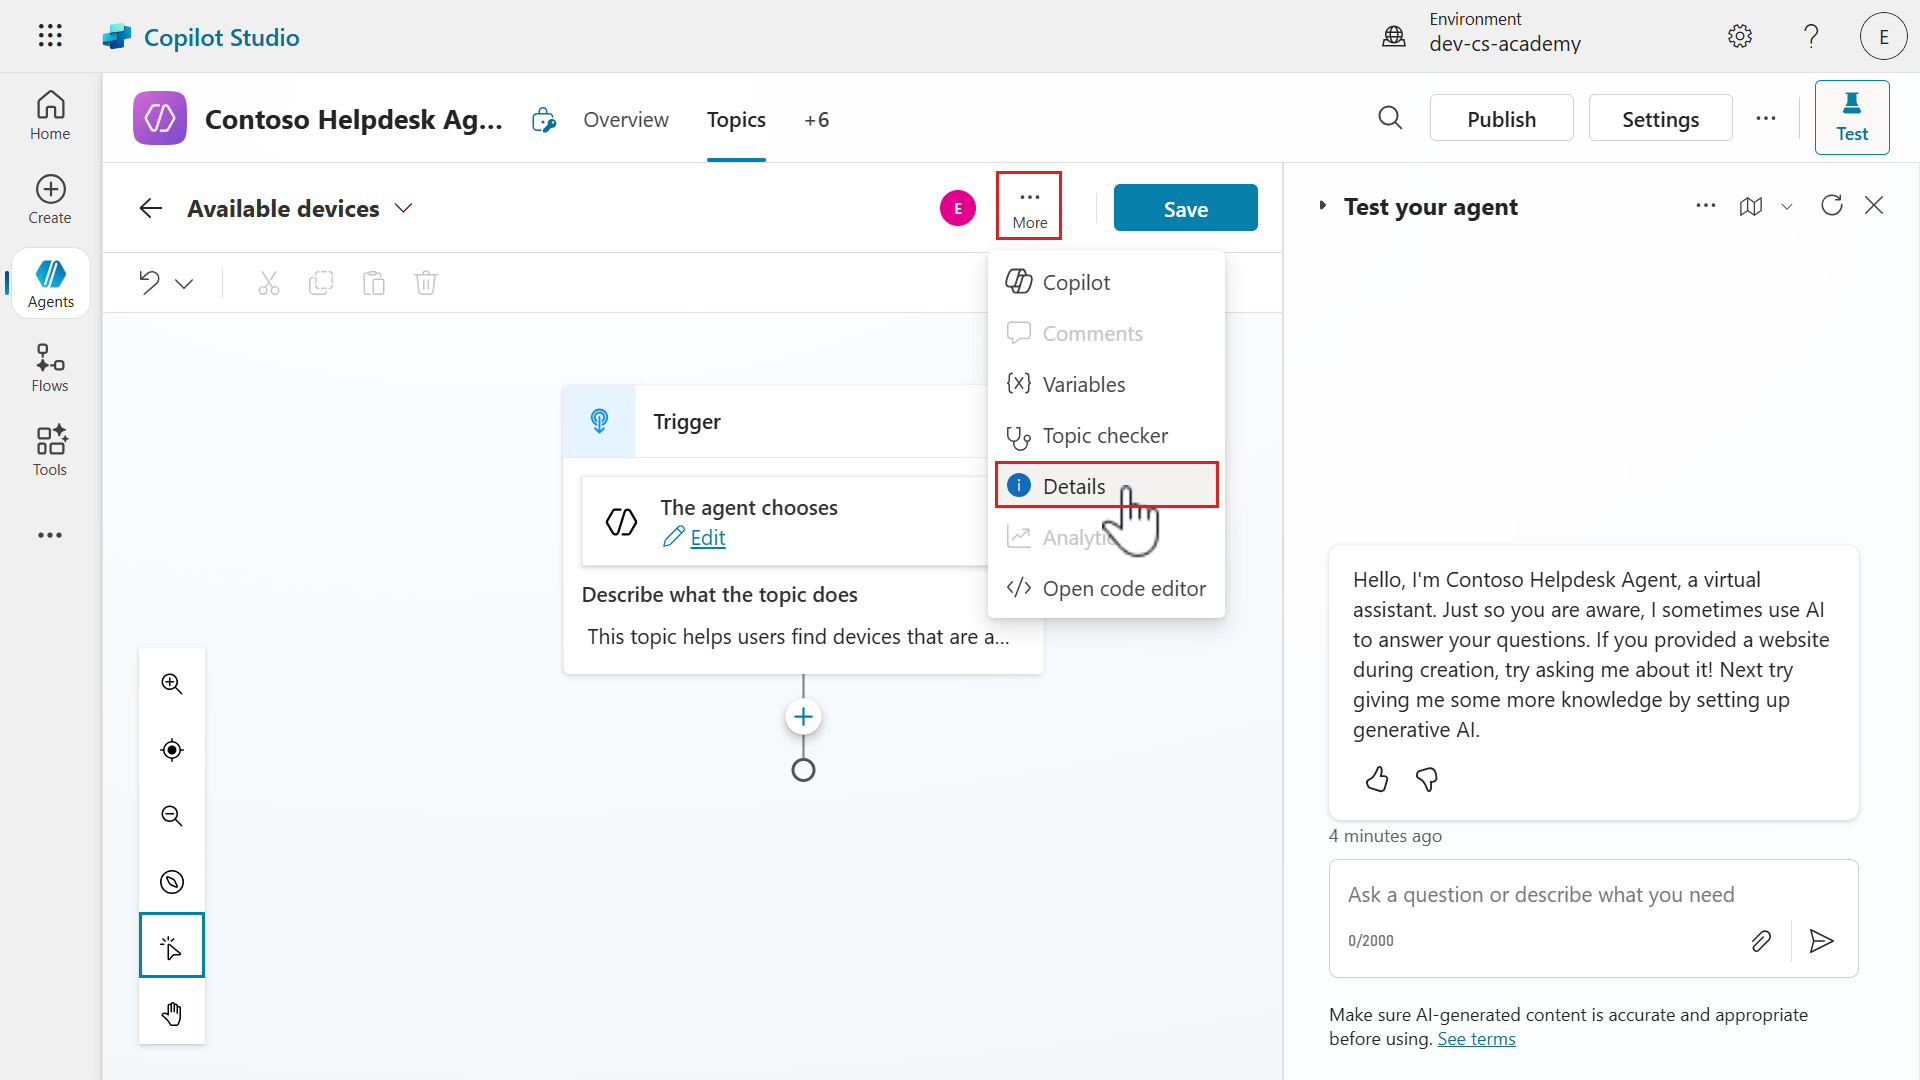
Next, we’re going to add a new input variable that generative AI will use in its orchestration to extract the value of the device type from a user’s message. Select the More ellipsis (…) in the topic and select Details to view the topic details pane.
-
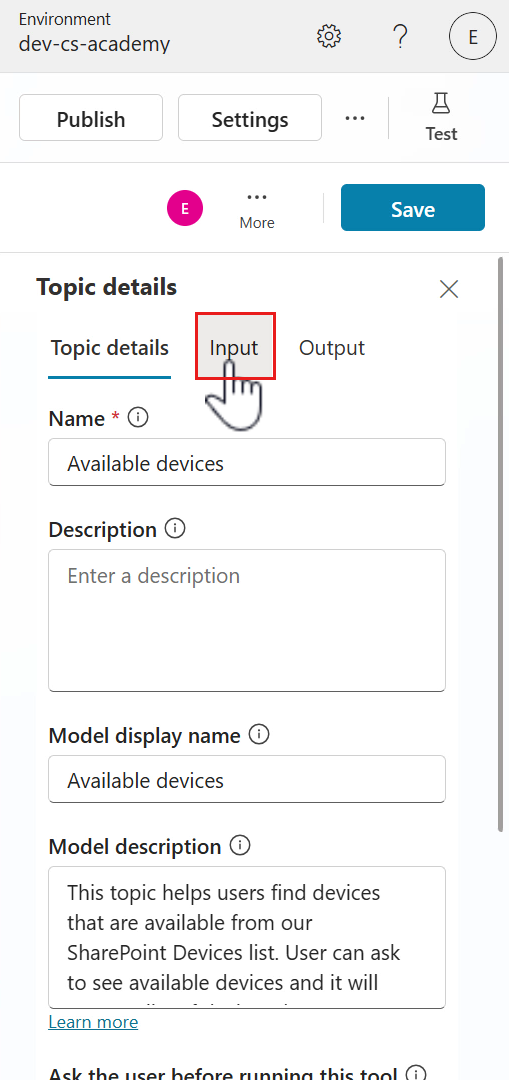
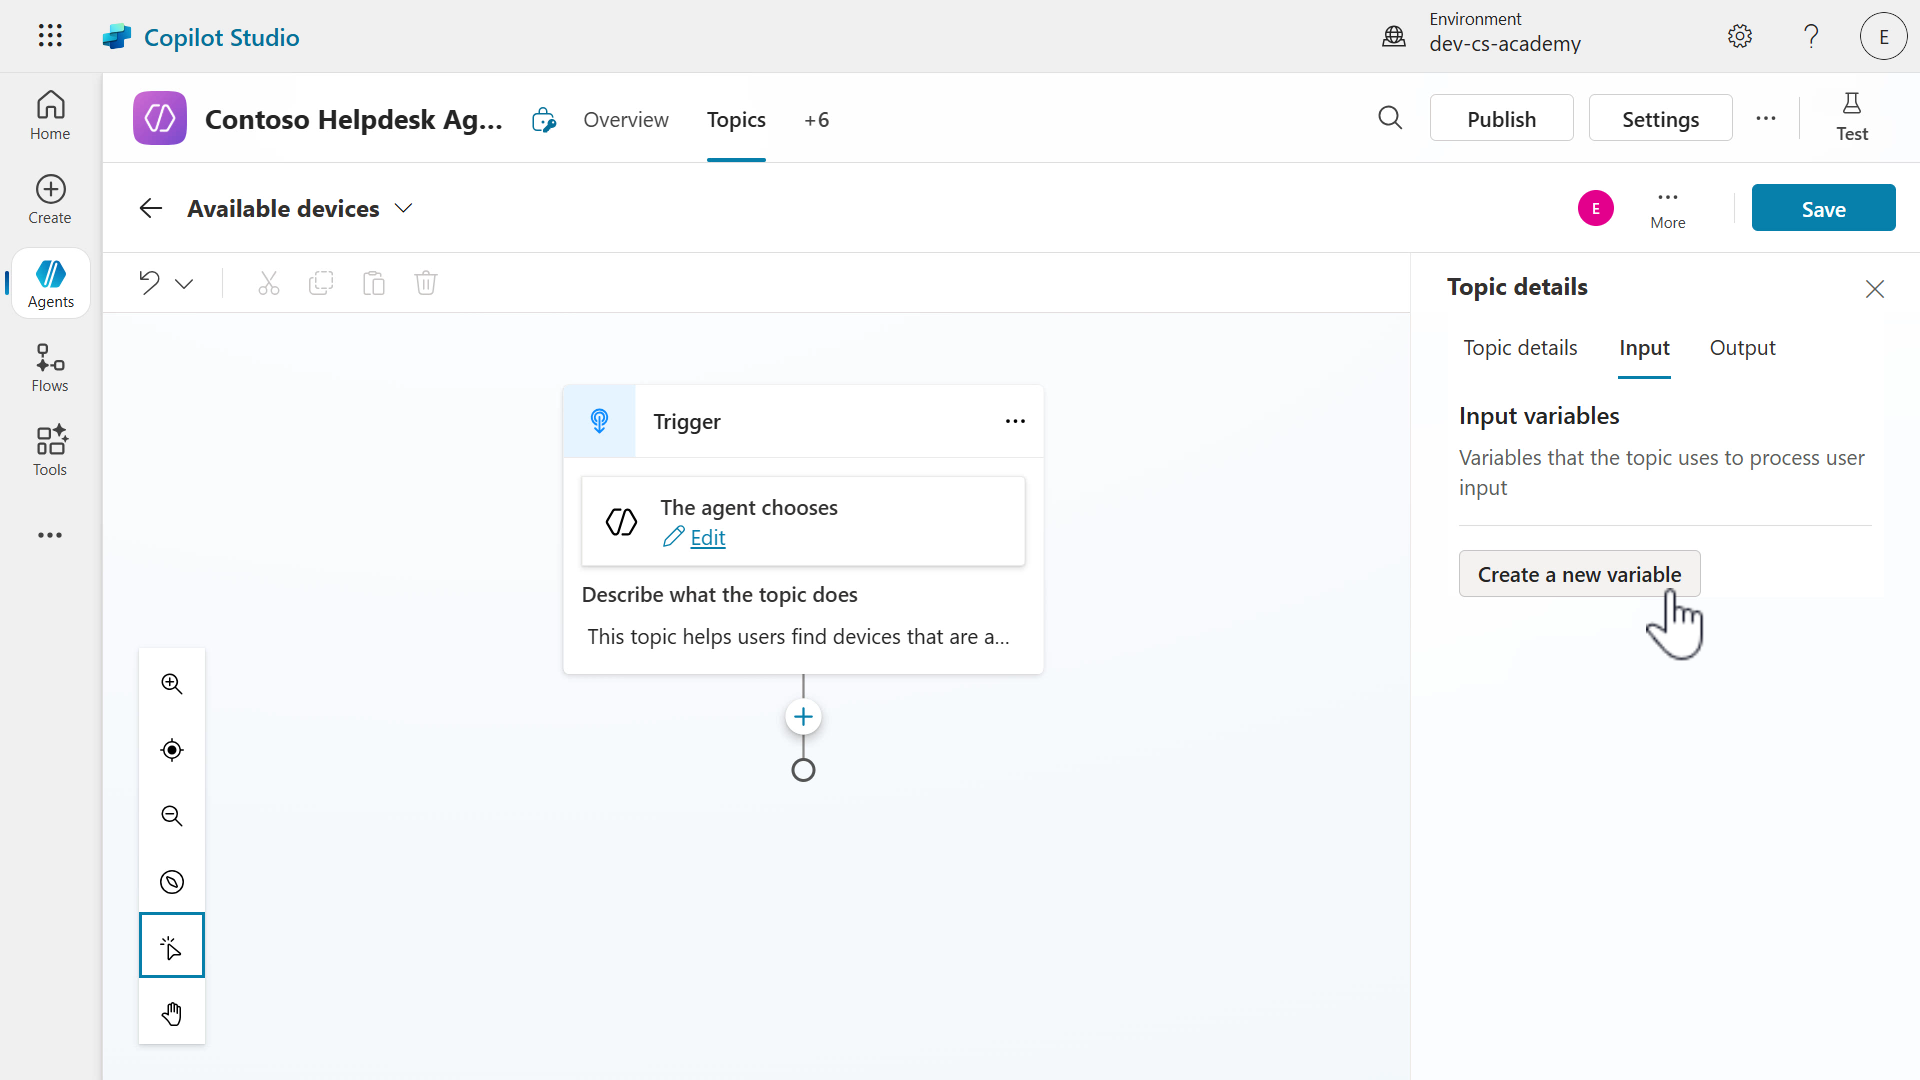
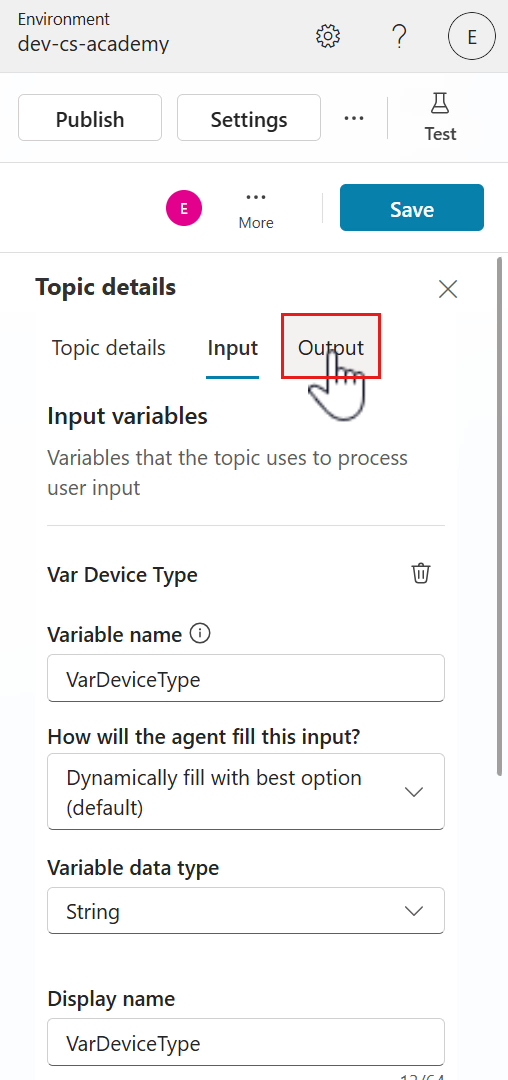
The Topic details pane has now loaded. Select the Input tab.
-
Select Create a new variable.
-
Enter a name for the variable. Copy and paste the following.
VarDeviceType
-
We now need to define our input and output variables. The following are properties that can be defined for topic inputs and outputs.
Field Value How will the agent fill this input? Determines how the agent fills this variable with a value before running the topic. By default it’s set to Dynamically fill with the best option. Otherwise you can override an input with a value instead of asking the user Variable data type The data type of the variable. Supported data types are String,Boolean,Number,Date,DateTime,DateTimeNoTimeZone,Time,Record,Table,Unspecified,From sample dataDisplay name Name of variable Identify as Entity type for the agent to capture the correct value type Description The description helps the agent automatically fill inputs before running the topic or generate questions to ask for the values The How will the agent fill this input?, Variable data type and Display name can remain as-is. Update the Identify as property to User’s entire response.

-
Copy and paste the following as the description.
List of possible values: Laptop, Desktop, Smartphone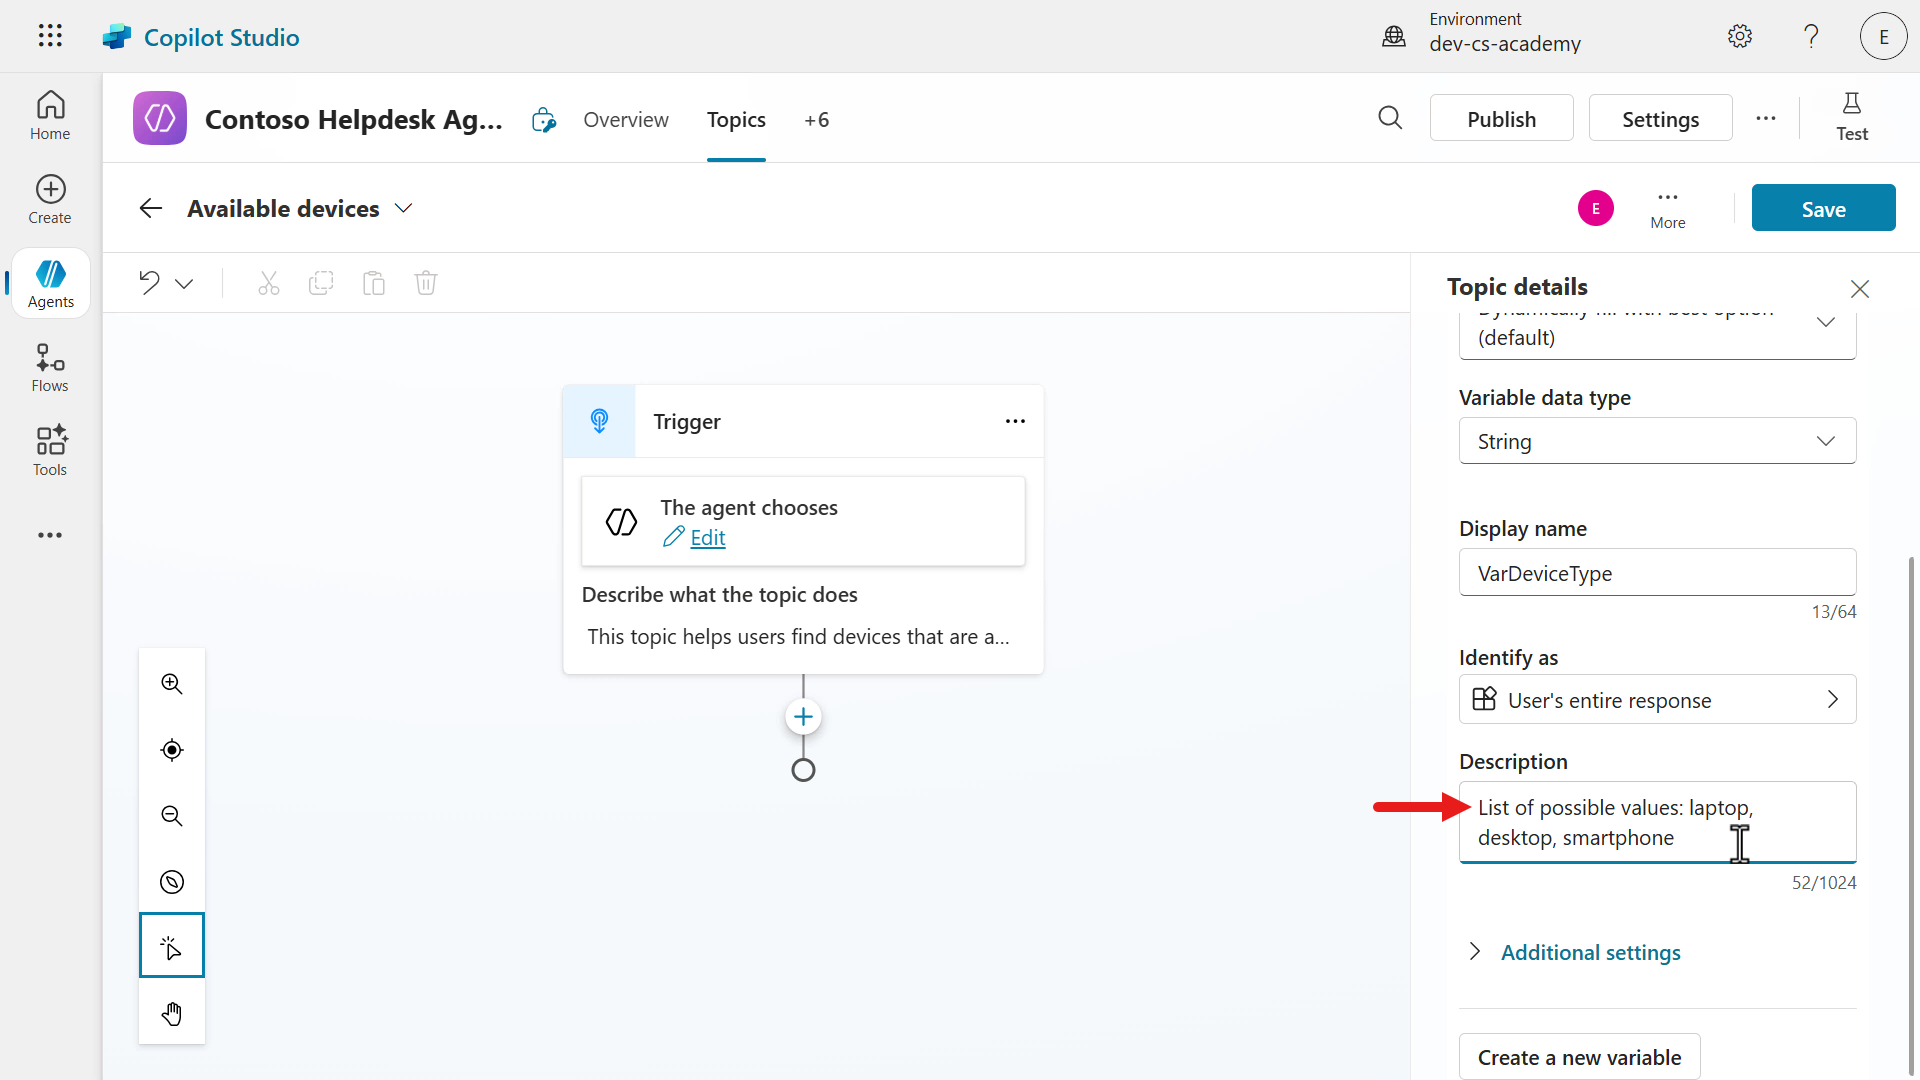
-
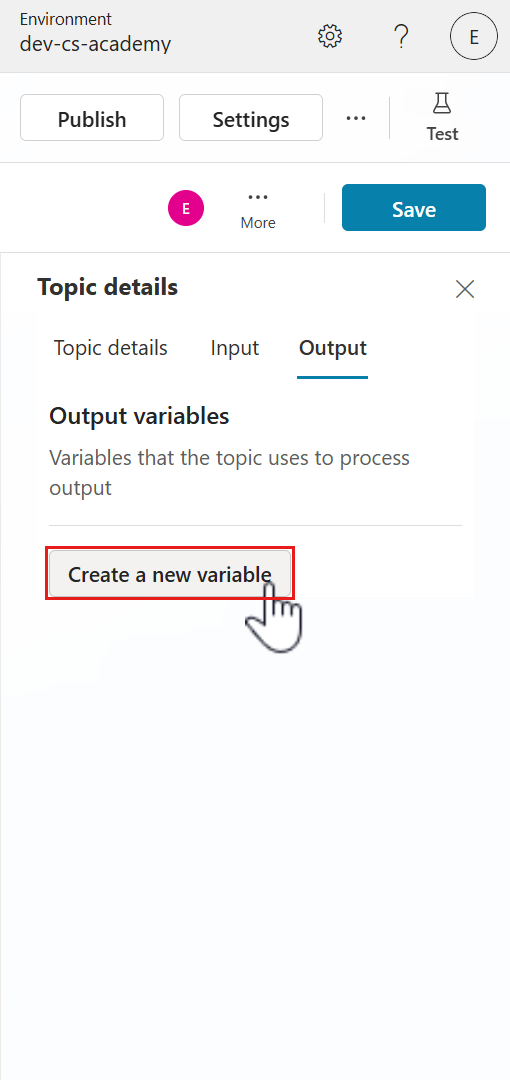
Next, let’s define our output for the topic. Select the Output tab.
-
Select Create a new variable.
-
Update the following properties.
Variable name - Copy and paste the following.
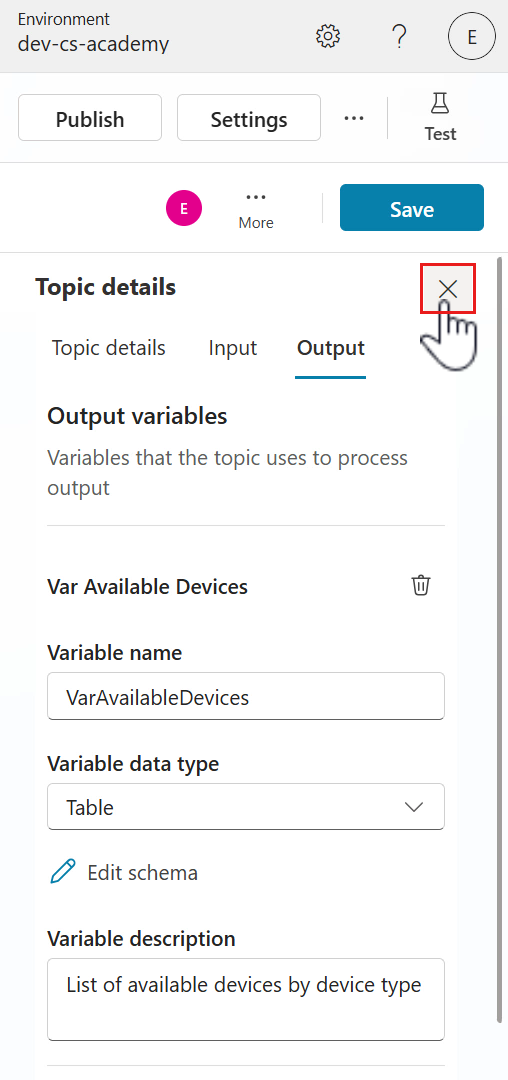
VarAvailableDevicesVariable data type - Select Table as the data type.
Variable description - Copy and paste the following.
List of available devices by device type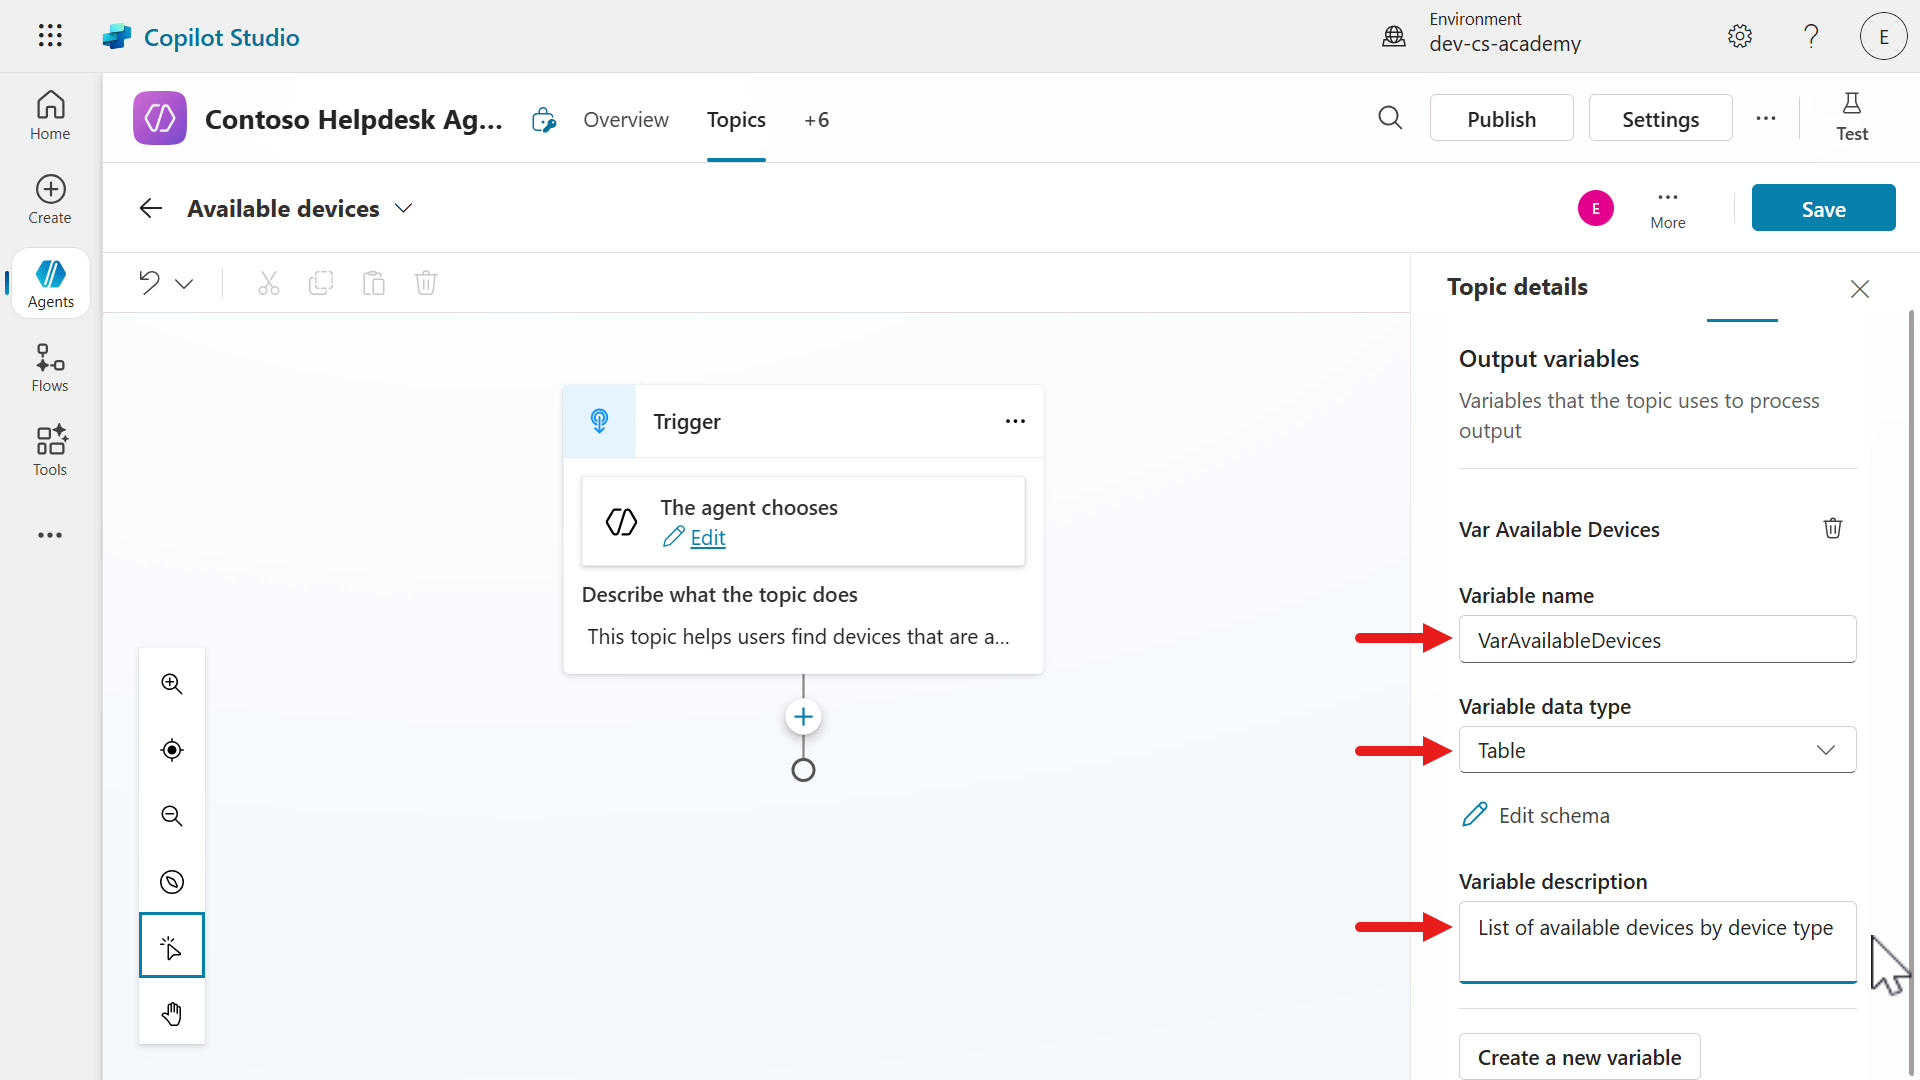
-
We’ve now completed defining the inputs and outputs of the topic. Select the X icon to exit from the Topic details pane.
7.3 Add a tool using a connector
-
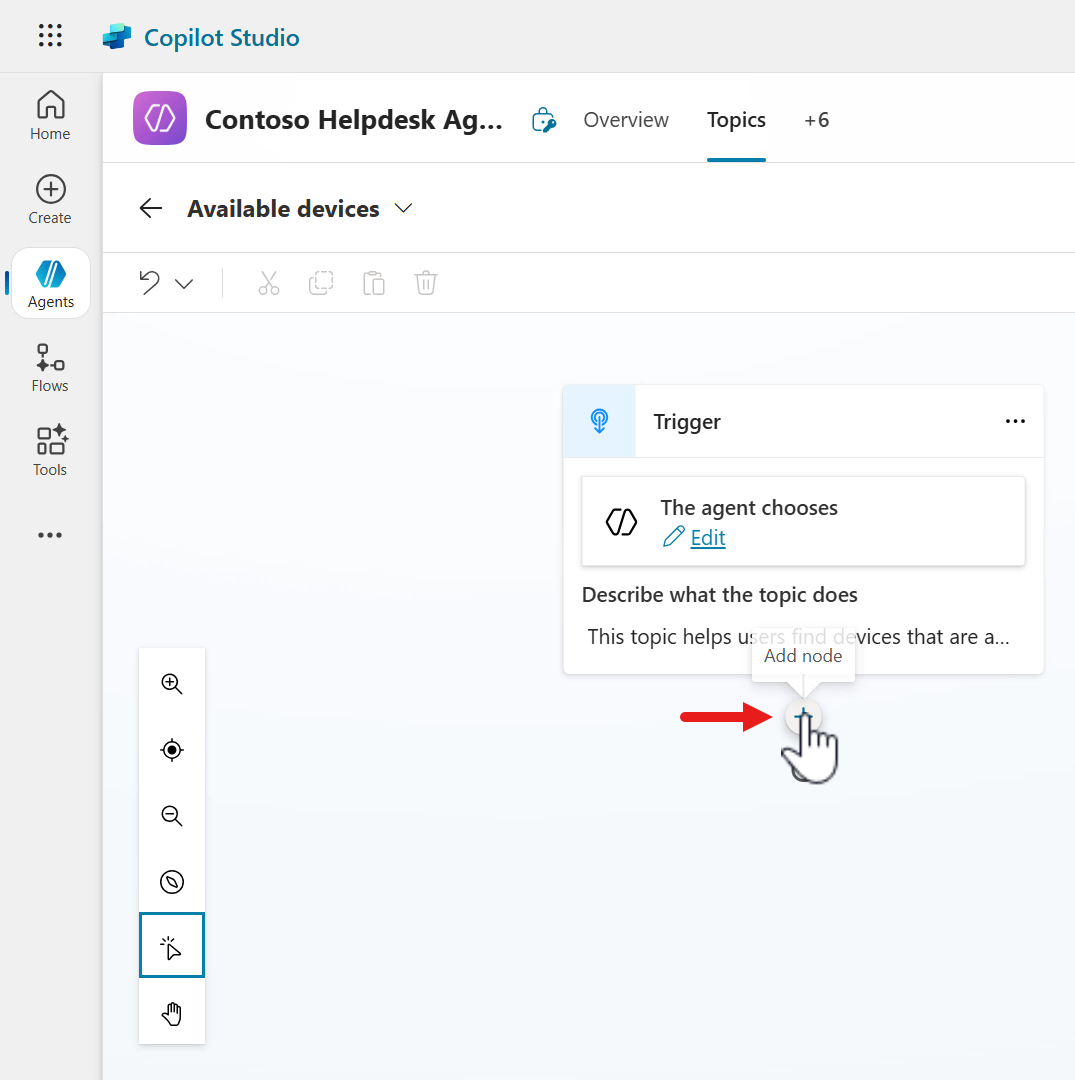
Let’s next add a node that enables the agent to retrieve the list of devices from the Devices SharePoint list. Select the + icon below the trigger.
-
Select the Add a tool node, then select the Connector tab. Search for
Get itemsand select the Get items SharePoint connector action.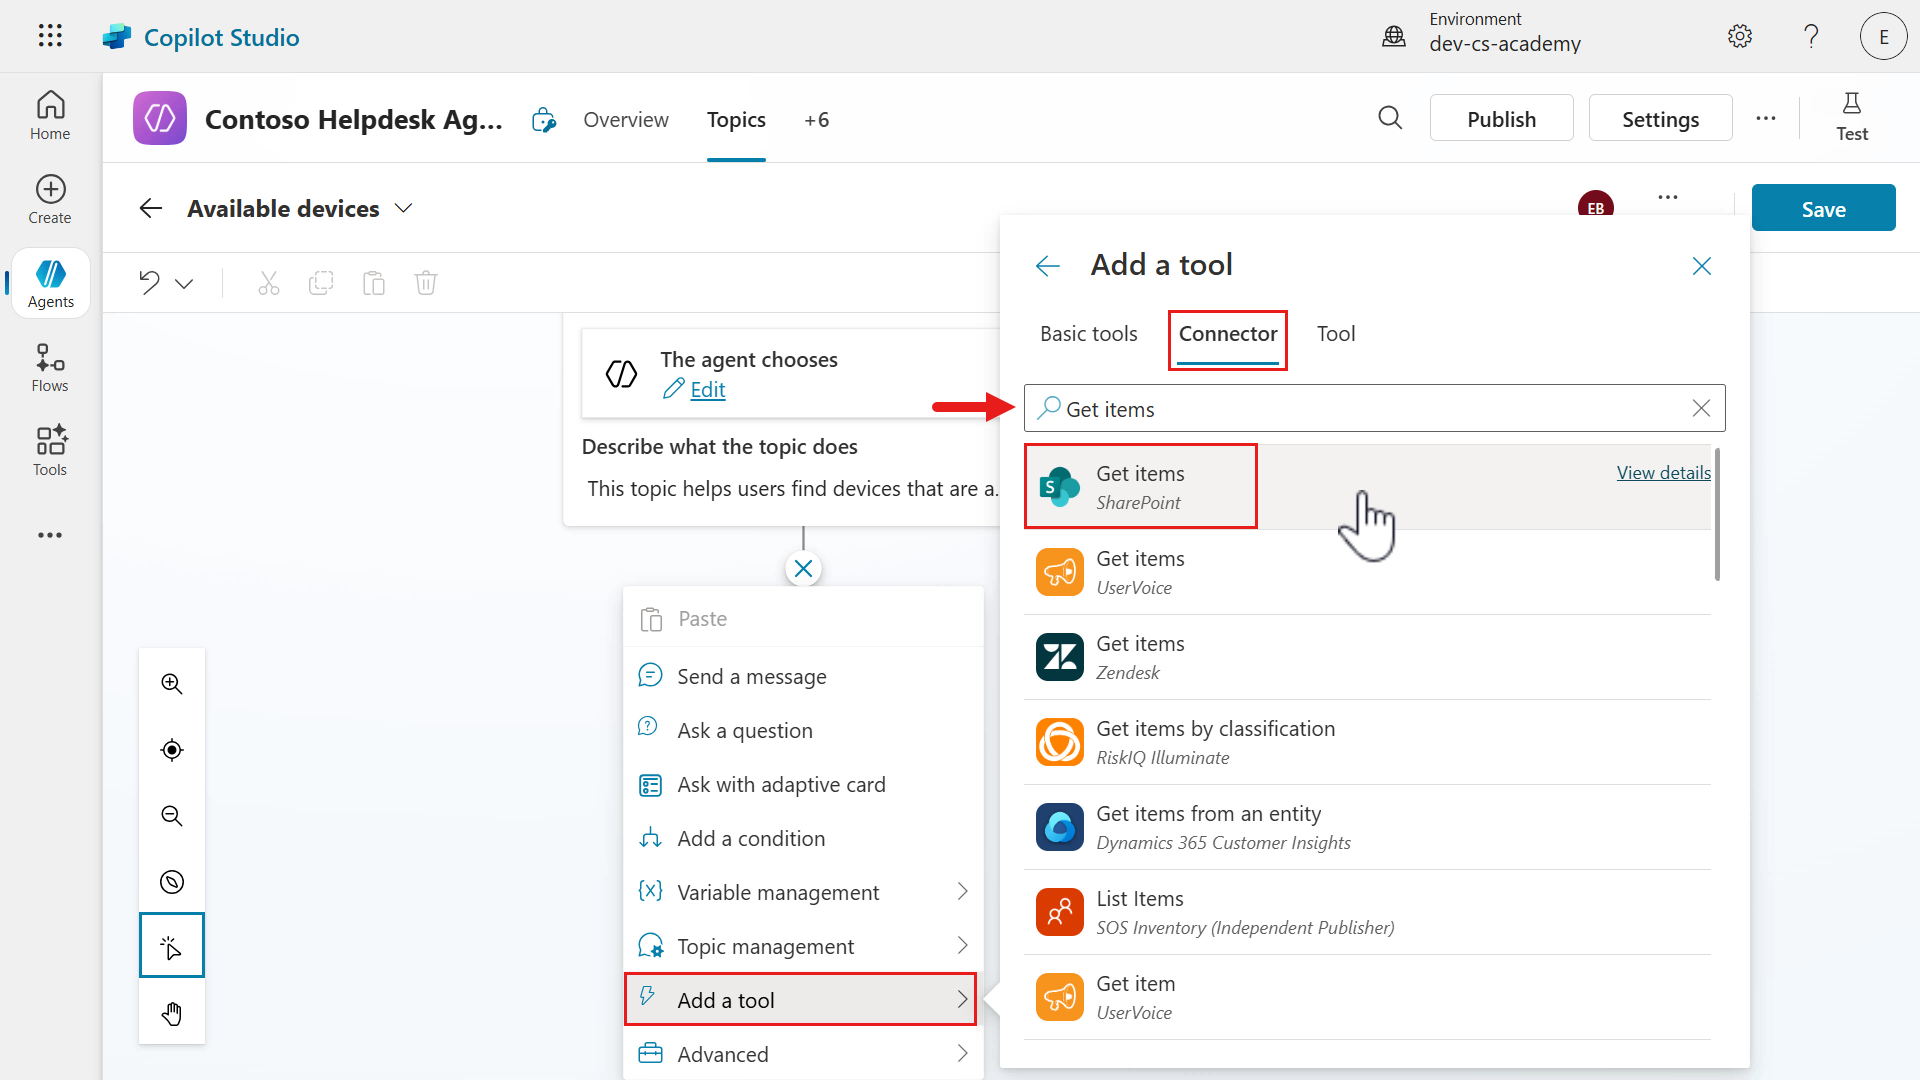
-
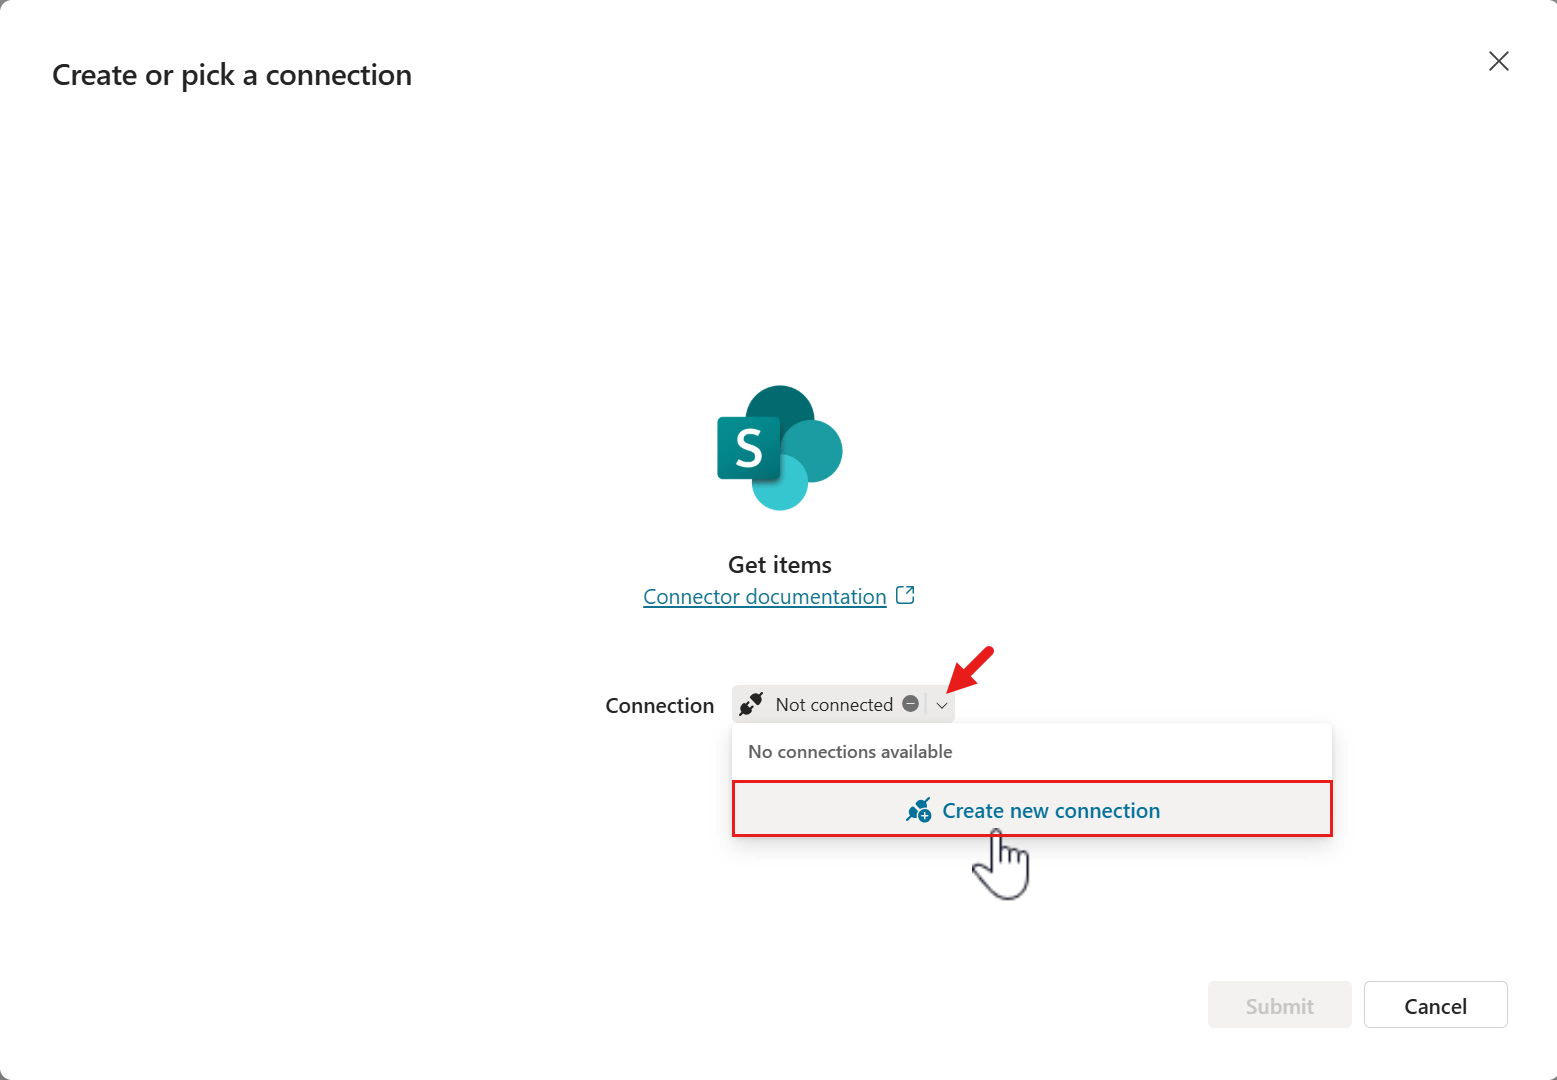
A new connection needs to be created for the connector. Select the chevron icon and select Create new connection.
-
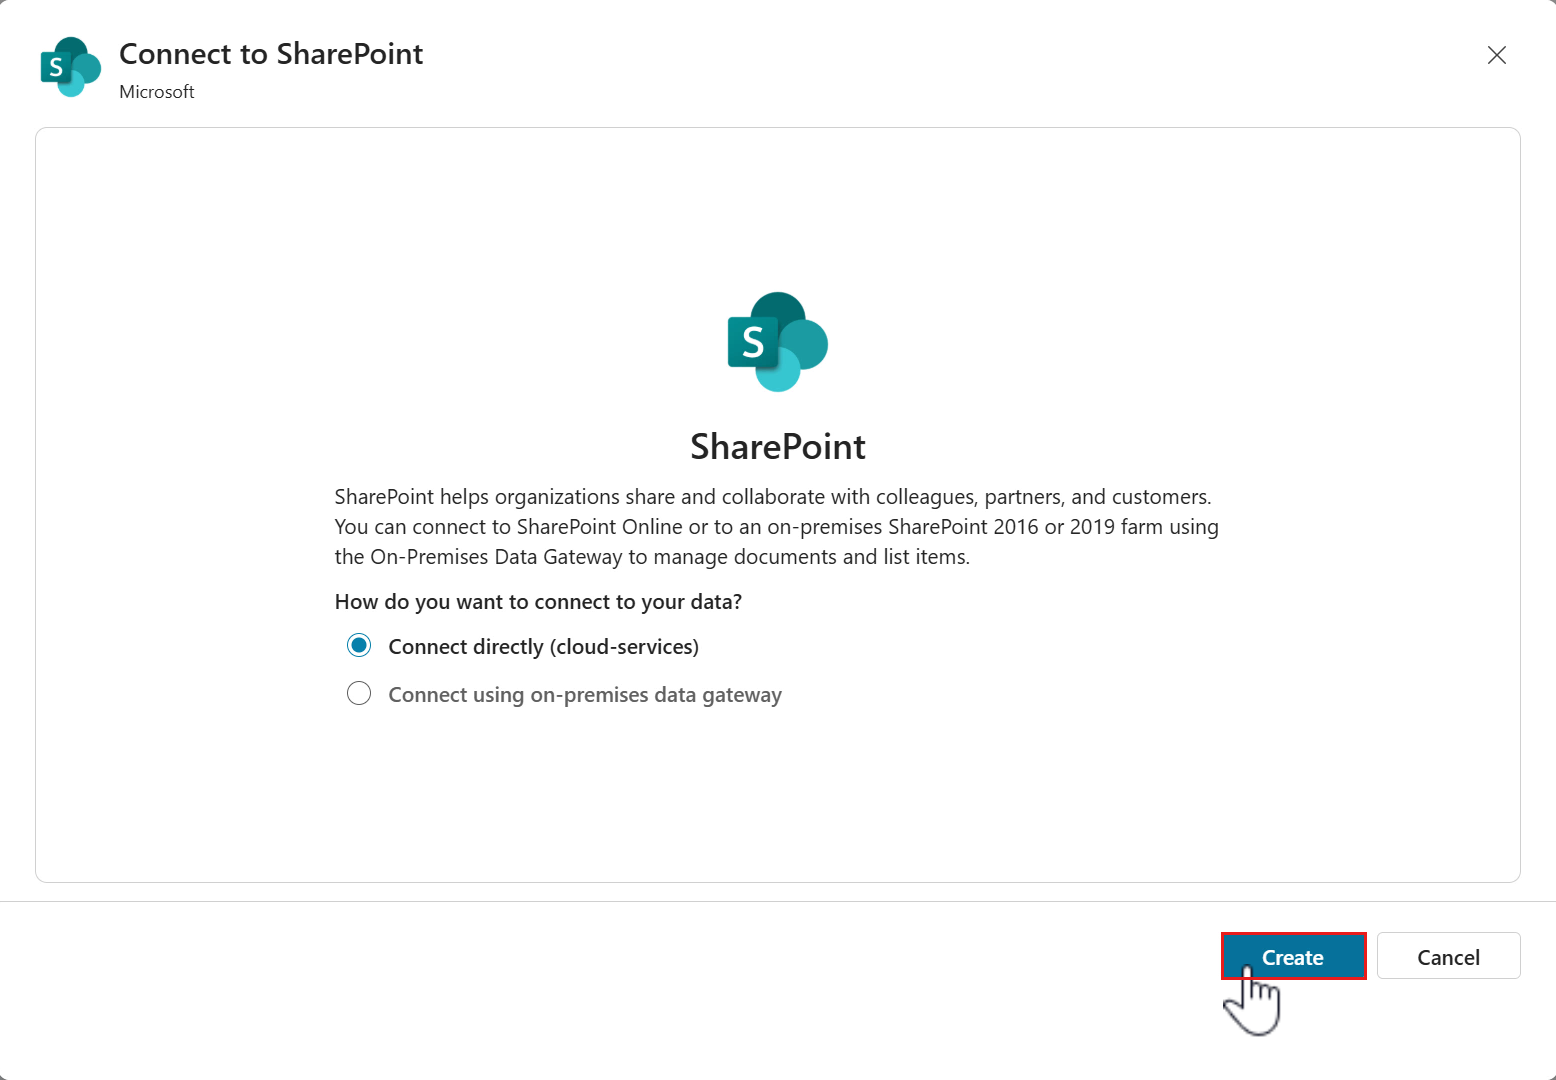
Two options will be displayed that allows you to connect directly to SharePoint Online or to an on-premises SharePoint. By default the Connect directly (cloud-services) option will be selected, which is what we’ll use for our connection.
Select Create.
-
Select your signed in user account.

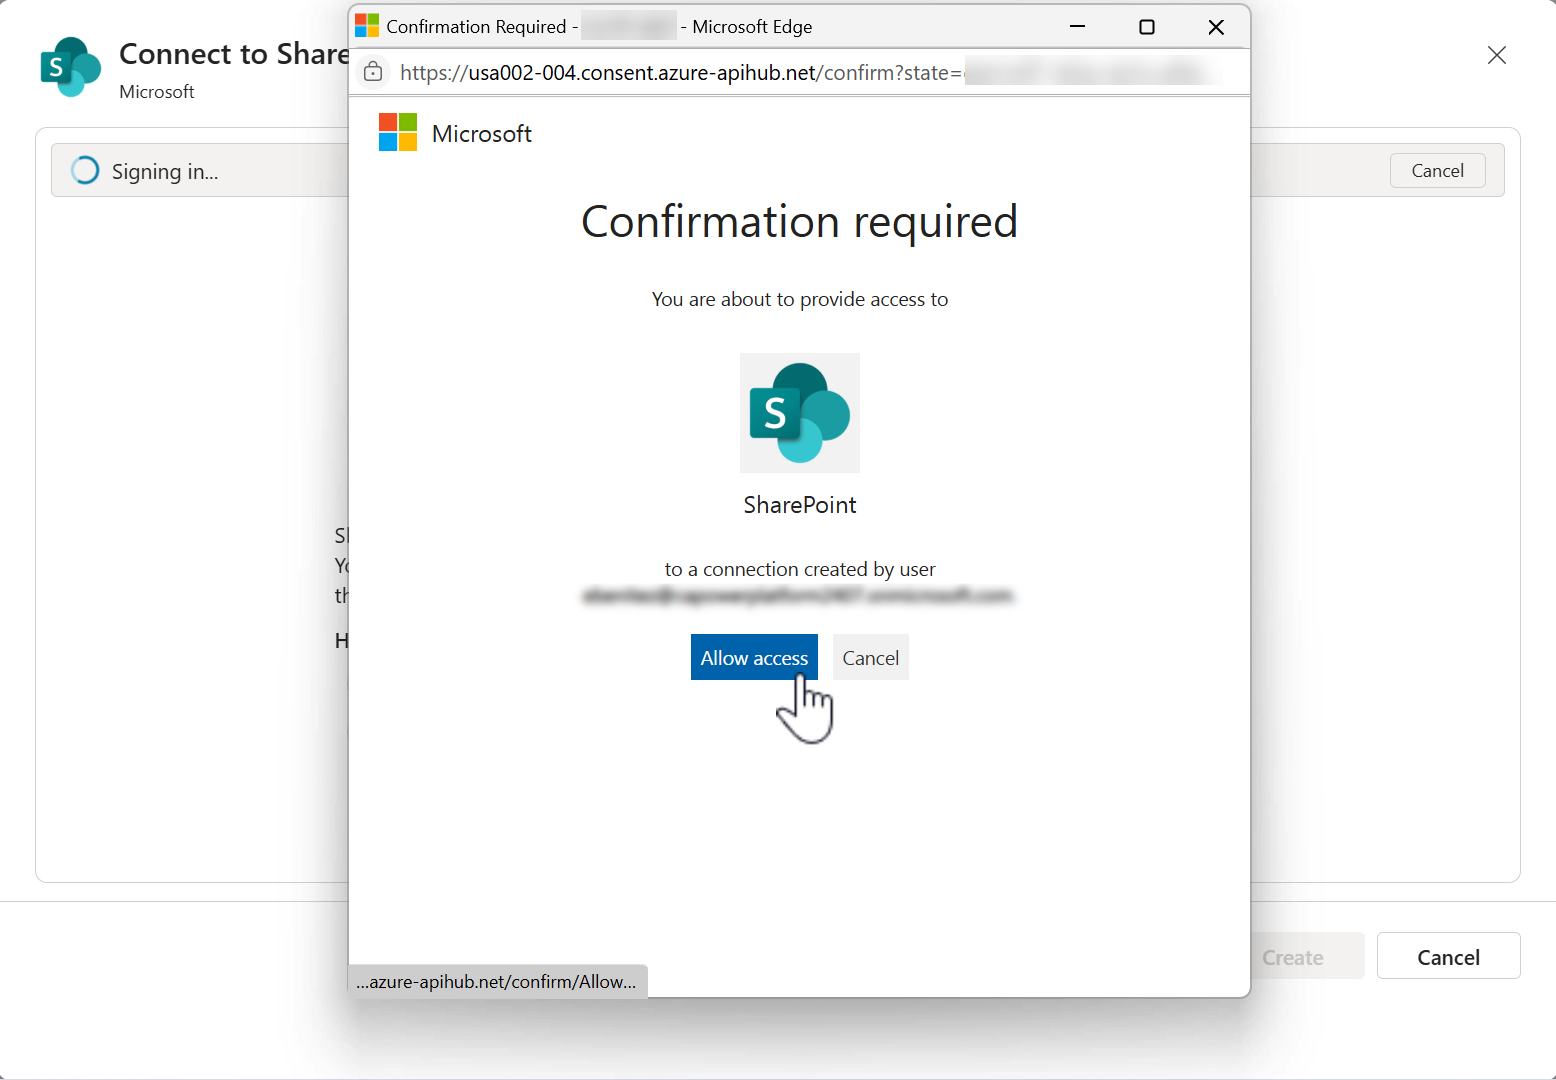
-
Next, you need to confirm your user account can be used for the connection to the SharePoint connector. Select Allow access.
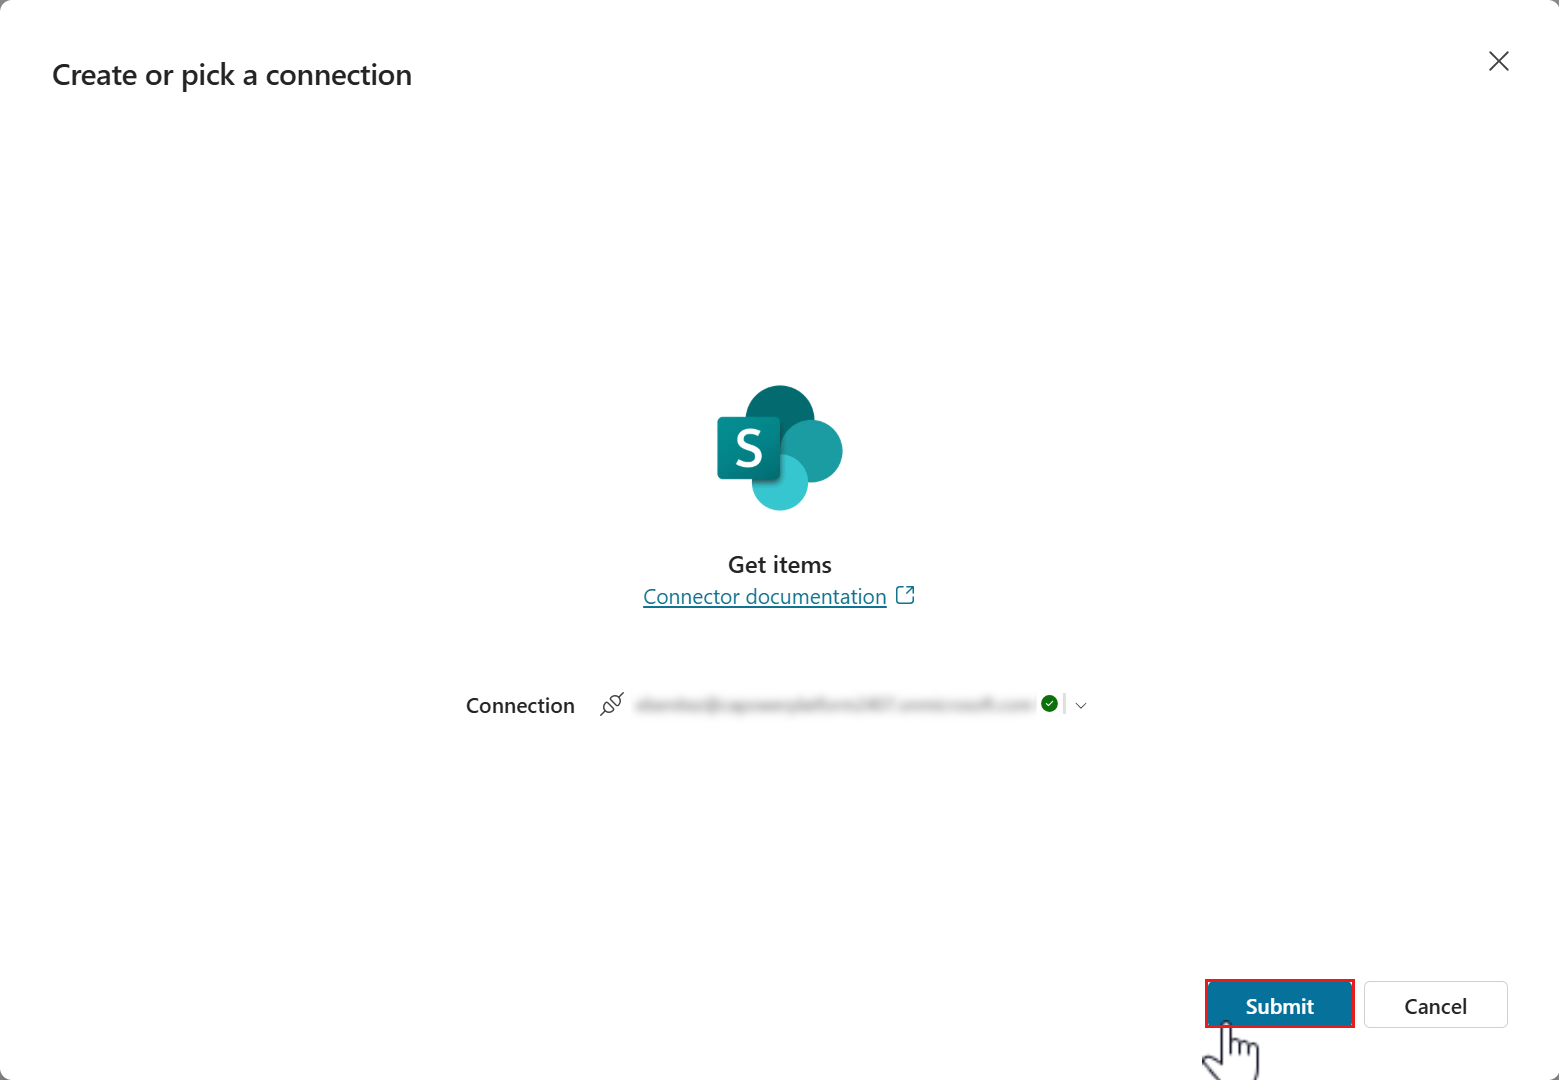
-
Select Submit for the Get items SharePoint connector action to be added as a node to the topic.
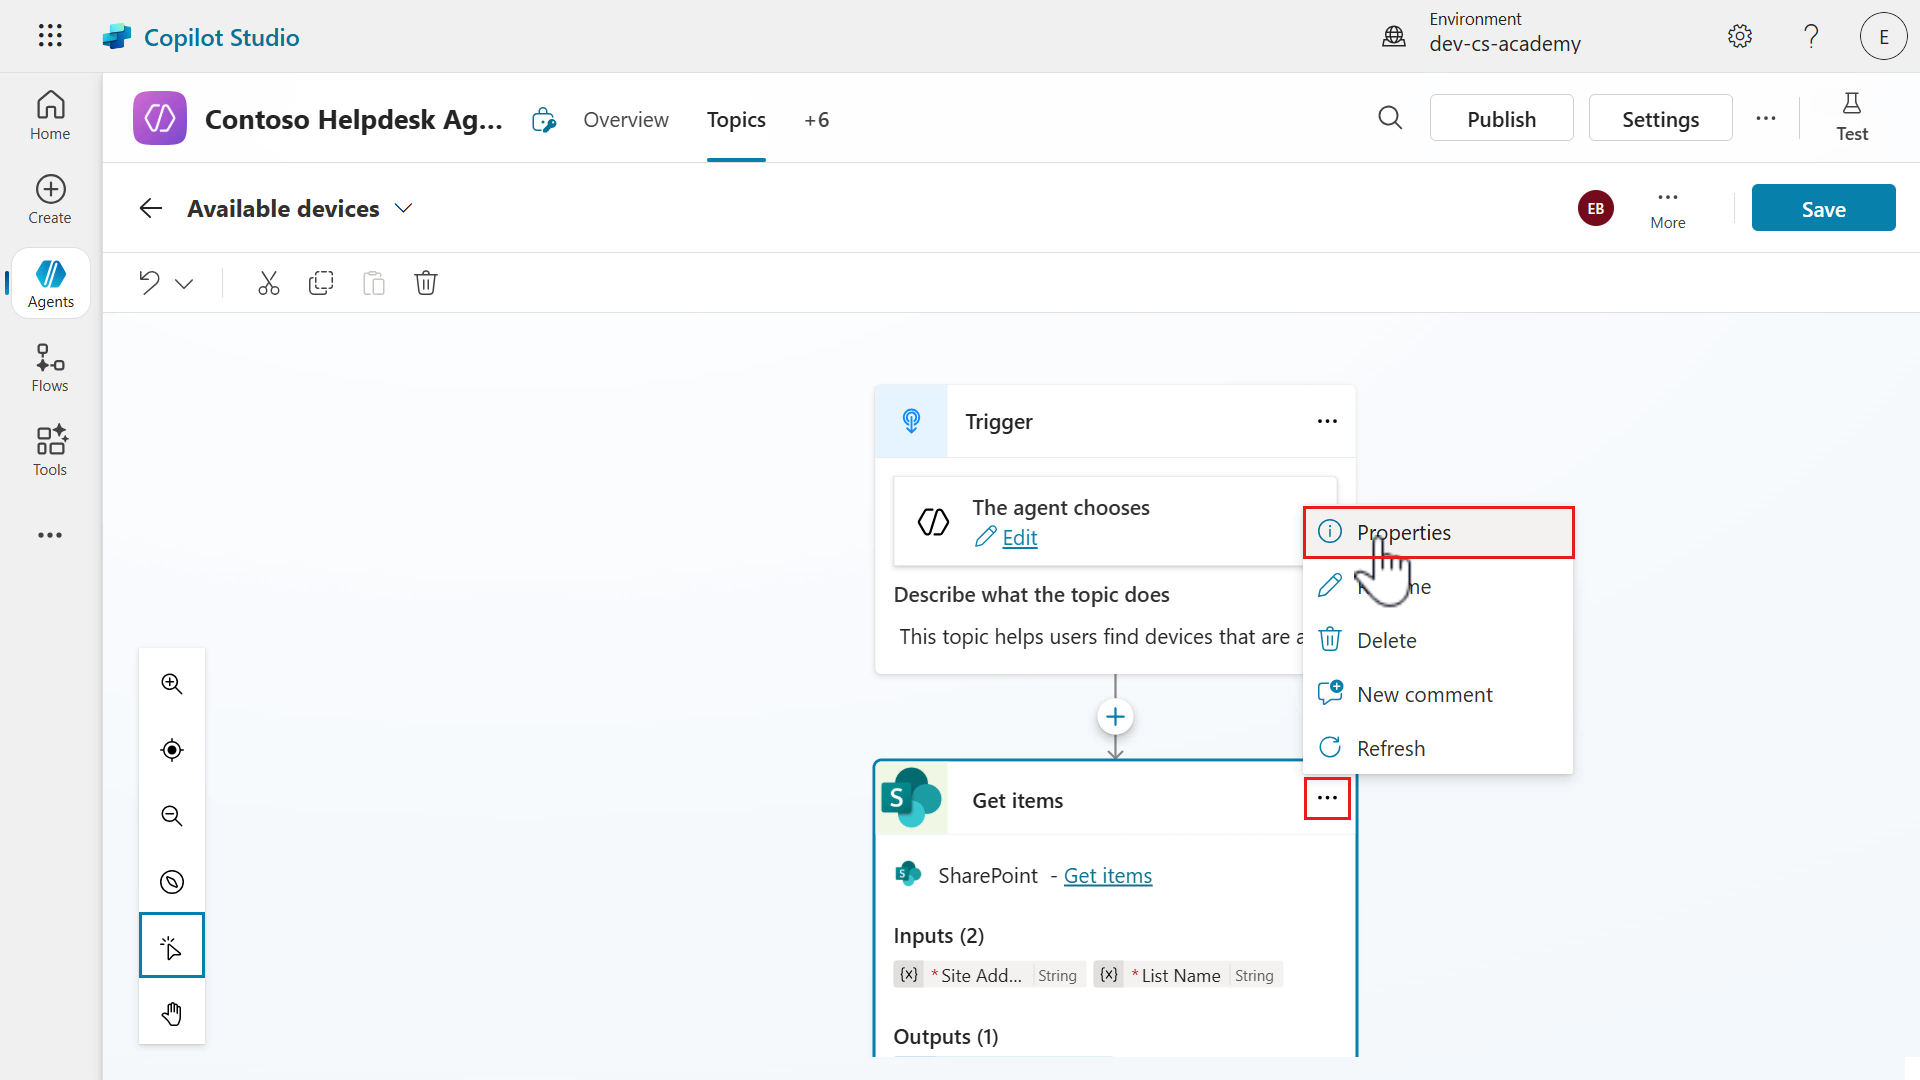
-
The Get items SharePoint connector action is now added to the topic. We can now begin configuring the inputs of the action. Select the ellipsis (…) icon and select Properties.
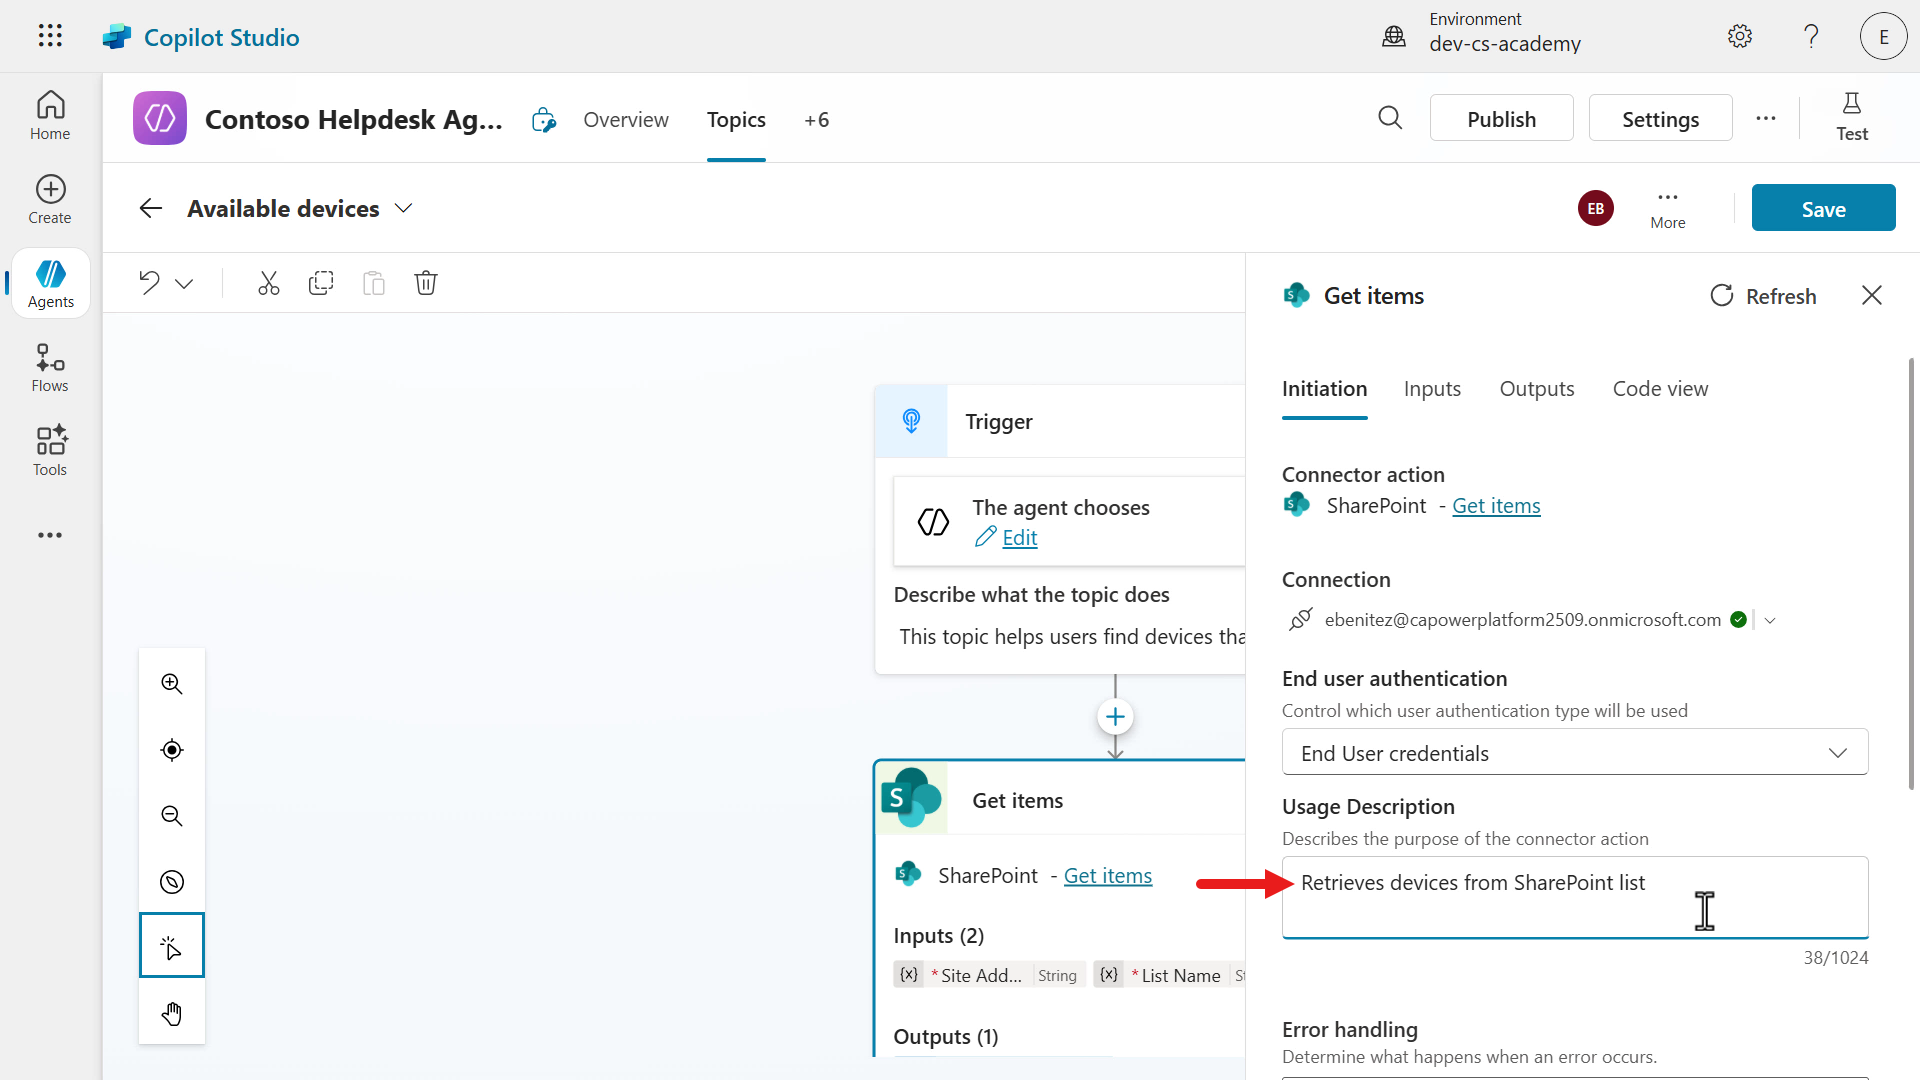
-
The Get items configuration pane will appear and by default, you’ll see the Inputs tab. Select the Initiation tab and enter a description in the Usage Description field. Copy and paste the following.
Retrieves devices from SharePoint listThis will come in handy when we view the Manage your connections page of our agent. We’ll return to this shortly.
-
Select the Inputs tab and select the Contoso IT site and the Devices list that you setup in Lesson 00 - Course Setup - Step 3: Create new SharePoint site.
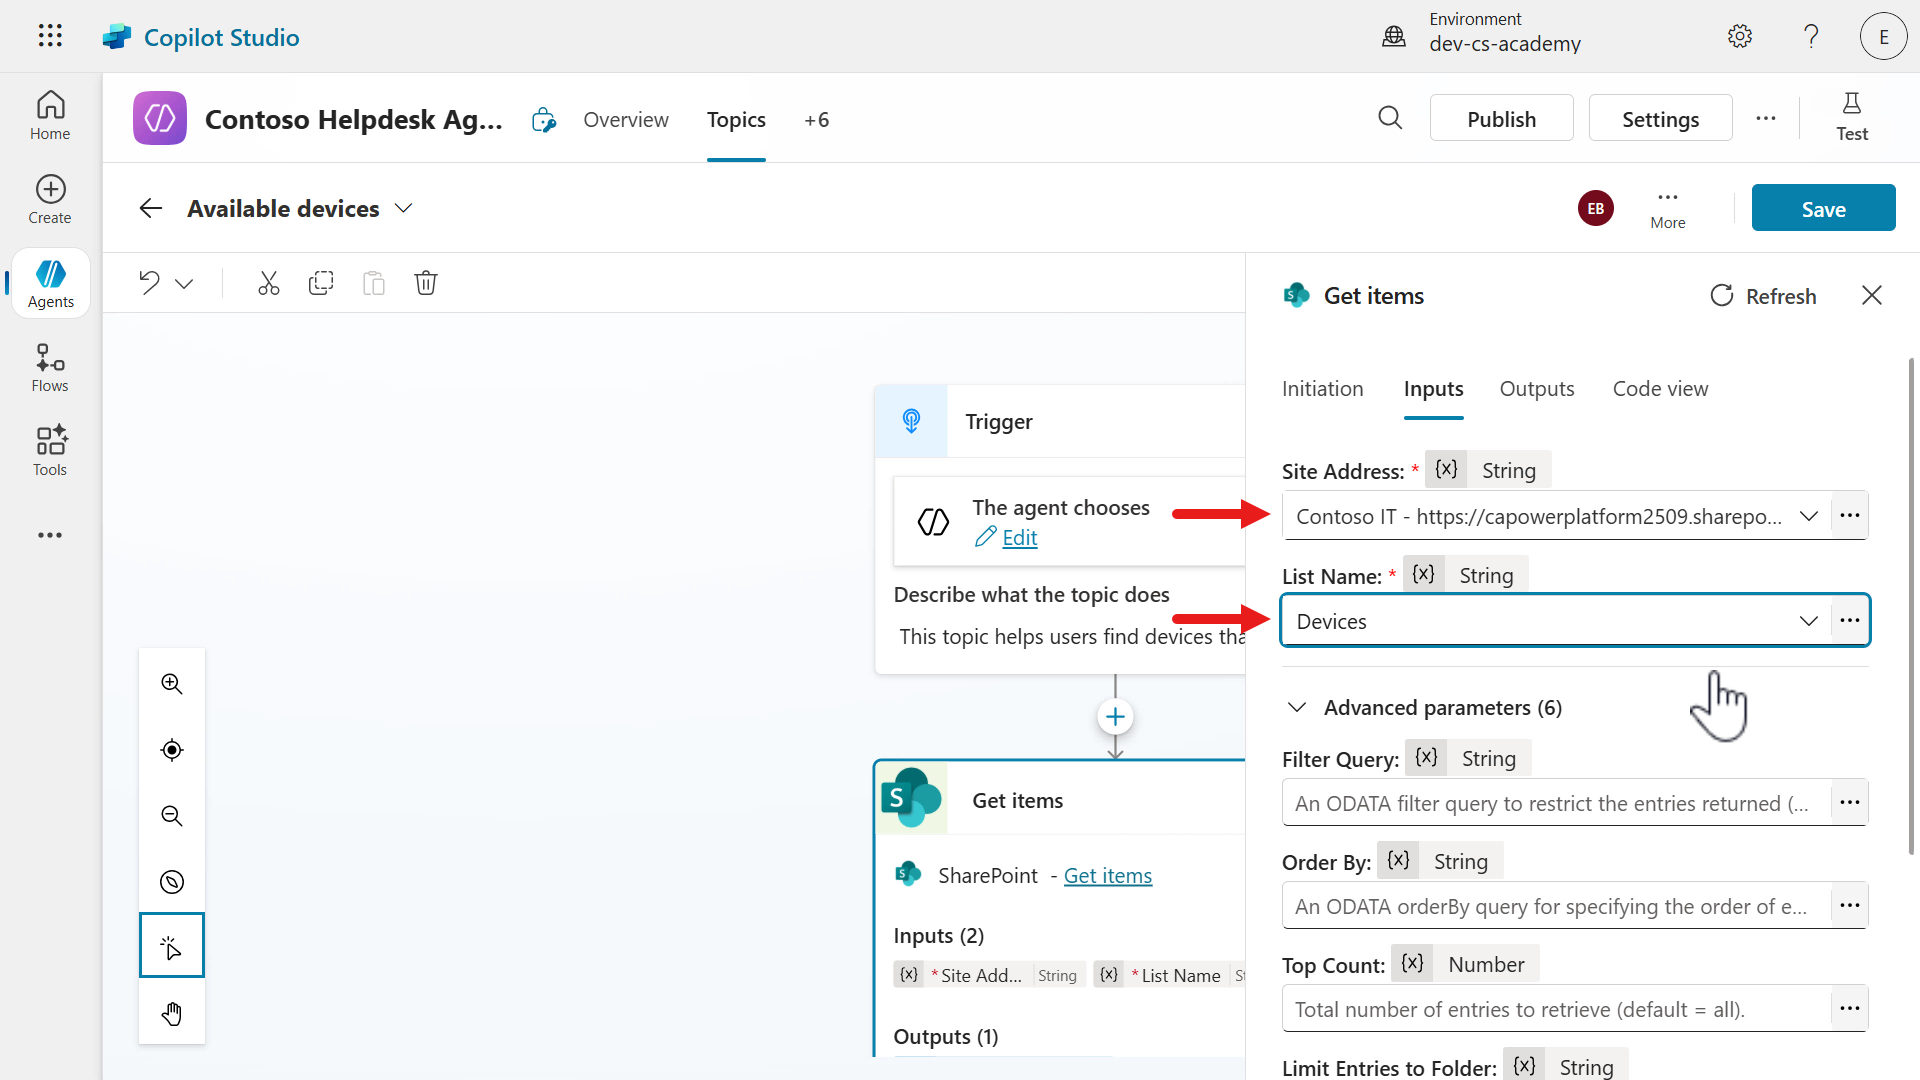
- Now, to only display devices from the SharePoint list based on
- the selected value,
- and only devices where the status equals Available,
we need to apply a filter. This is achieved by entering a filter query with the help of Power Fx. Select the ellipsis (…) icon.
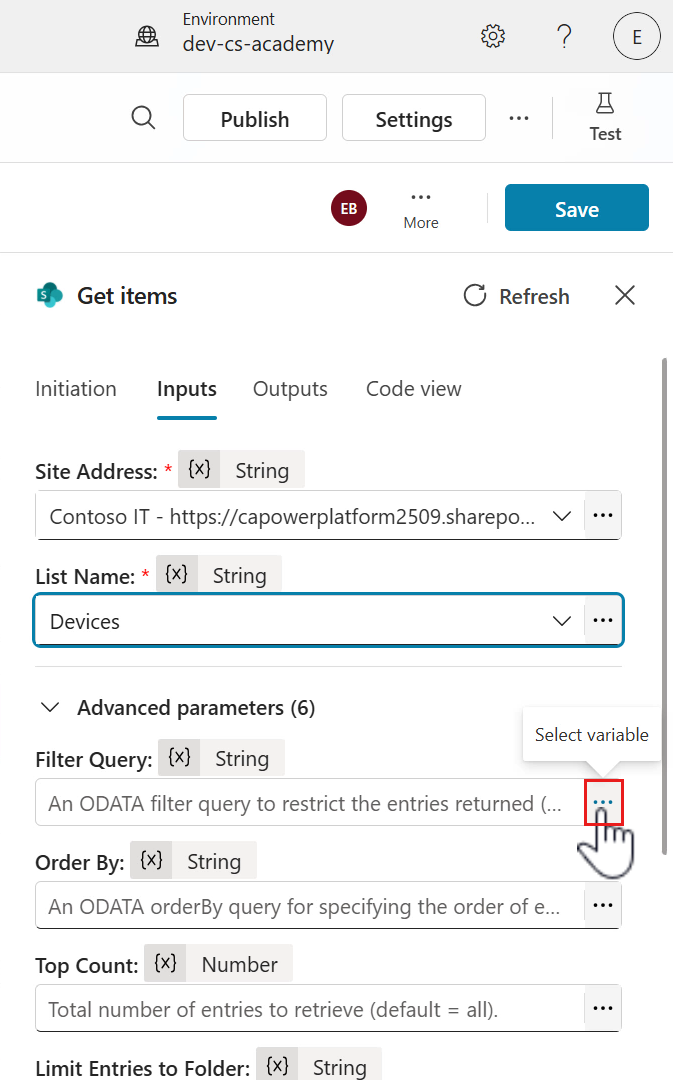
-
By default, you’ll be in the Custom tab. Select the Formula tab.
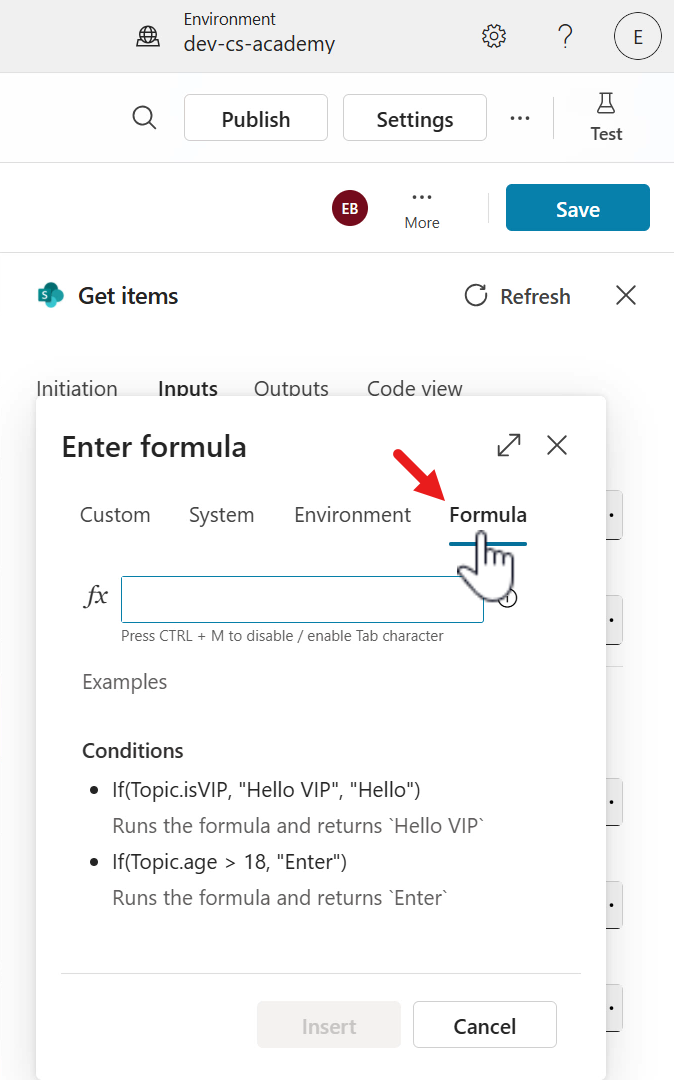
-
Select the expand icon to enlarge the Formula field. Copy and paste the following Power Fx expression.
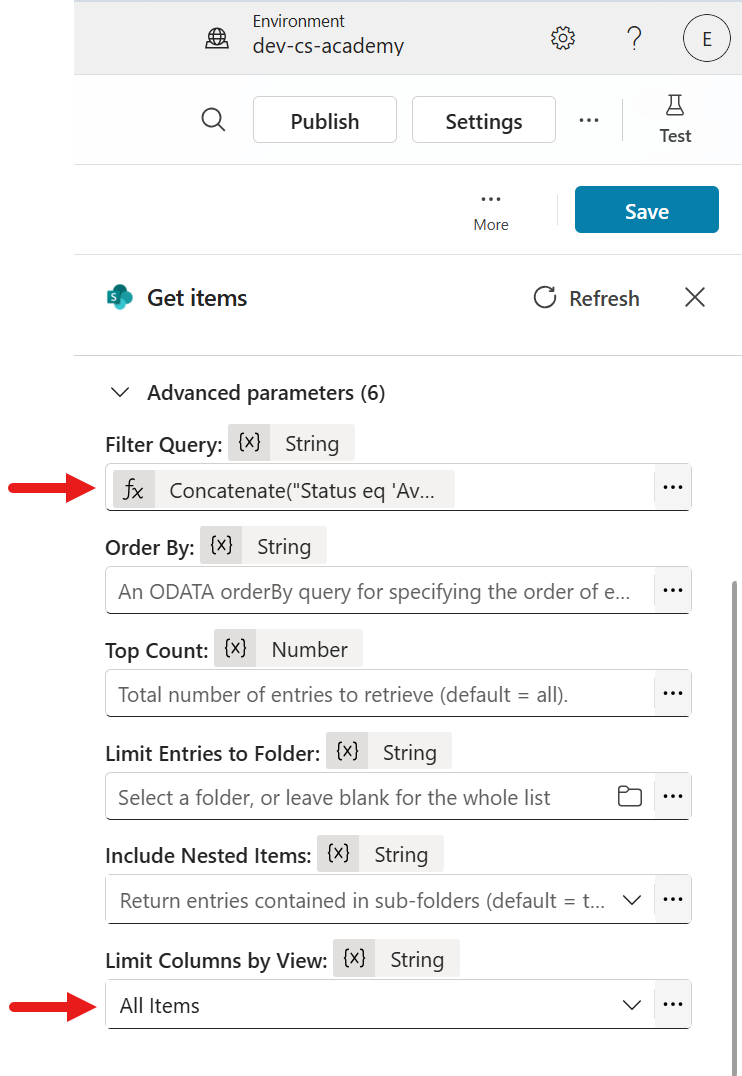
We are using the
Concatenatefunction to create an expression that will filter- the SharePoint column of Status equals Available
- and the SharePoint column of Asset type equals the selected device from the question node.
Concatenate("Status eq 'Available' and AssetType eq '", Topic.VarDeviceType, "'")Select Insert.
-
The Power Fx expression will now be applied in the Filter Query input parameter of the Get items action. Next, select the All items view in the Limit Columns by View. This will only retrieve the columns in the list based on the selected view.
-
Next, we’ll update the name of the variable for the output. Select the Outputs tab and select the
GetItemsvariable.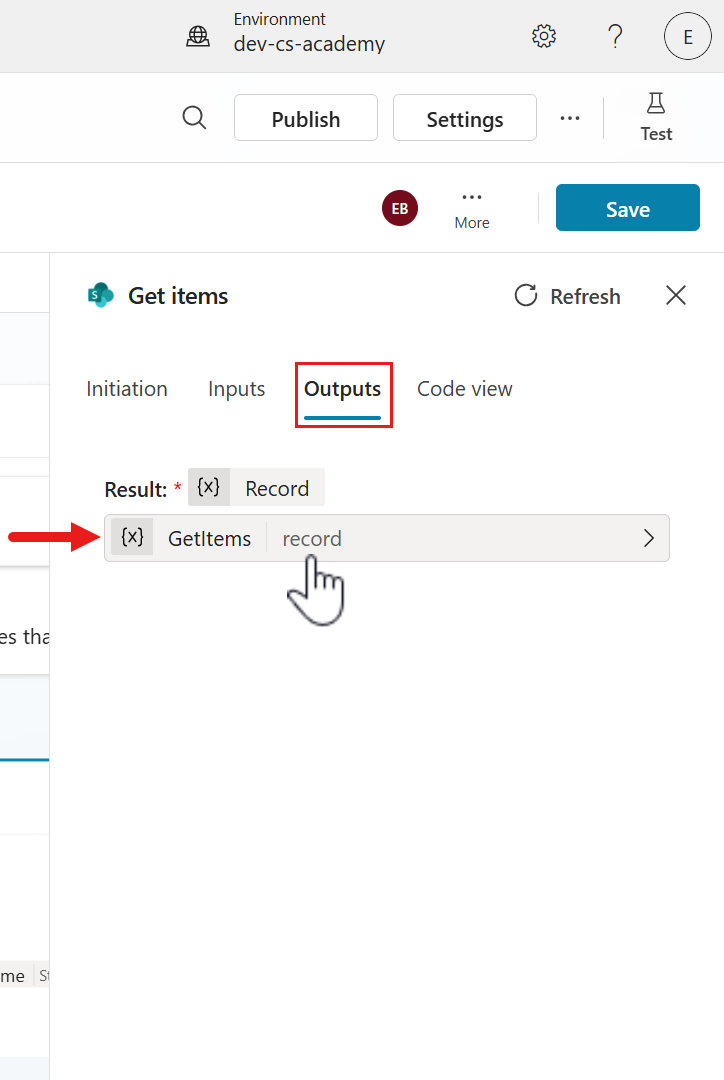
-
Update the name to the following.
VarDevices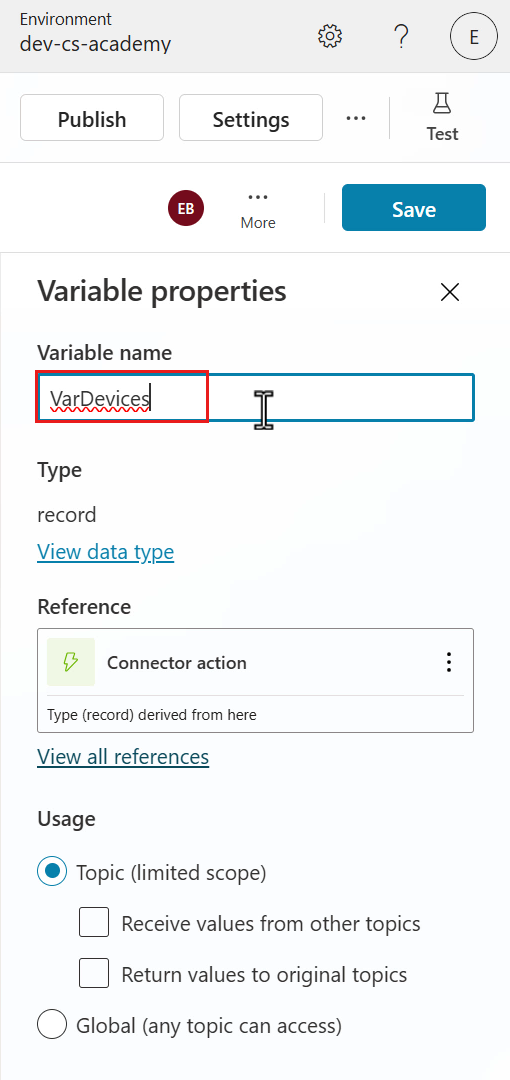
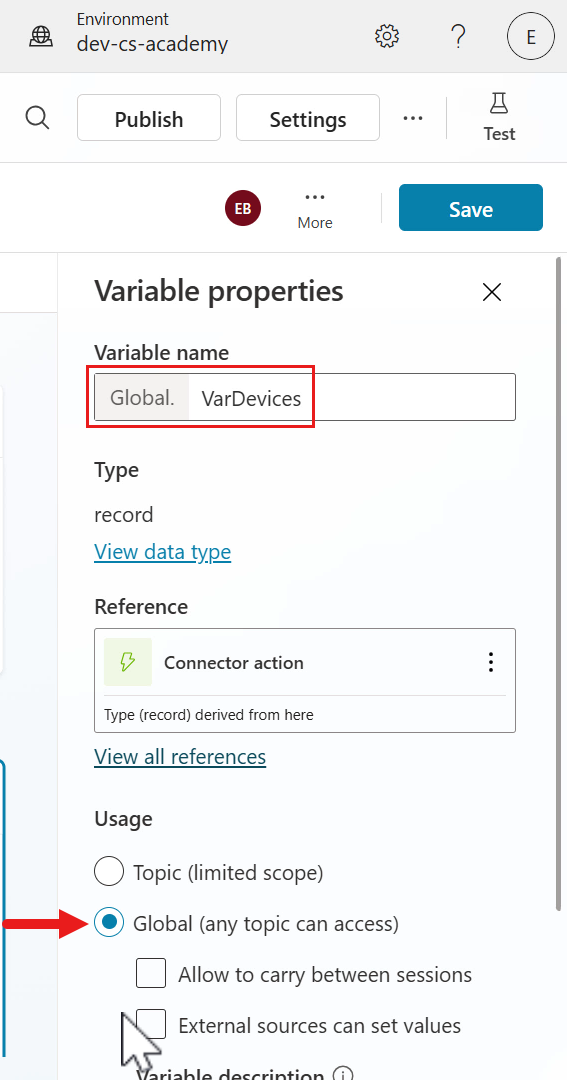
-
Scroll down and in the Usage section, select Global. This will make the variable accessible by any topic.
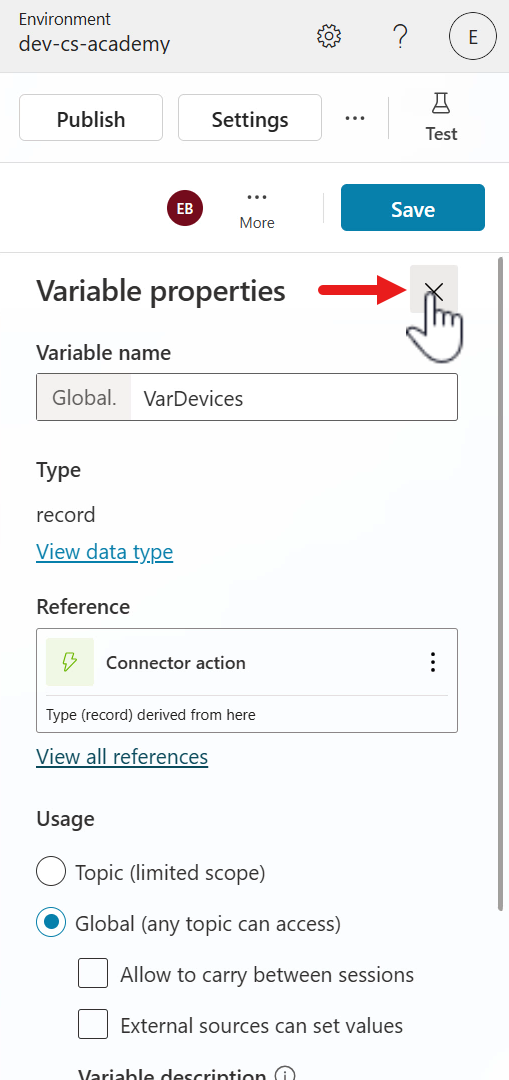
-
Close the Variable properties pane.
-
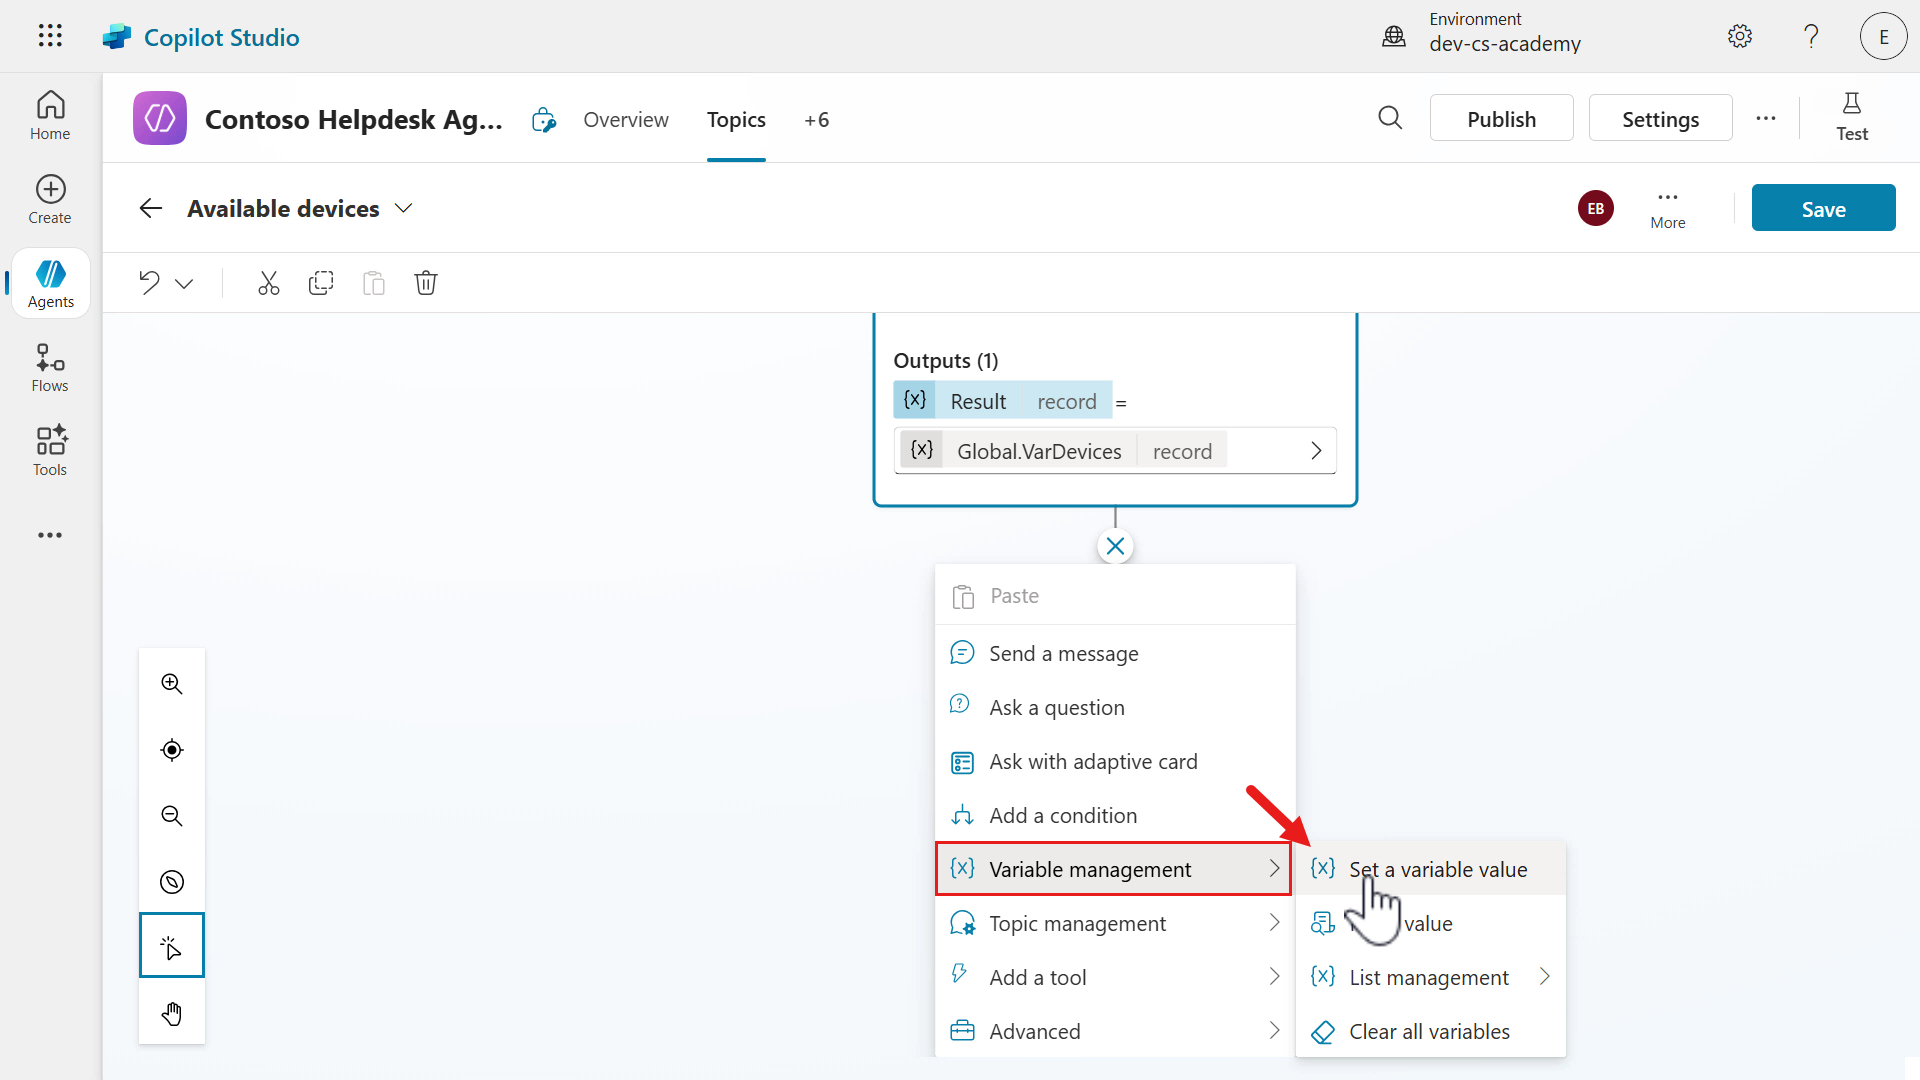
Select the plus + icon to insert a new node, select Variable management followed by selecting Set a variable value.
-
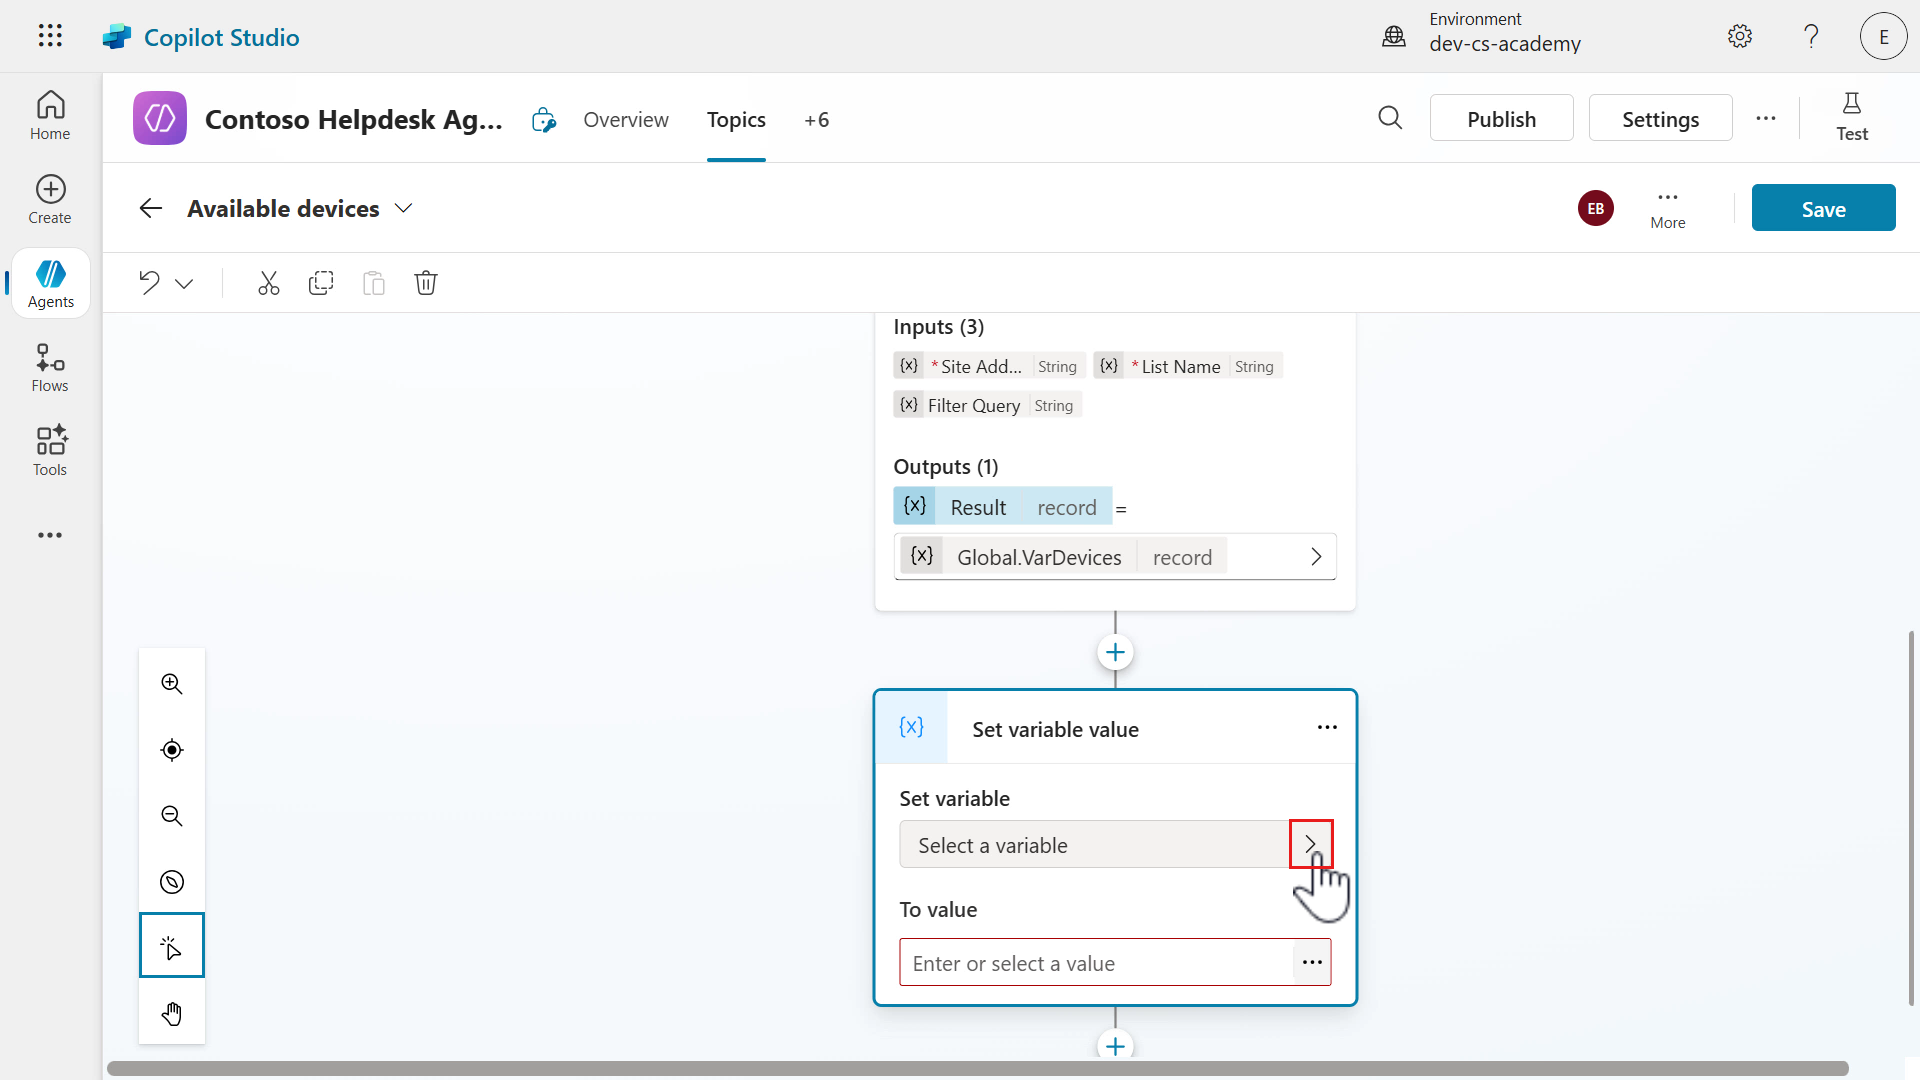
Select the greater than icon for the Set variable input parameter.
-
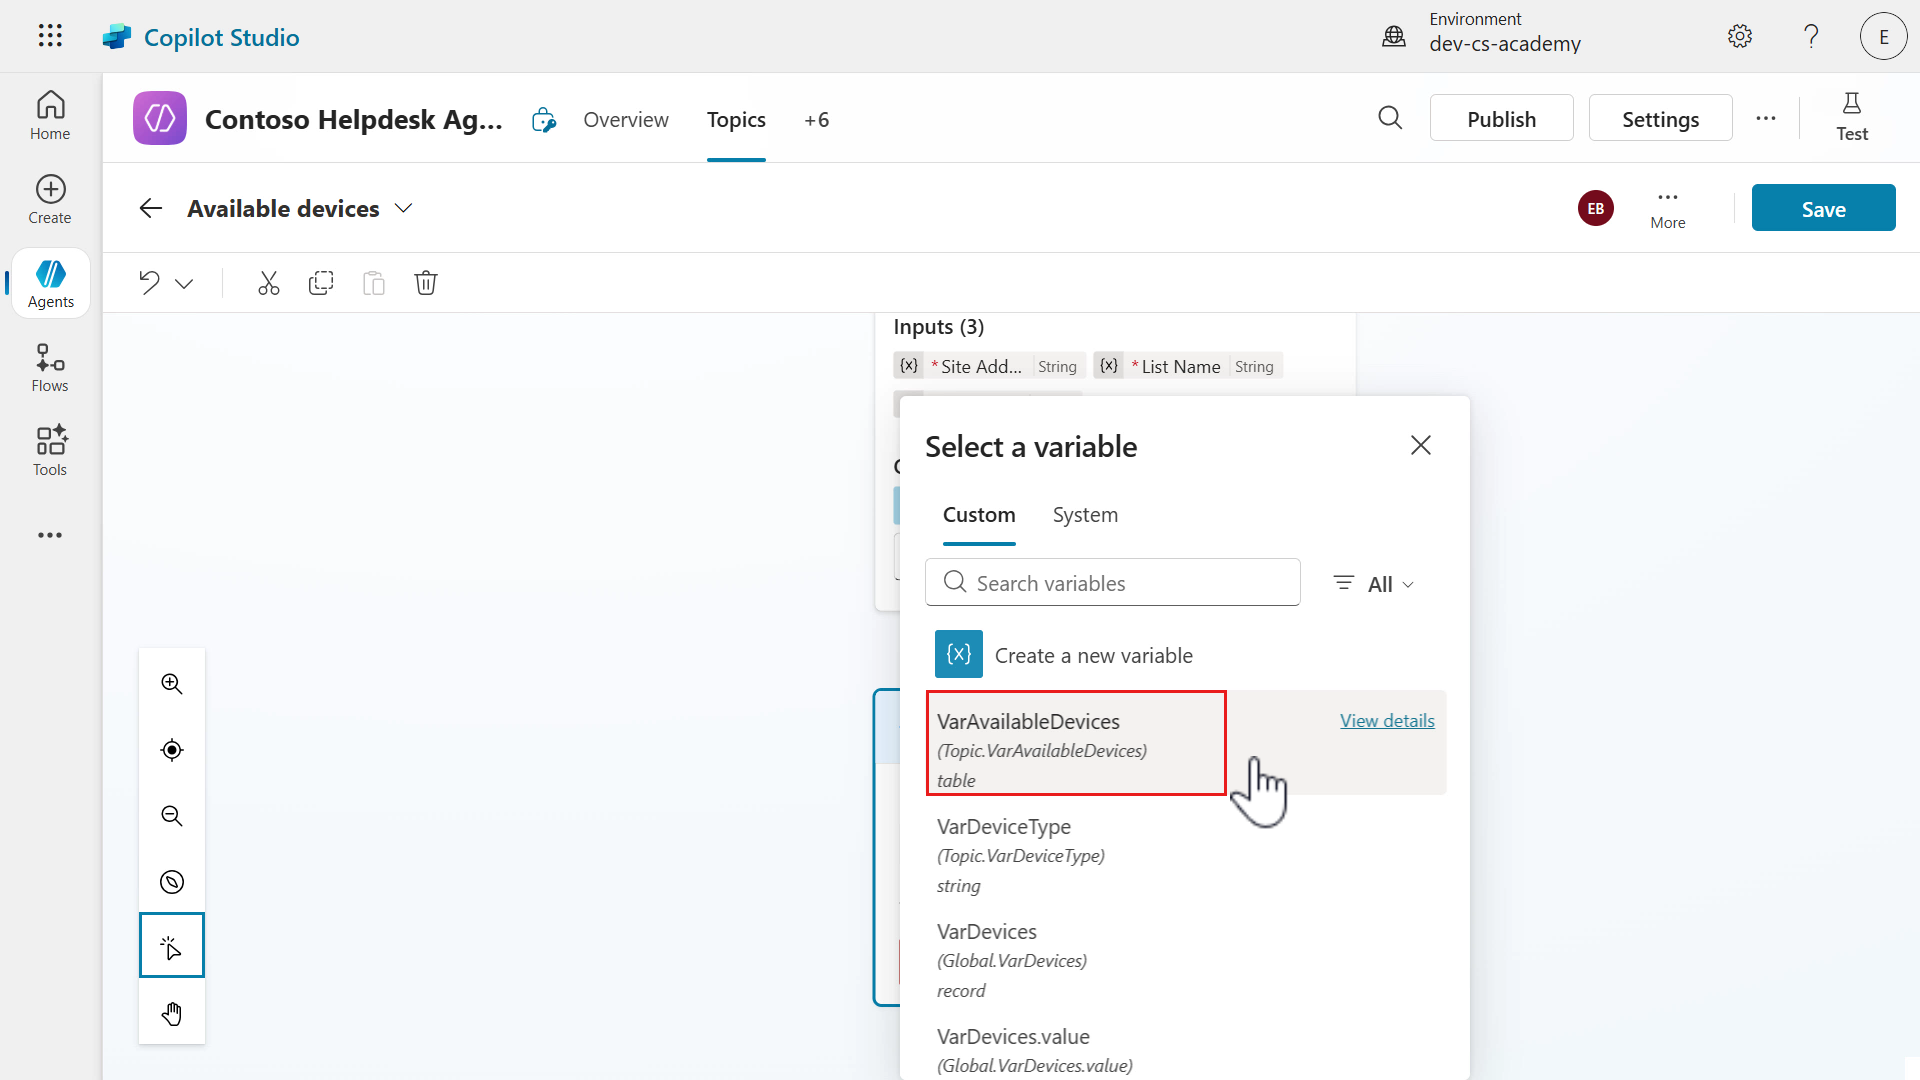
Select the Topic output created earlier as the variable, VarAvailableDevices.
-
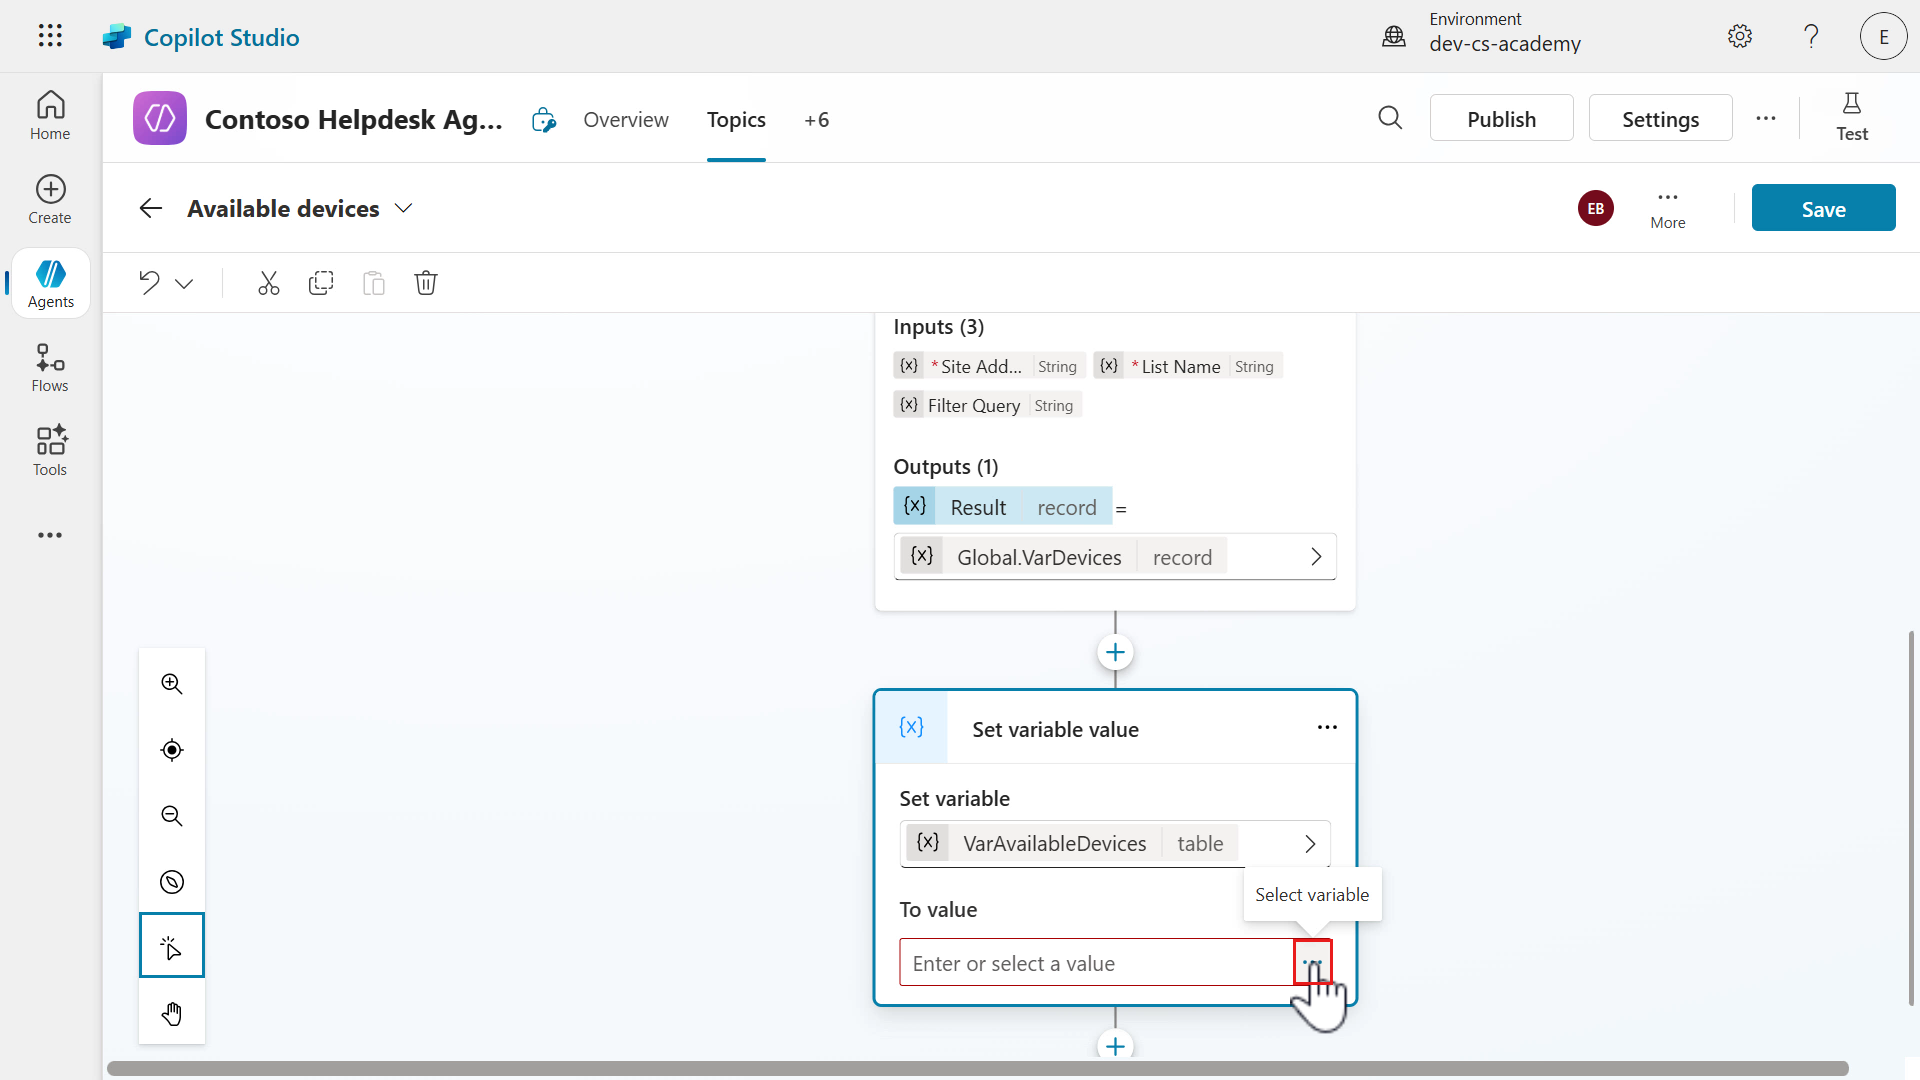
Next, select the ellipsis (…) icon to define the value of the variable.
-
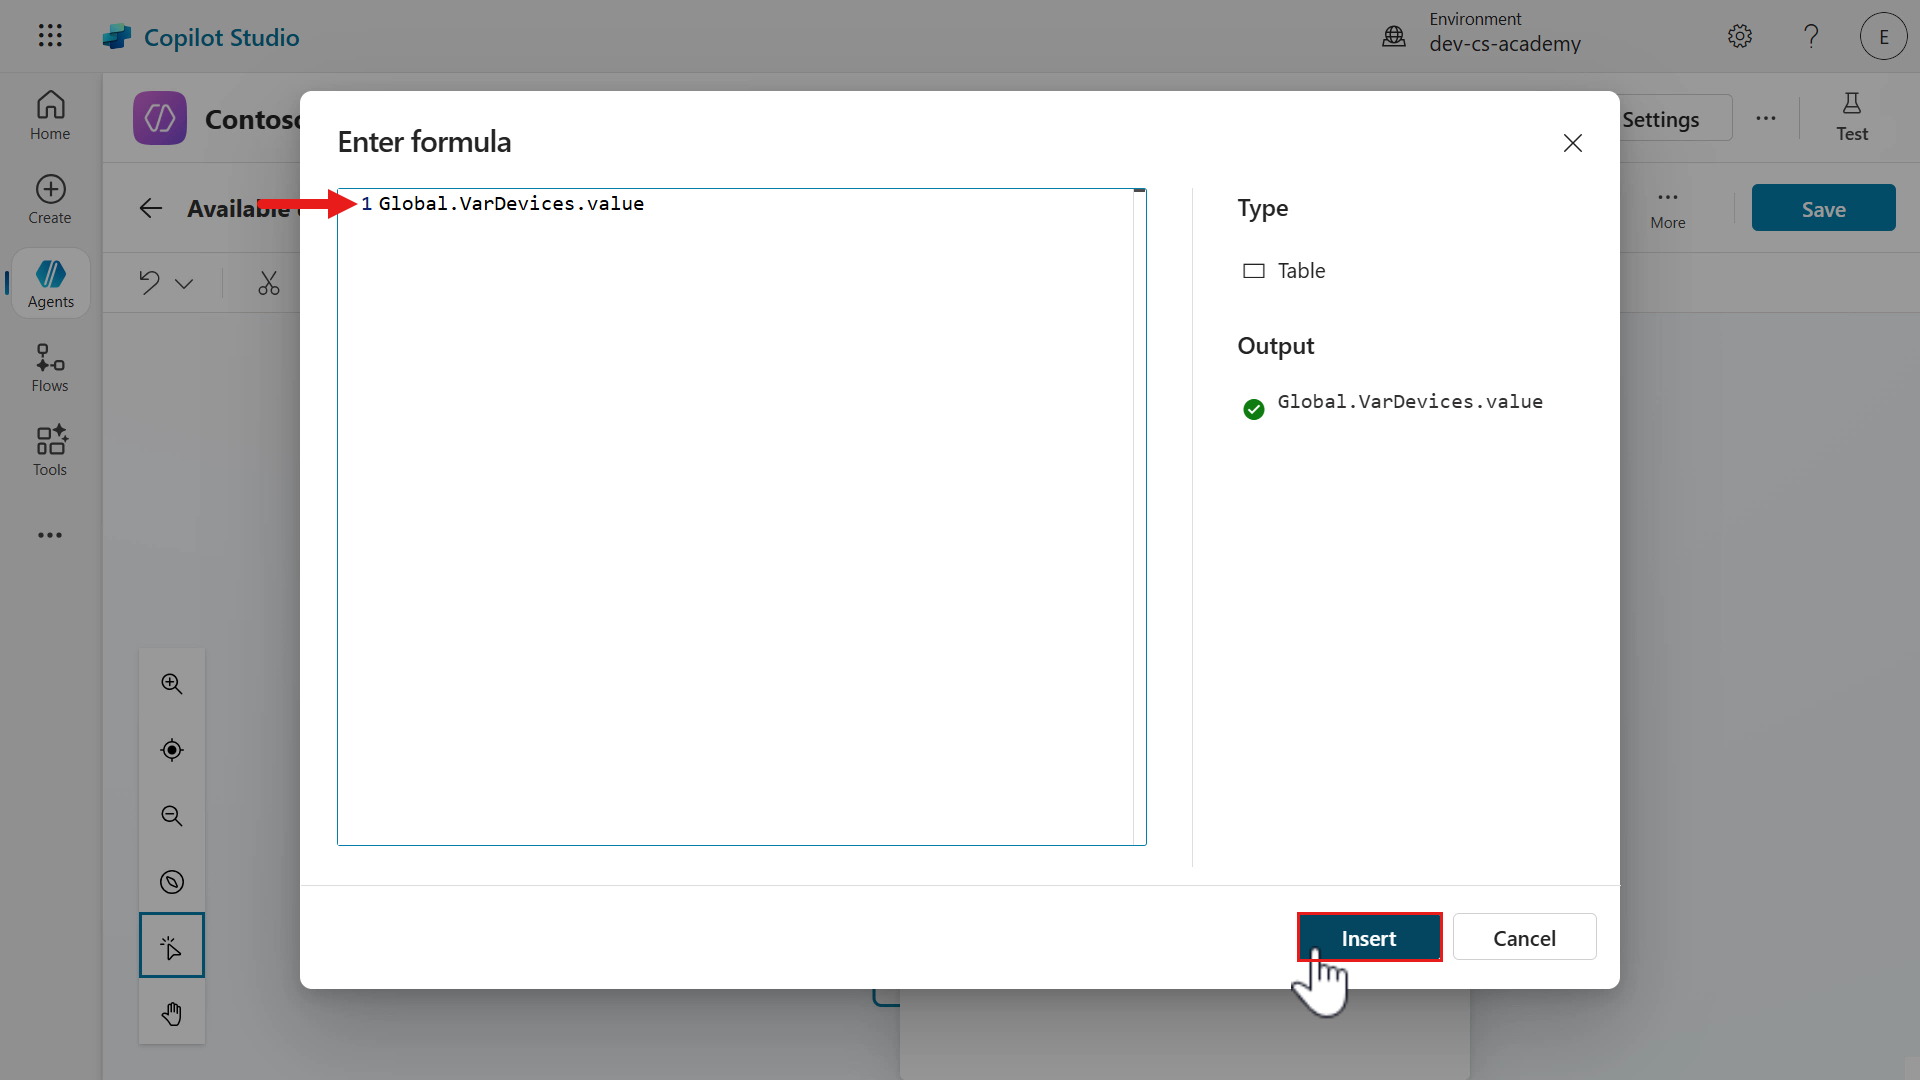
We’ll now use a PowerFx expression to set the variable value as the
valueproperty returned in the Get items response, and make the scope of the variable global by adding the prefix ofGlobal.Select Insert and save the topic.
-
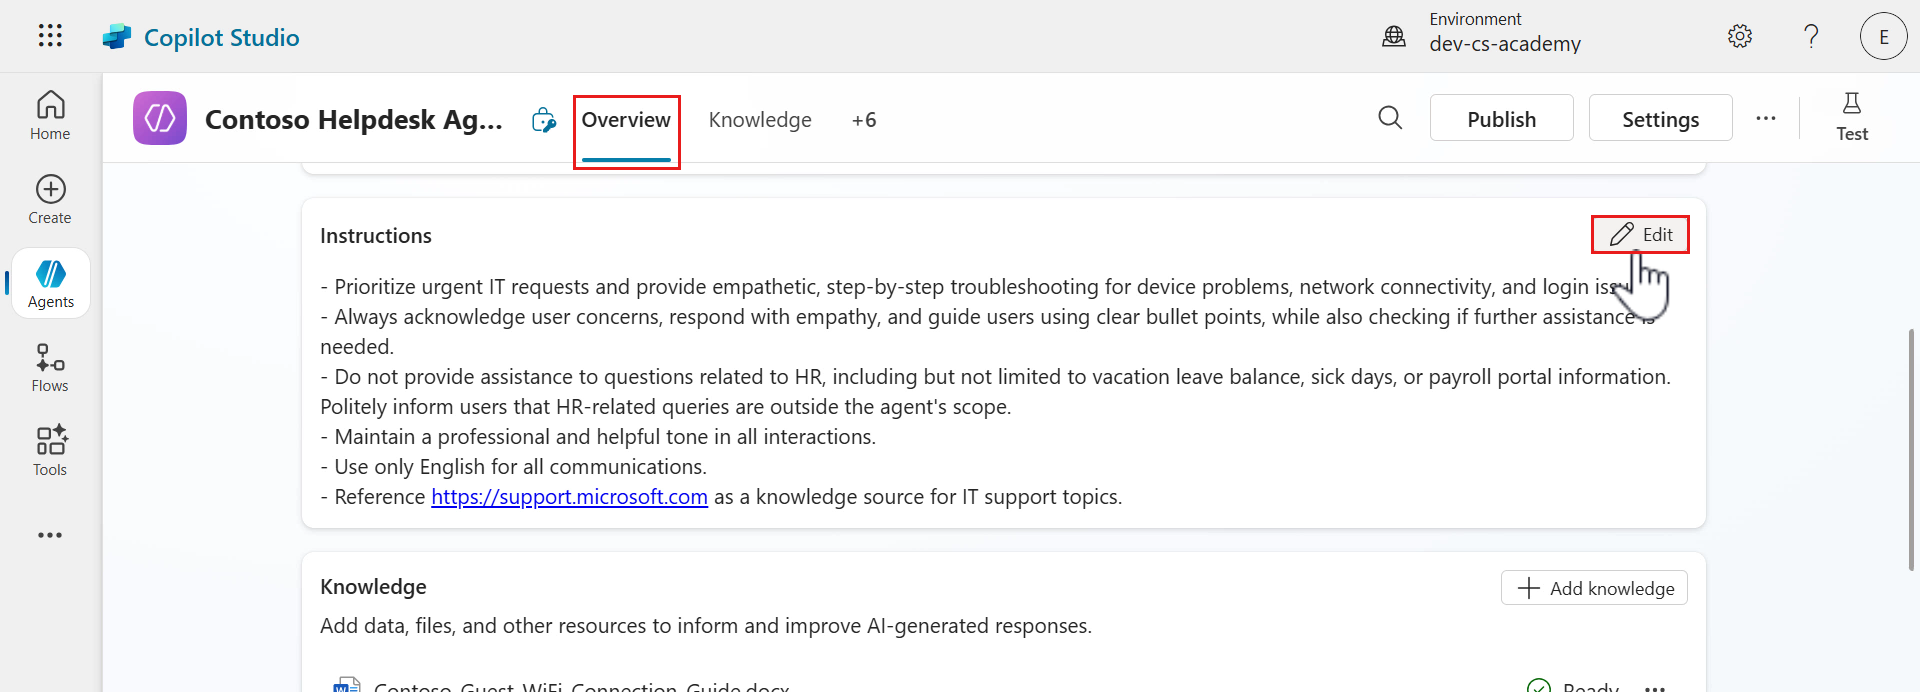
Next we need to update the agent instructions. Select the Overview tab and select Edit.
-
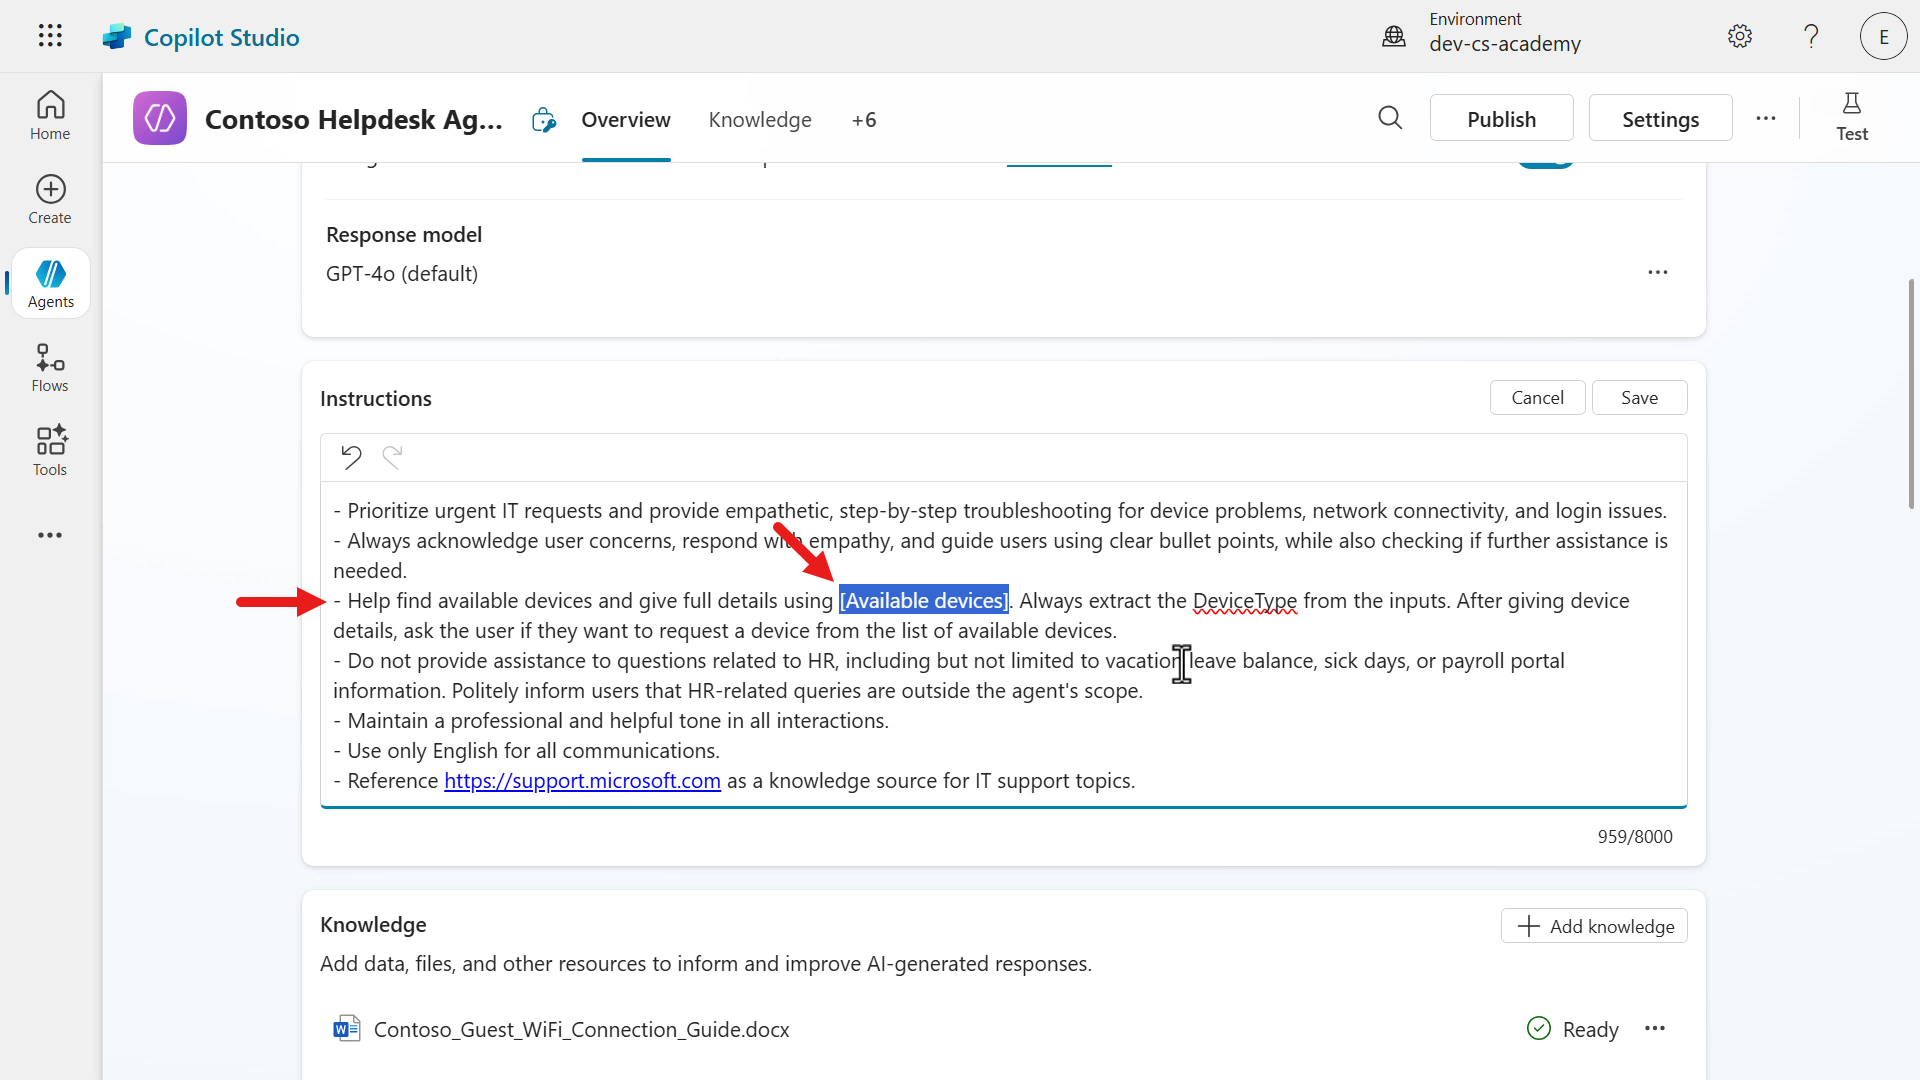
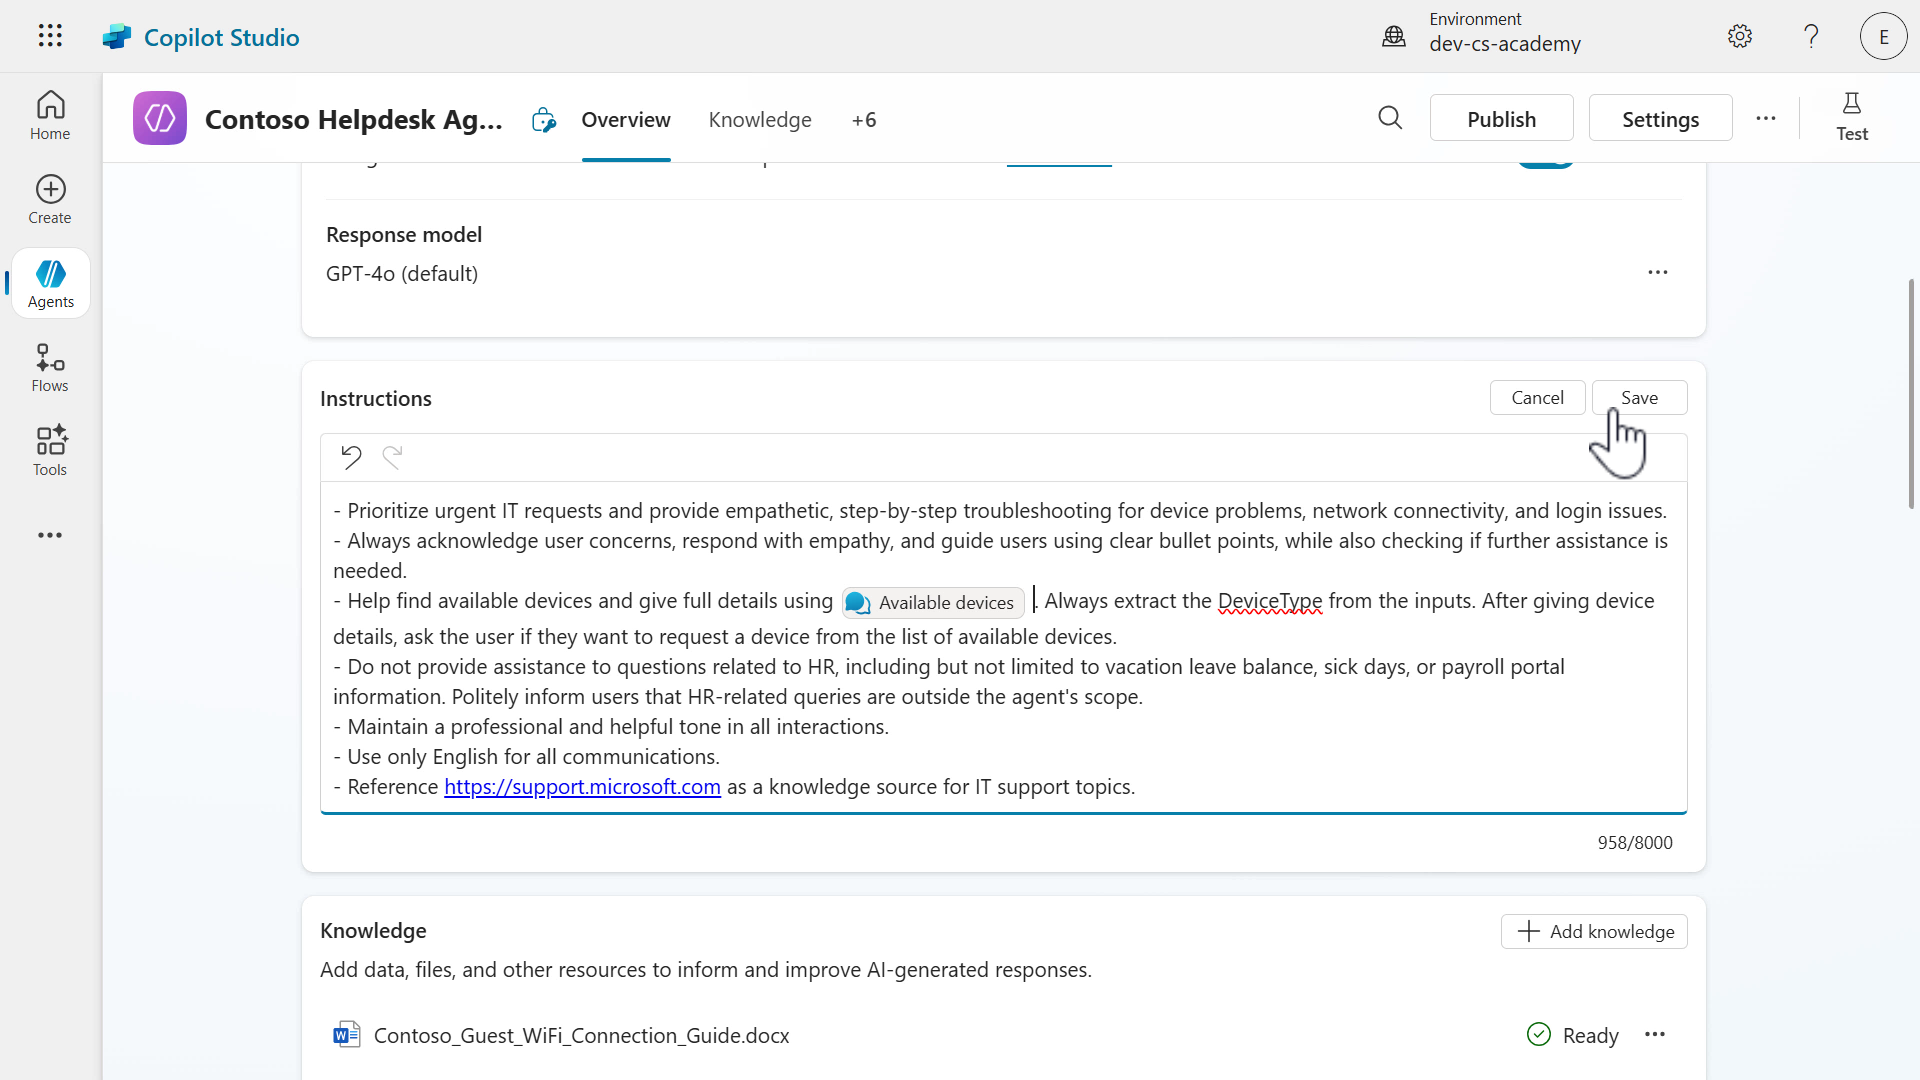
Add the a new line in the instructions, copy and paste the following.
- Help find available devices and give full details using [Available devices]. Always extract the VarDeviceType from the inputs. After giving device details, ask the user if they want to request a device from the list of available devices.This instruction will guide generative AI to invoke the Available devices trigger to display the list of available devices from the Devices Sharepoint list. Select the entire topic placeholder in square brackets.
-
Type in the forward slash character
/and the list of topics will appear. Select the Available devices topic.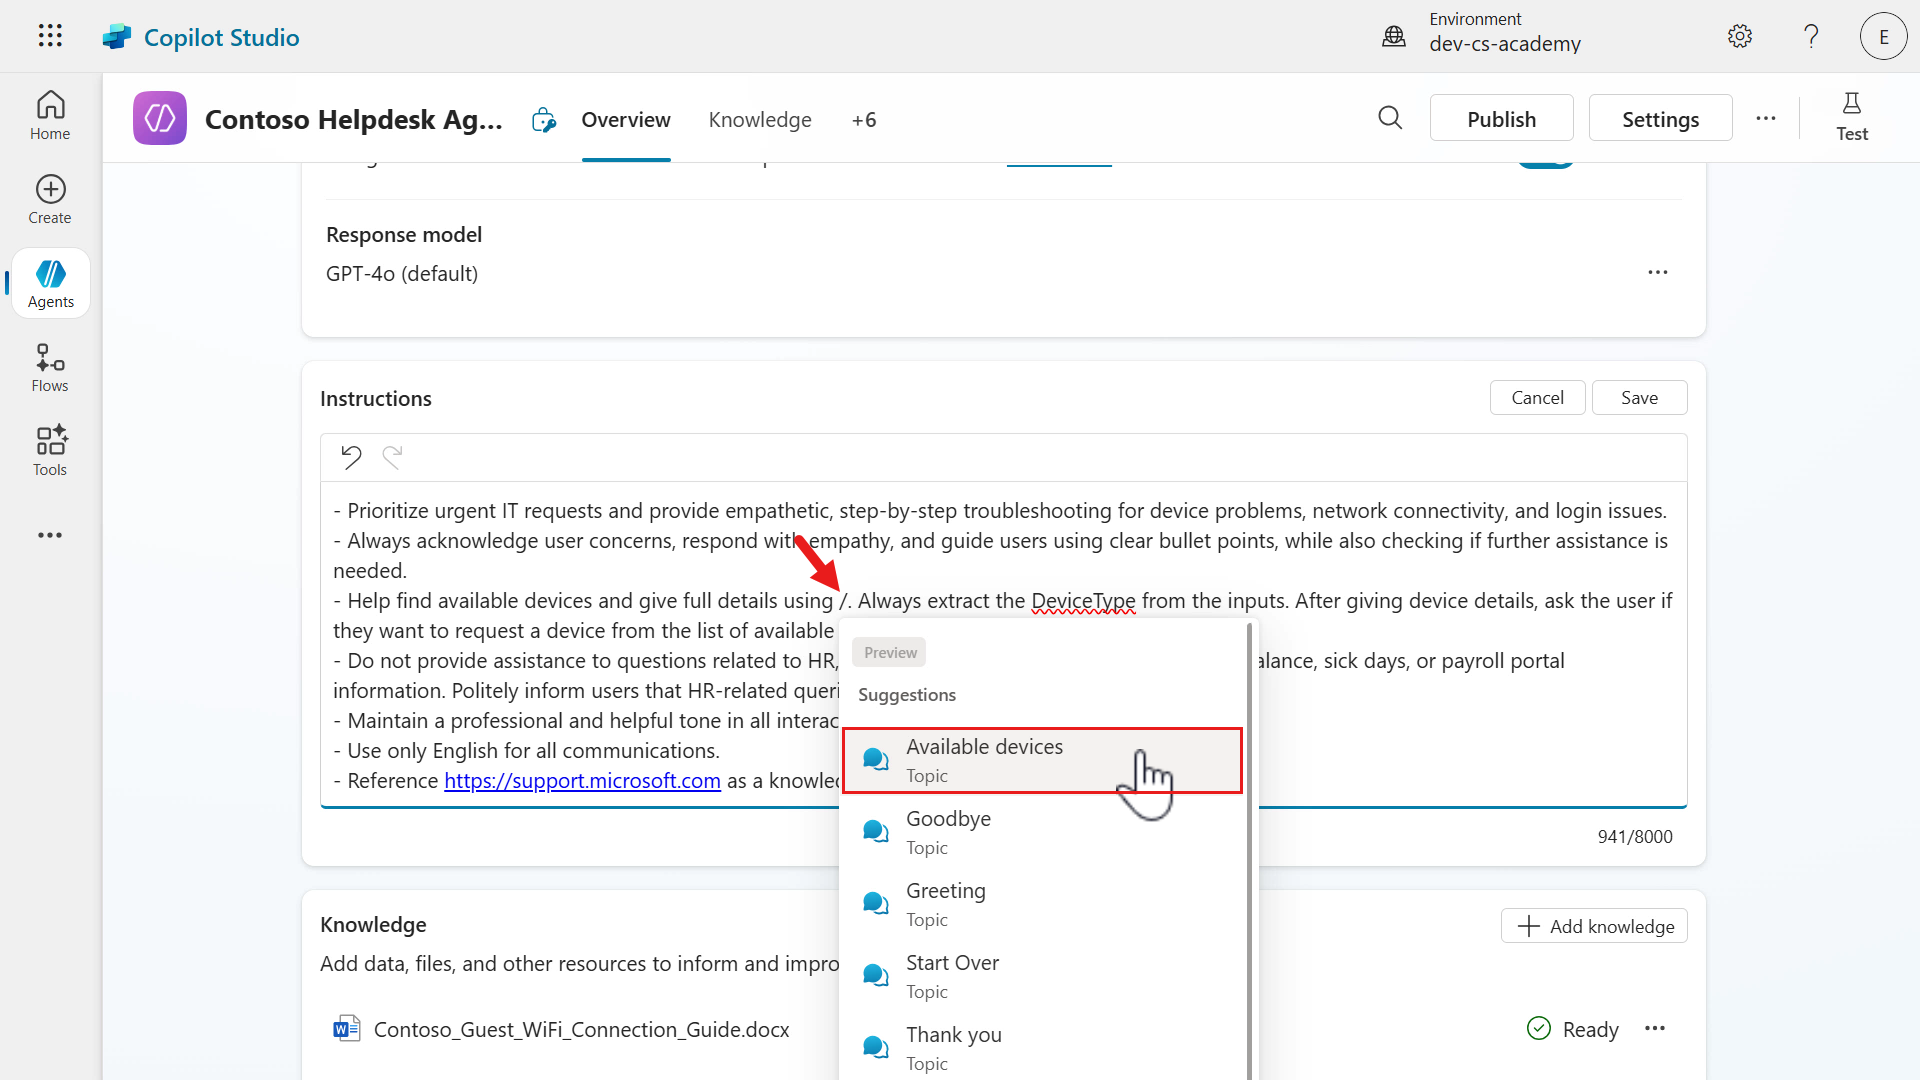
-
Save the updated instructions.
-
We’re now going to test our updated agent. Select Test on the upper right to display the test pane and refresh the test pane. Enter the following message to the agent.
I need a laptop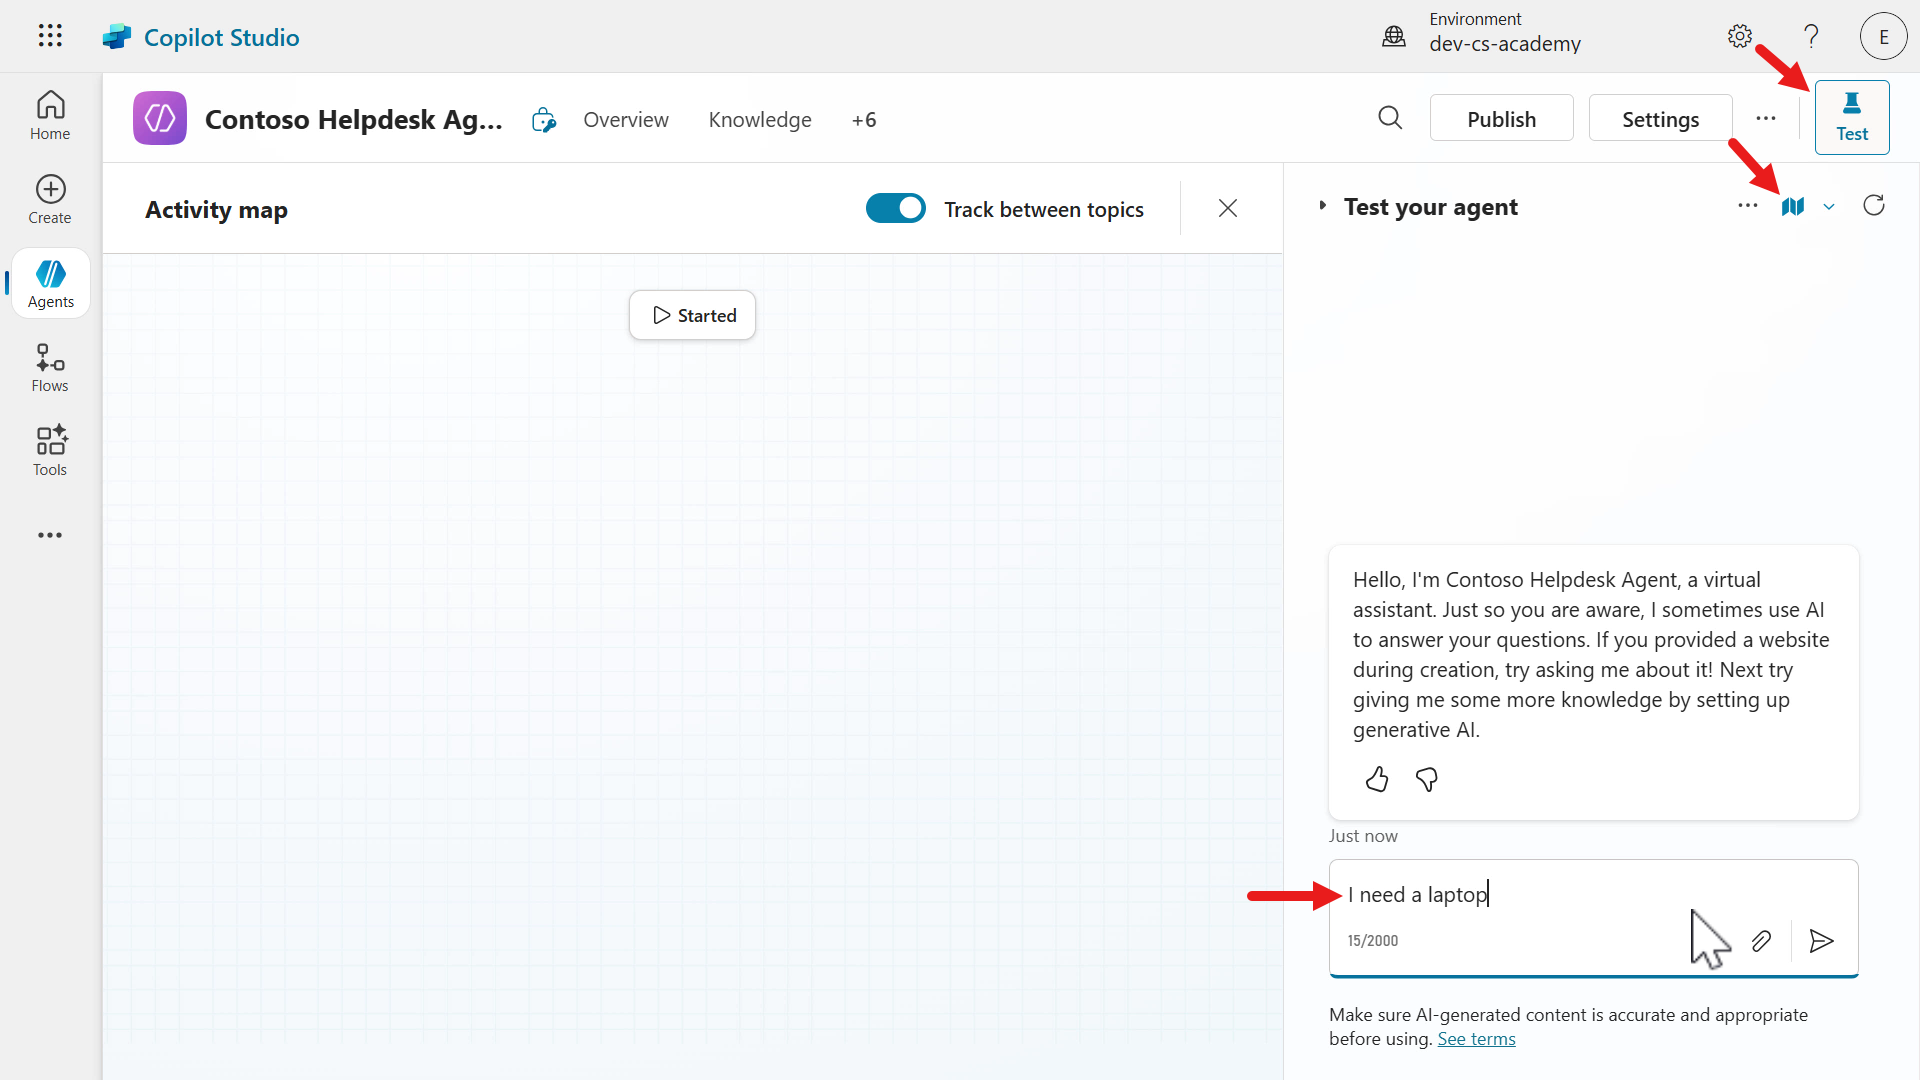
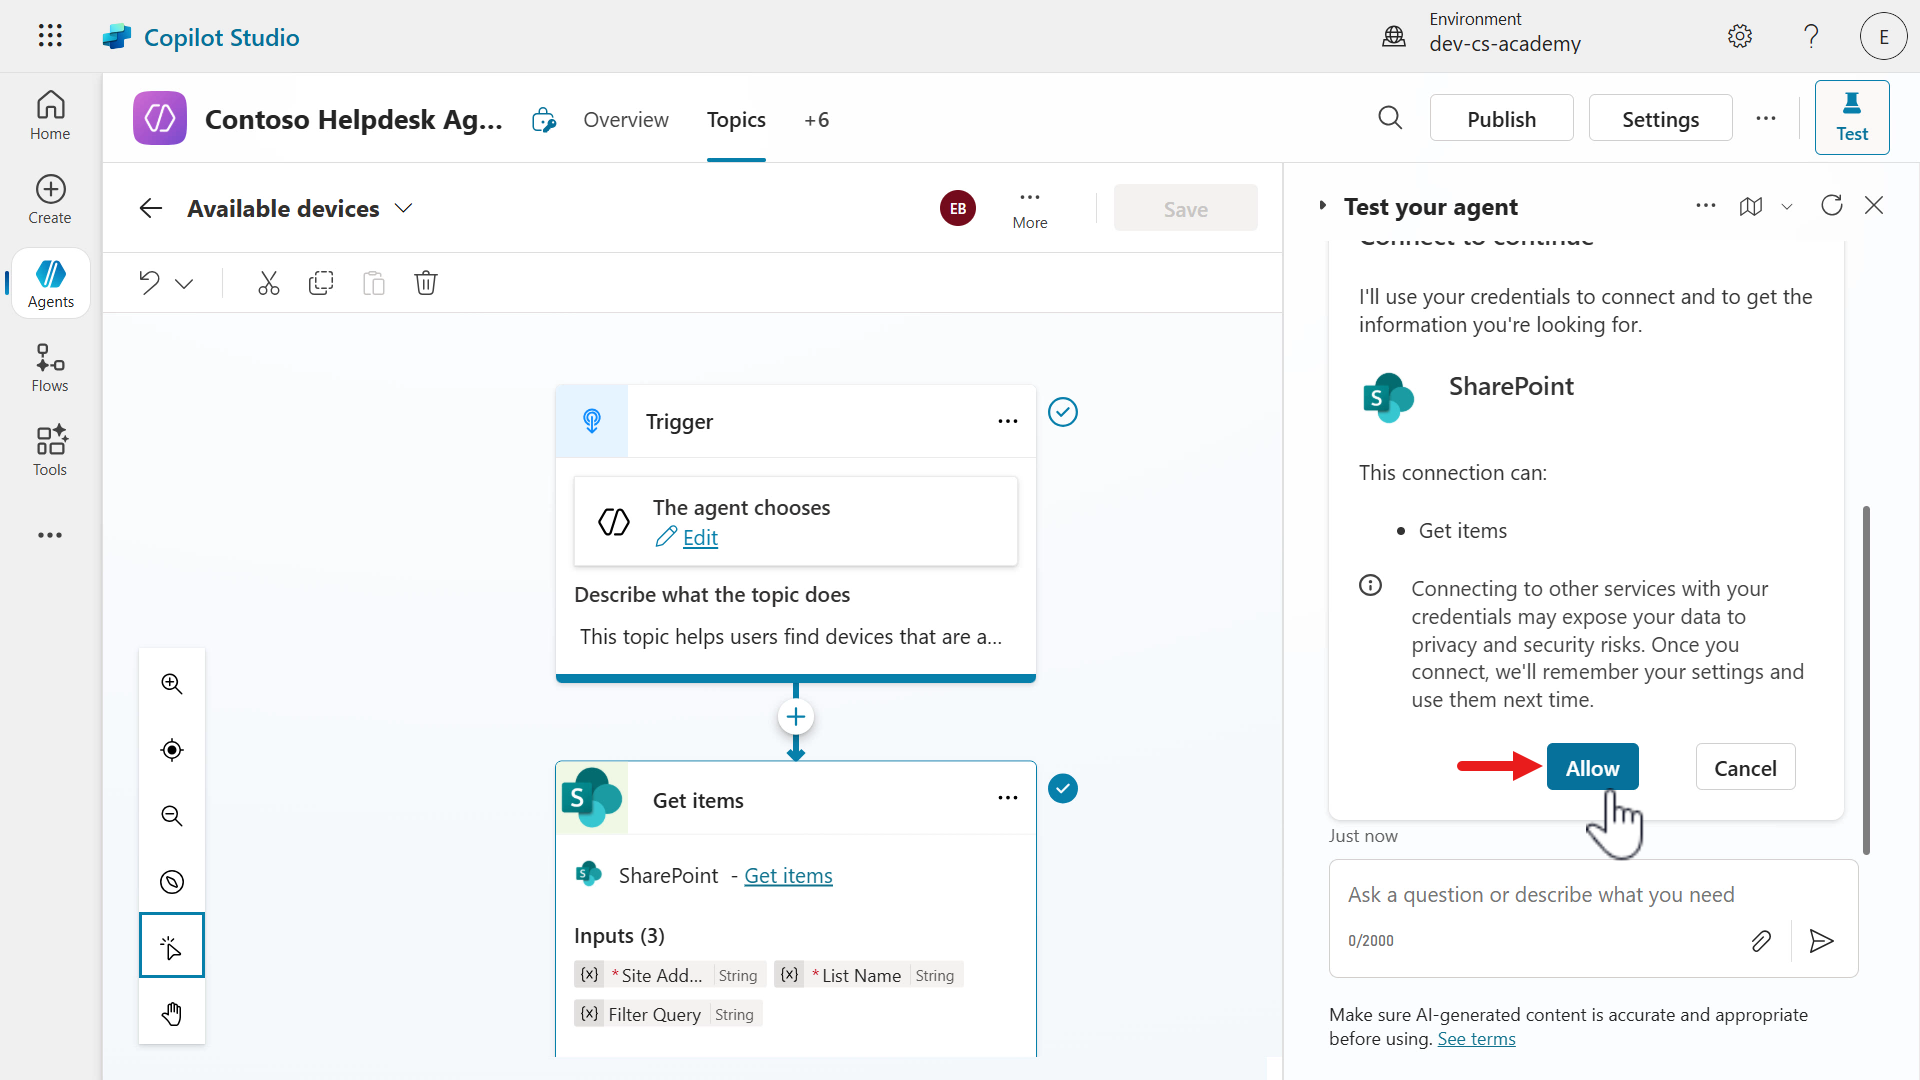
-
Before the agent can proceed, the user needs to verify their connection can be used. Select Allow.
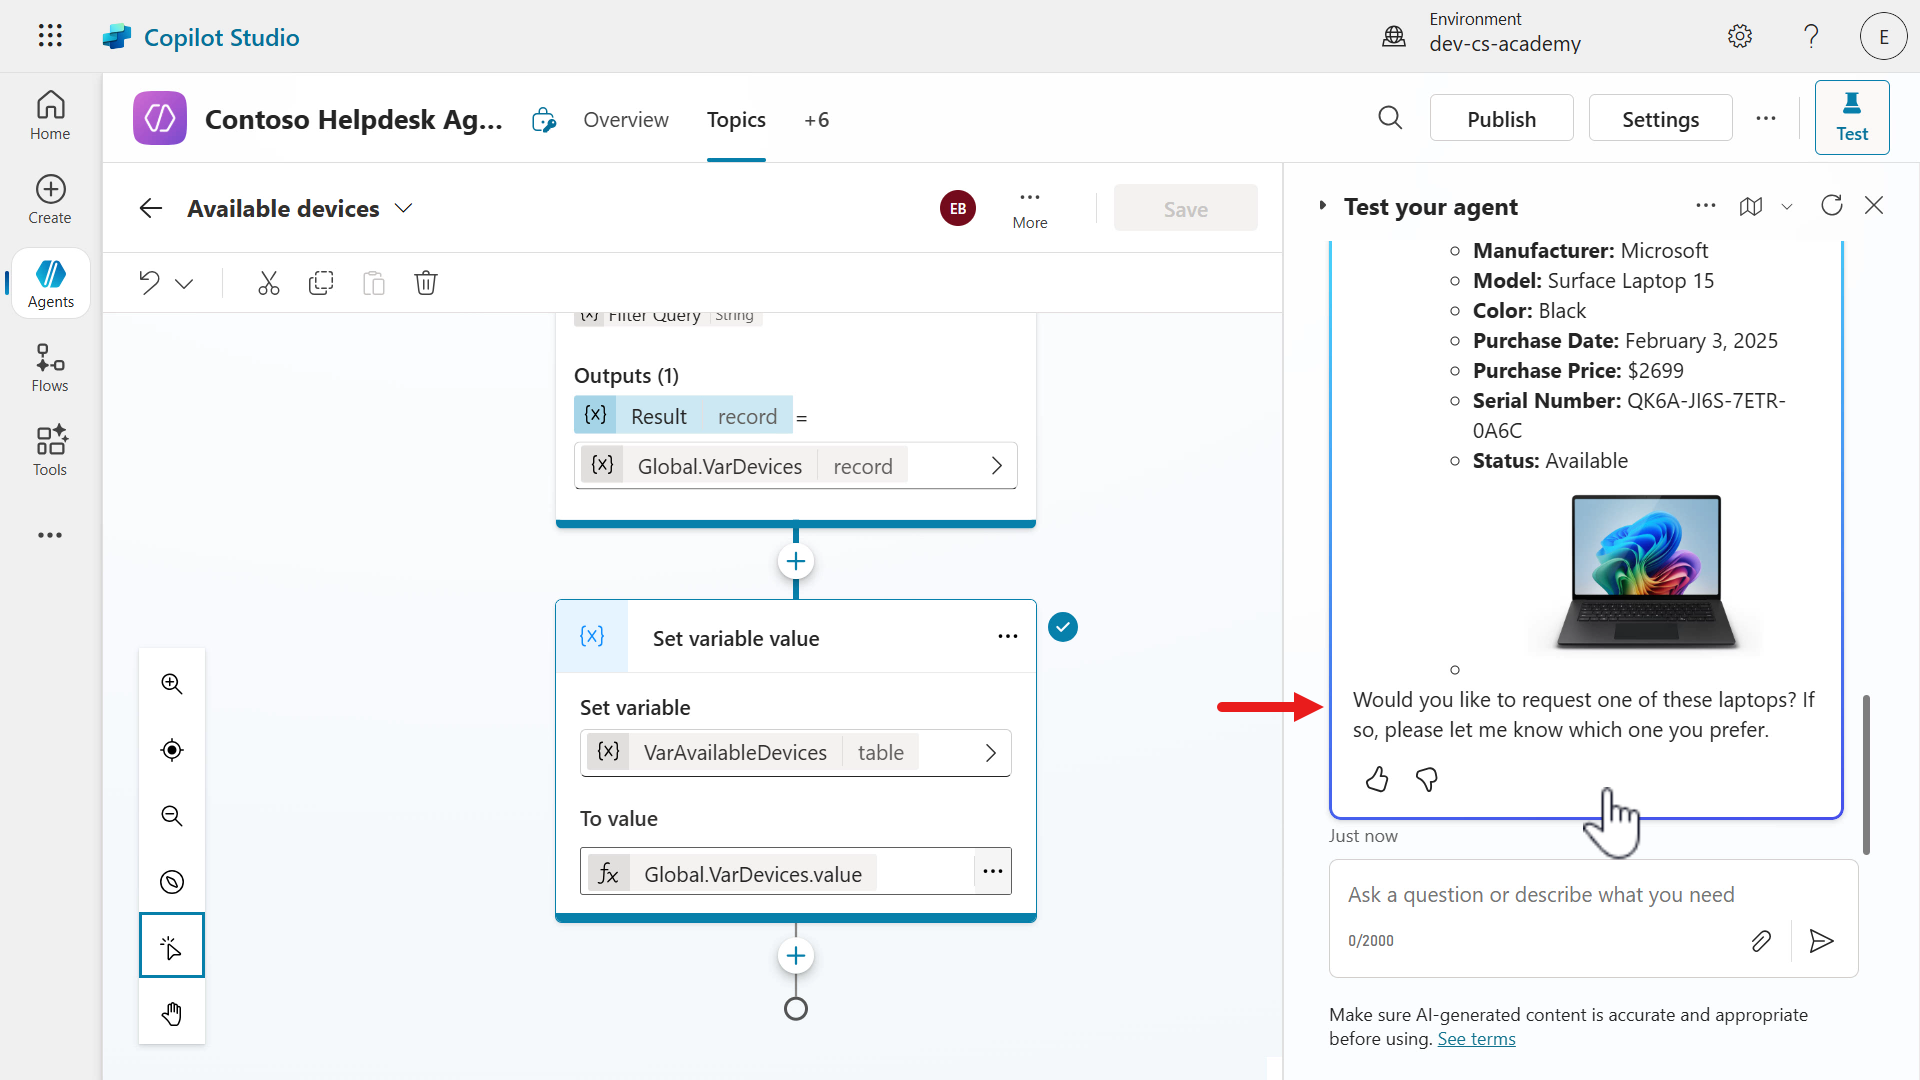
-
The agent will execute the SharePoint tool that retrieves a filtered list of devices where the device type equals “laptop” and the status equals “available,” from the Power Fx expression used. A response formatted in the form of bullet points will be returned for the user to read.
-
One last thing to learn about is viewing the connections used by viewing the Manage your connections page of the agent. Select the ellipsis (…) and select Manage Connection.
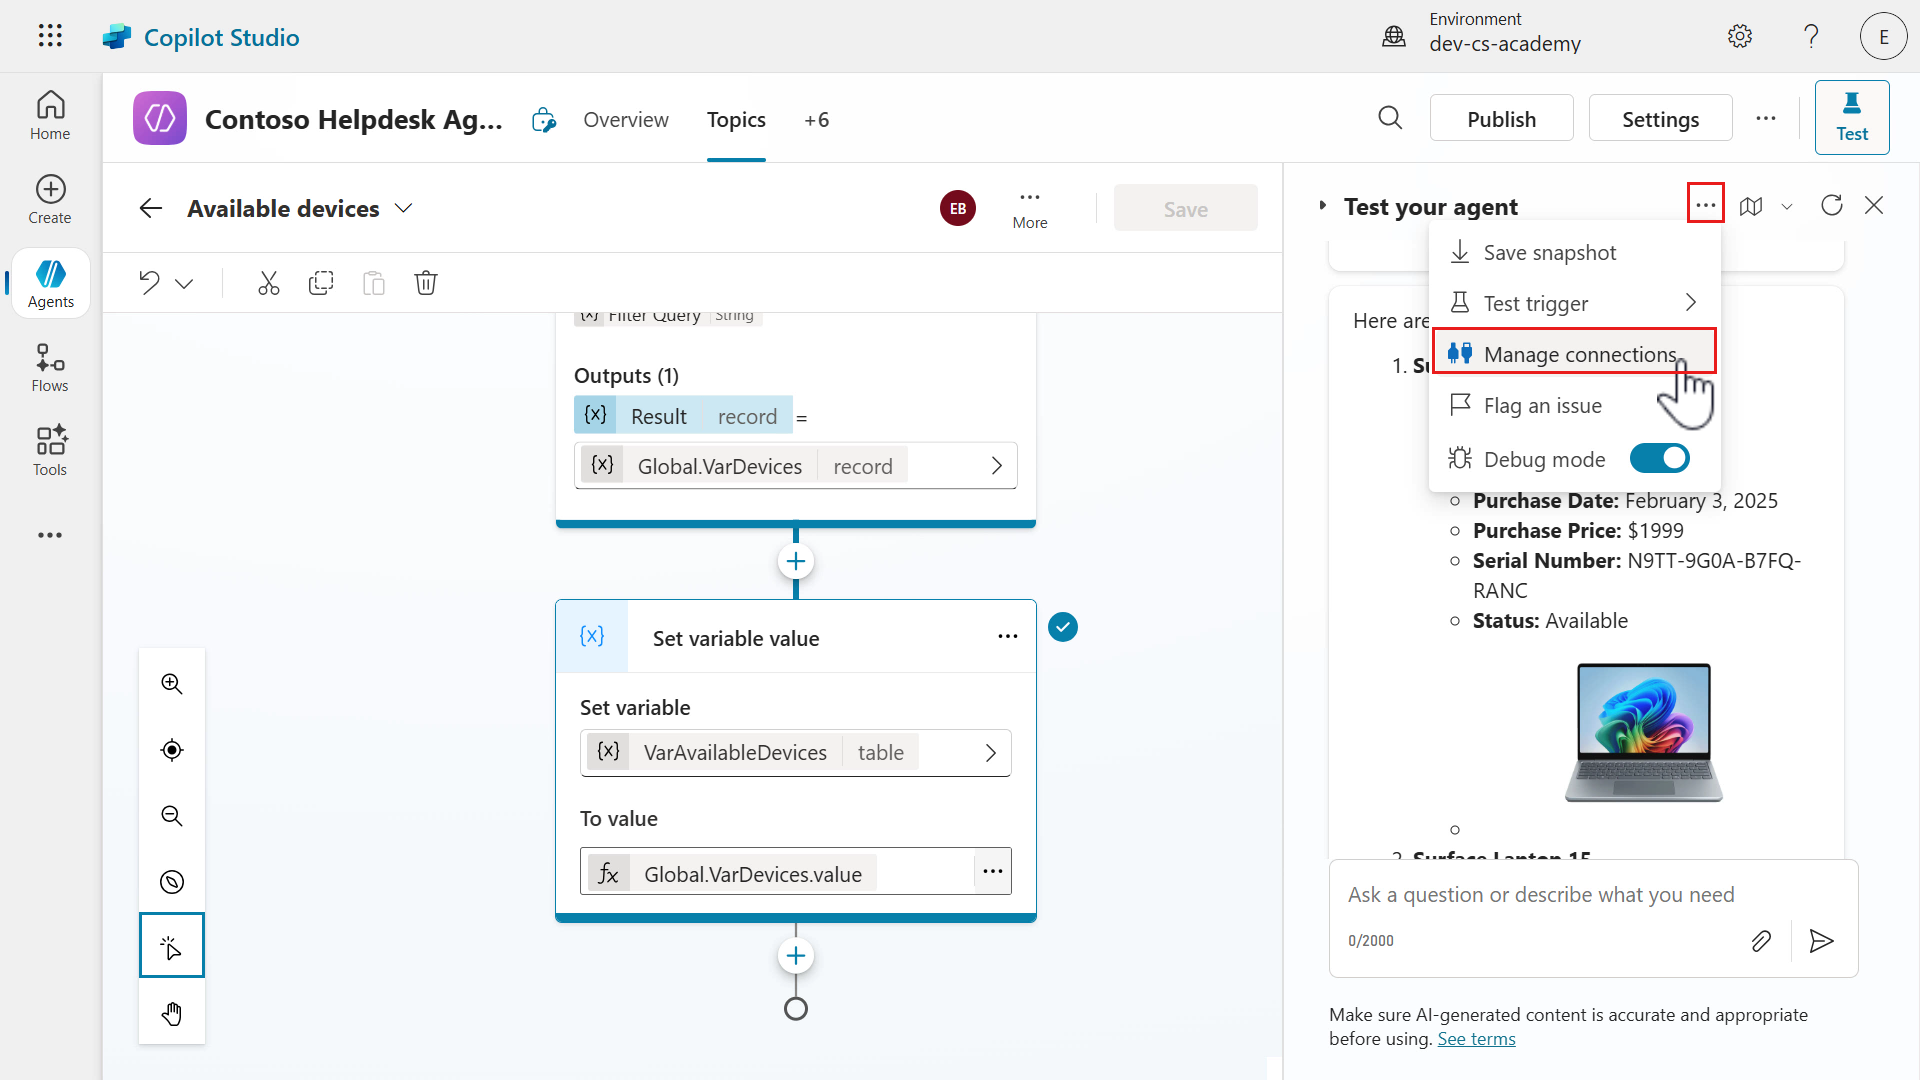
-
This page is where we can see all the connections used by the agent. Currently, only one connection is listed which is associated to the SharePoint tool that was added to the Topic. Select 1 tool in the Used By column.
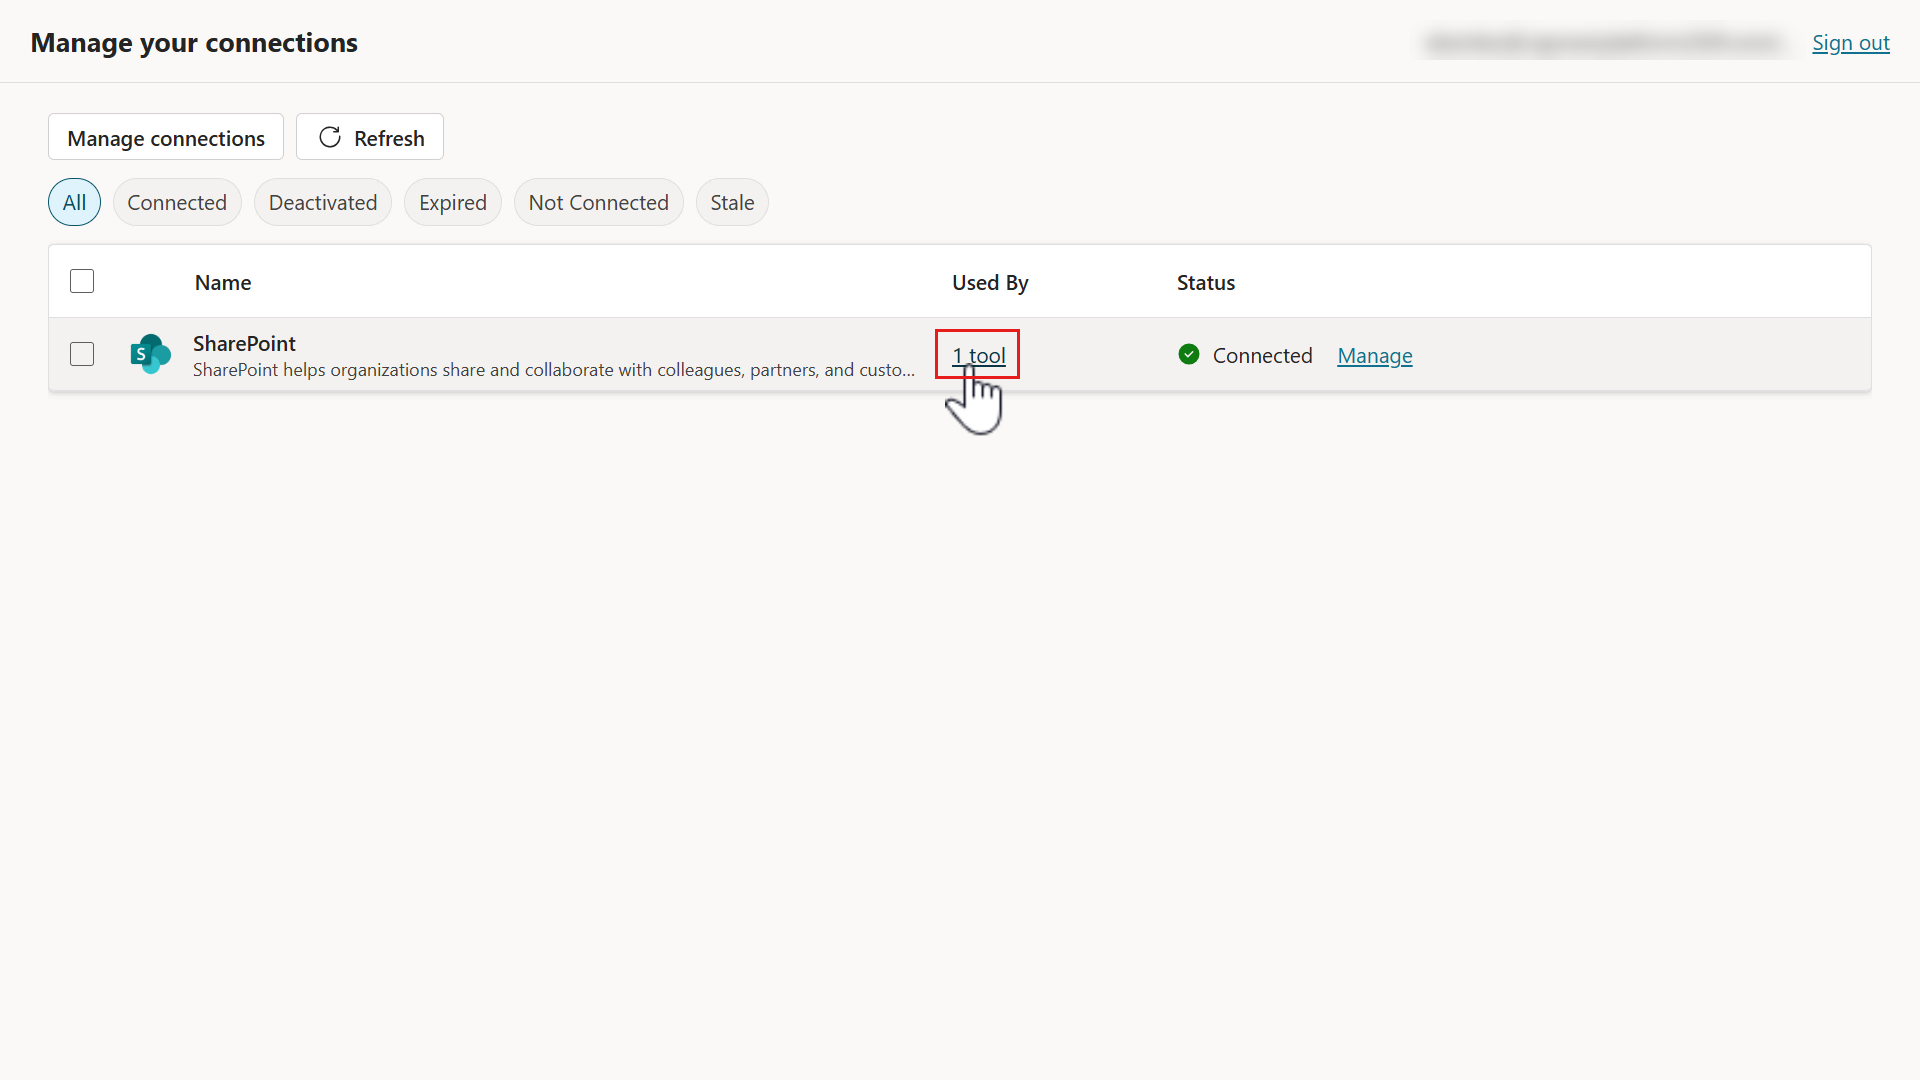
-
This is where we can see the details of the Get items action and remember the usage description we entered earlier? This is where we’ll see the usage description. Select Close.
This lets us know what actions are used and the purpose of it. This keeps our connections organized 📁.

- Go back to your browser tab with Copilot Studio and refresh the test pane to clear the test.
✅ Mission Complete
Congratulations! 👏🏻 You’ve learnt how to add a new topic from scratch, how to add a tool which calls the Get items SharePoint connector action and use Power Fx to filter the response to only return devices where the status equals available and the device type equals laptop. 🙌🏻
This is the end of Lab 07 - Add a new topic with conversation nodes, select the link below to move to the next lesson. We’ll expand on the use case in this lab in the following lesson’s lab.
⏭️ Move to Enhance user interactions with Adaptive Cards lesson
📚 Tactical Resources
🔗 Topics in Microsoft Copilot Studio
🔗 Create expressions using Power Fx
📺 Author topics using natural language
📺 Add actions to agents using connectors